 So last time we introduced Active Directory, it’s core components and also explained how authentication happens in Active Directory. Today, we will be building our lab right from installing the Windows Server to configuring AD Services, setting up a domain, adding users and group policies. Let’s begin!
 ![]()
Lab Requirements
- 1 Windows Server. Either Windows Server 2022 or Windows Server 2019
- 1 Windows Client Machines => Windows 10 Enterprise
- At least 50GB of disk space
- At least 8GB of Memory
- Hypervisor => I’ll be using VirtualBox
Go ahead and install virtualbox and also download the ISO files.
Installing Windows Server 2019
Create a New Virtual Machine
Click “NEW” to create a a new VM and give it a name. Choose the Windows Server ISO file from your Downloads Path then click “Skip Unattended Installation”
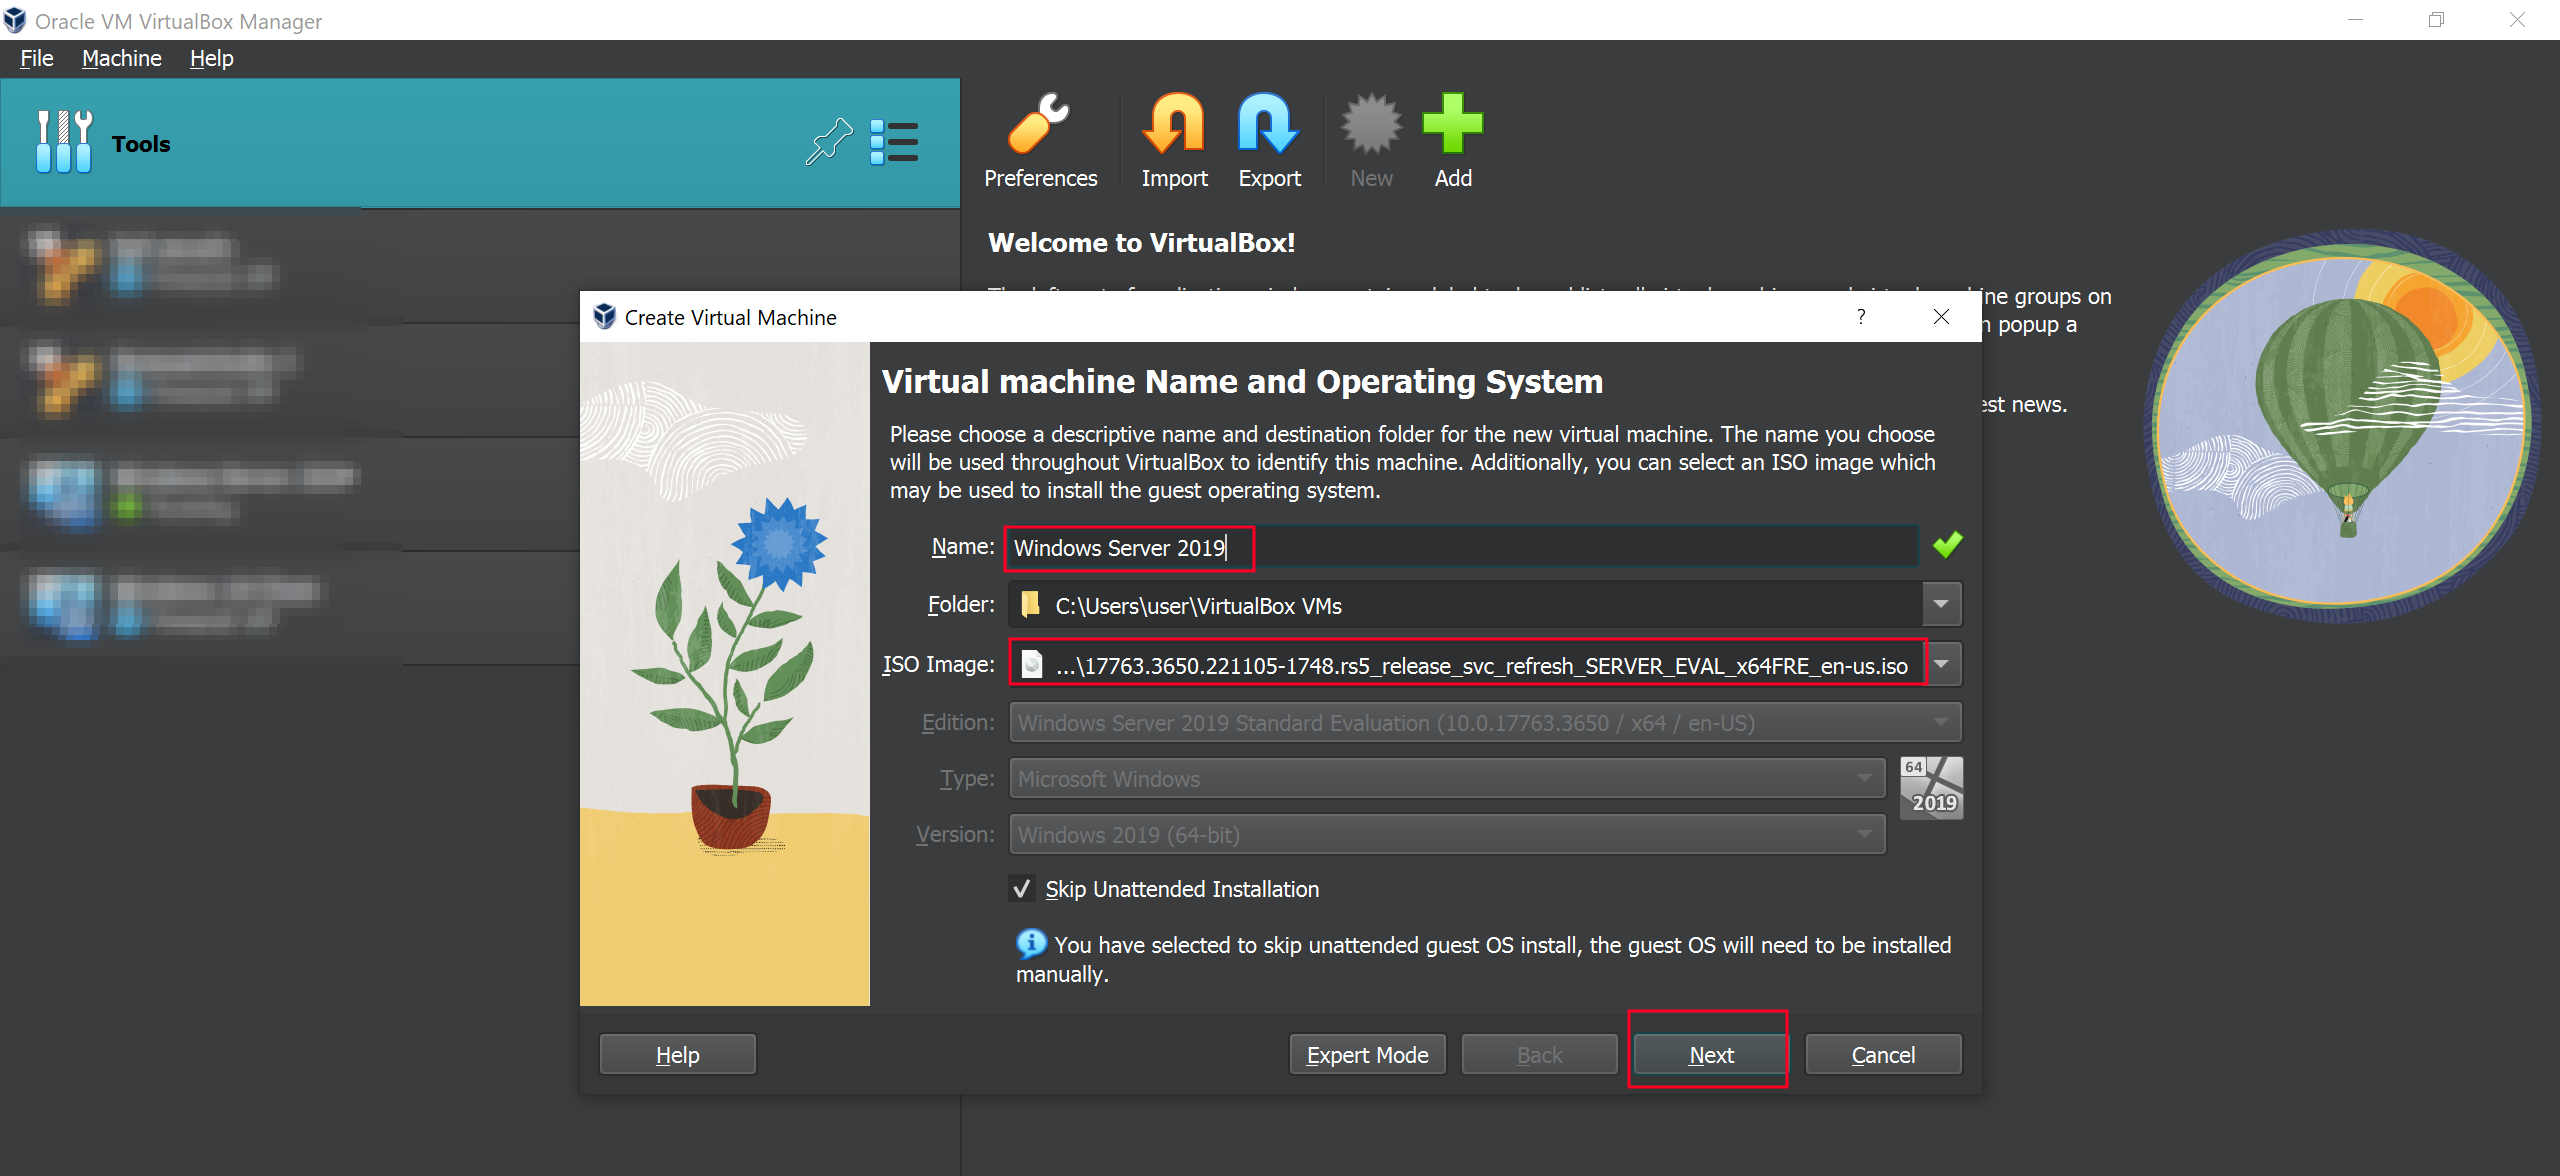
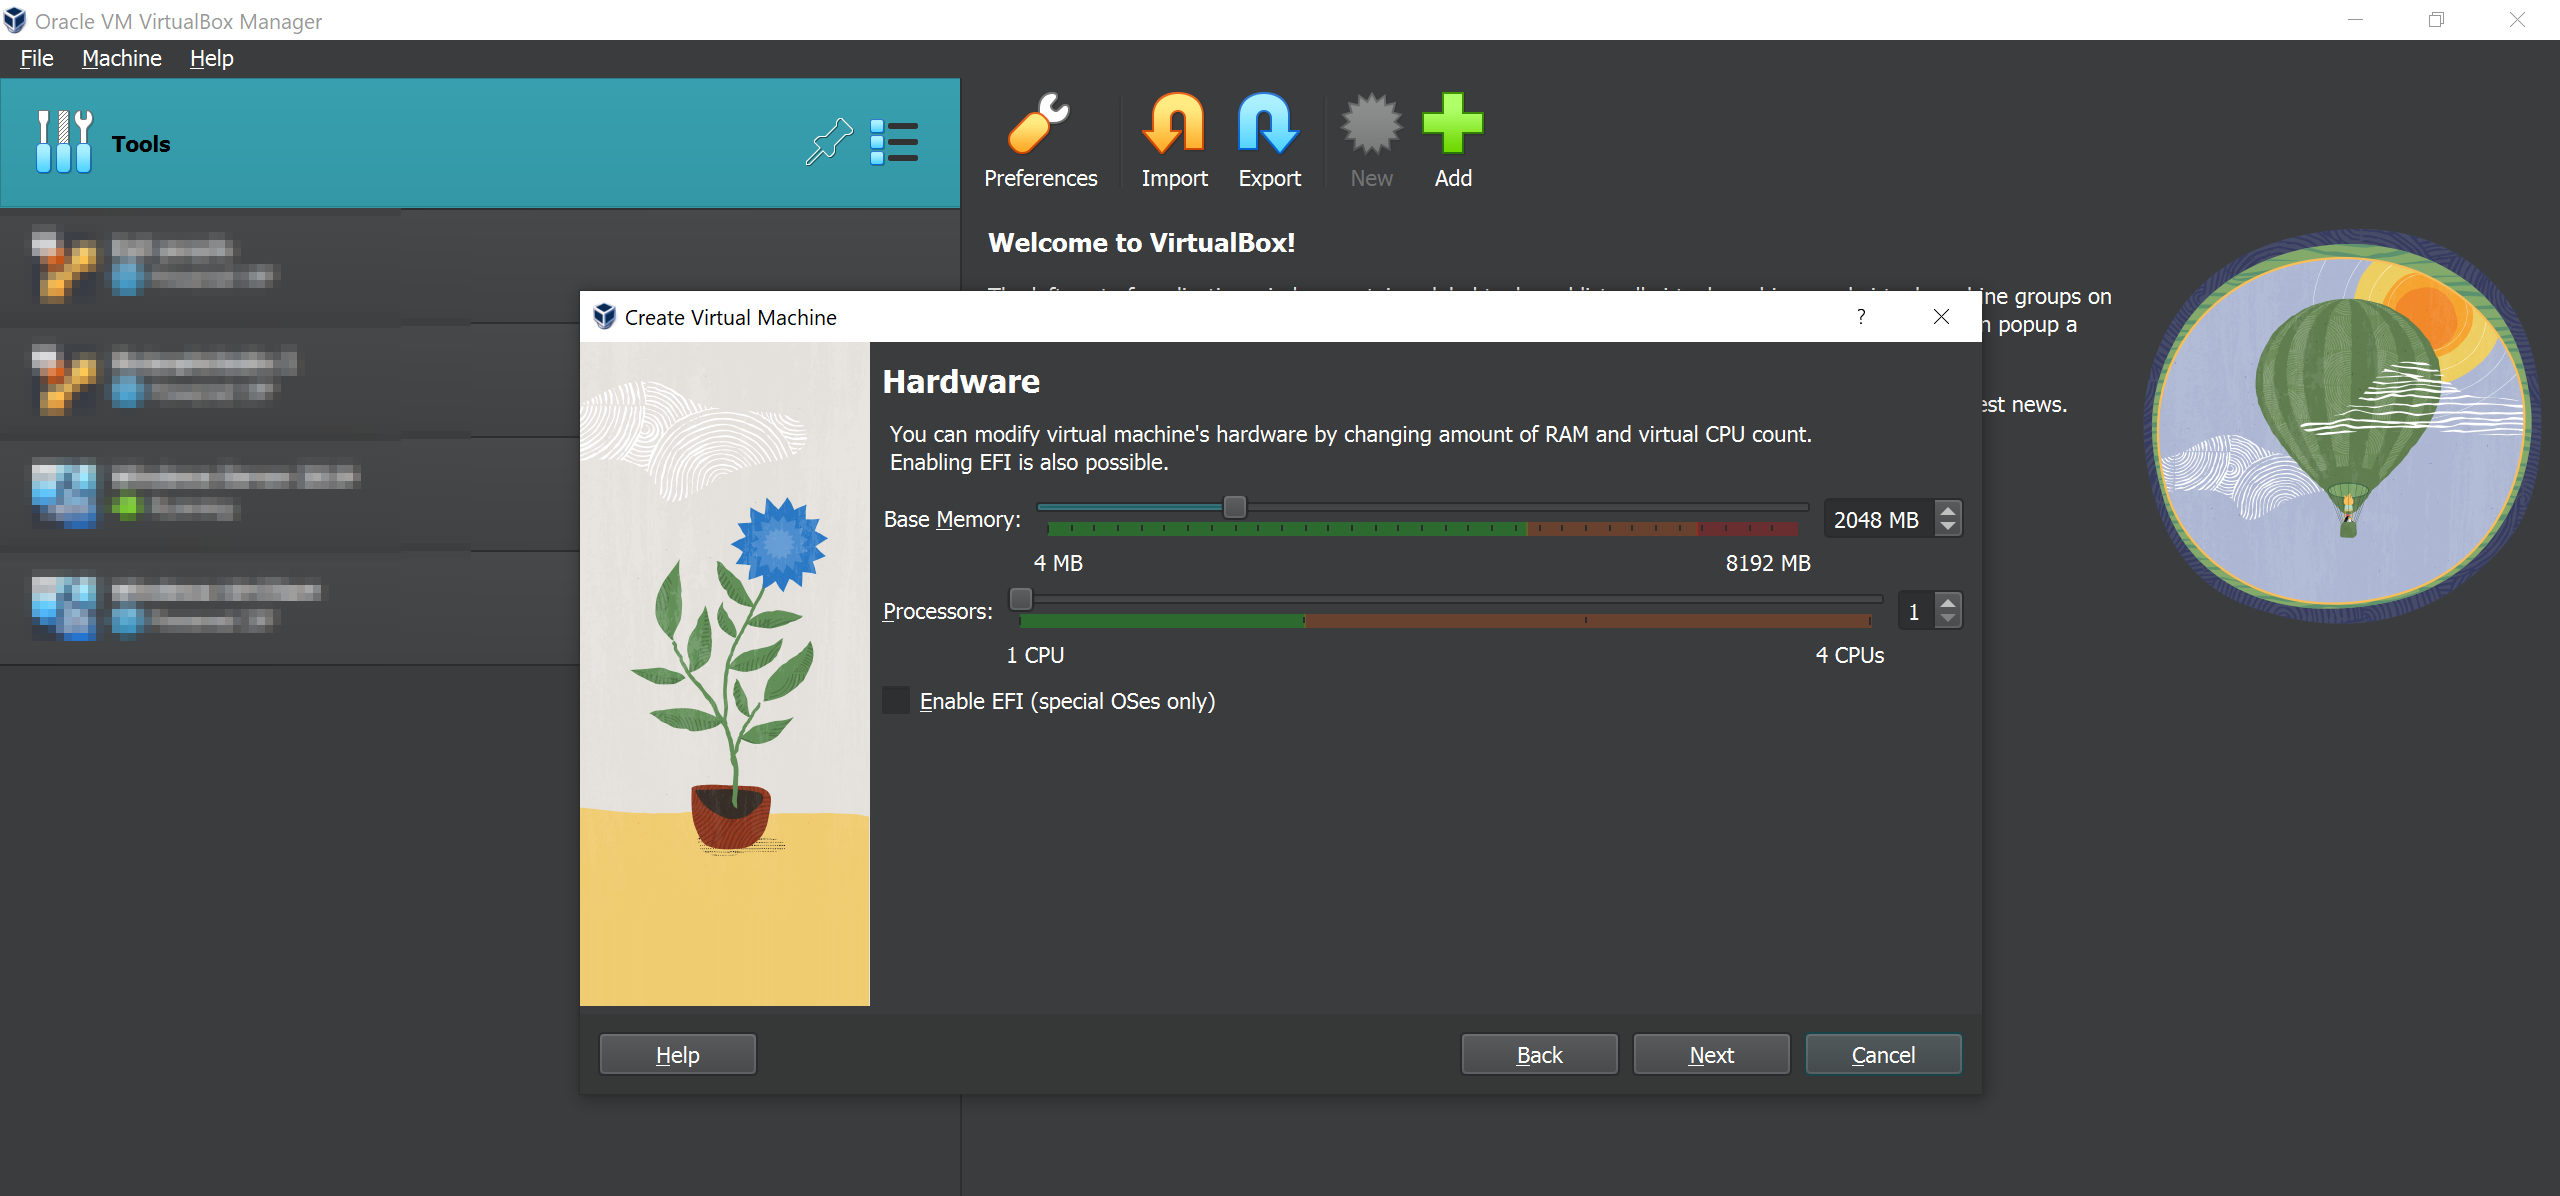
Next choose your memory space. 2GB should be enough.
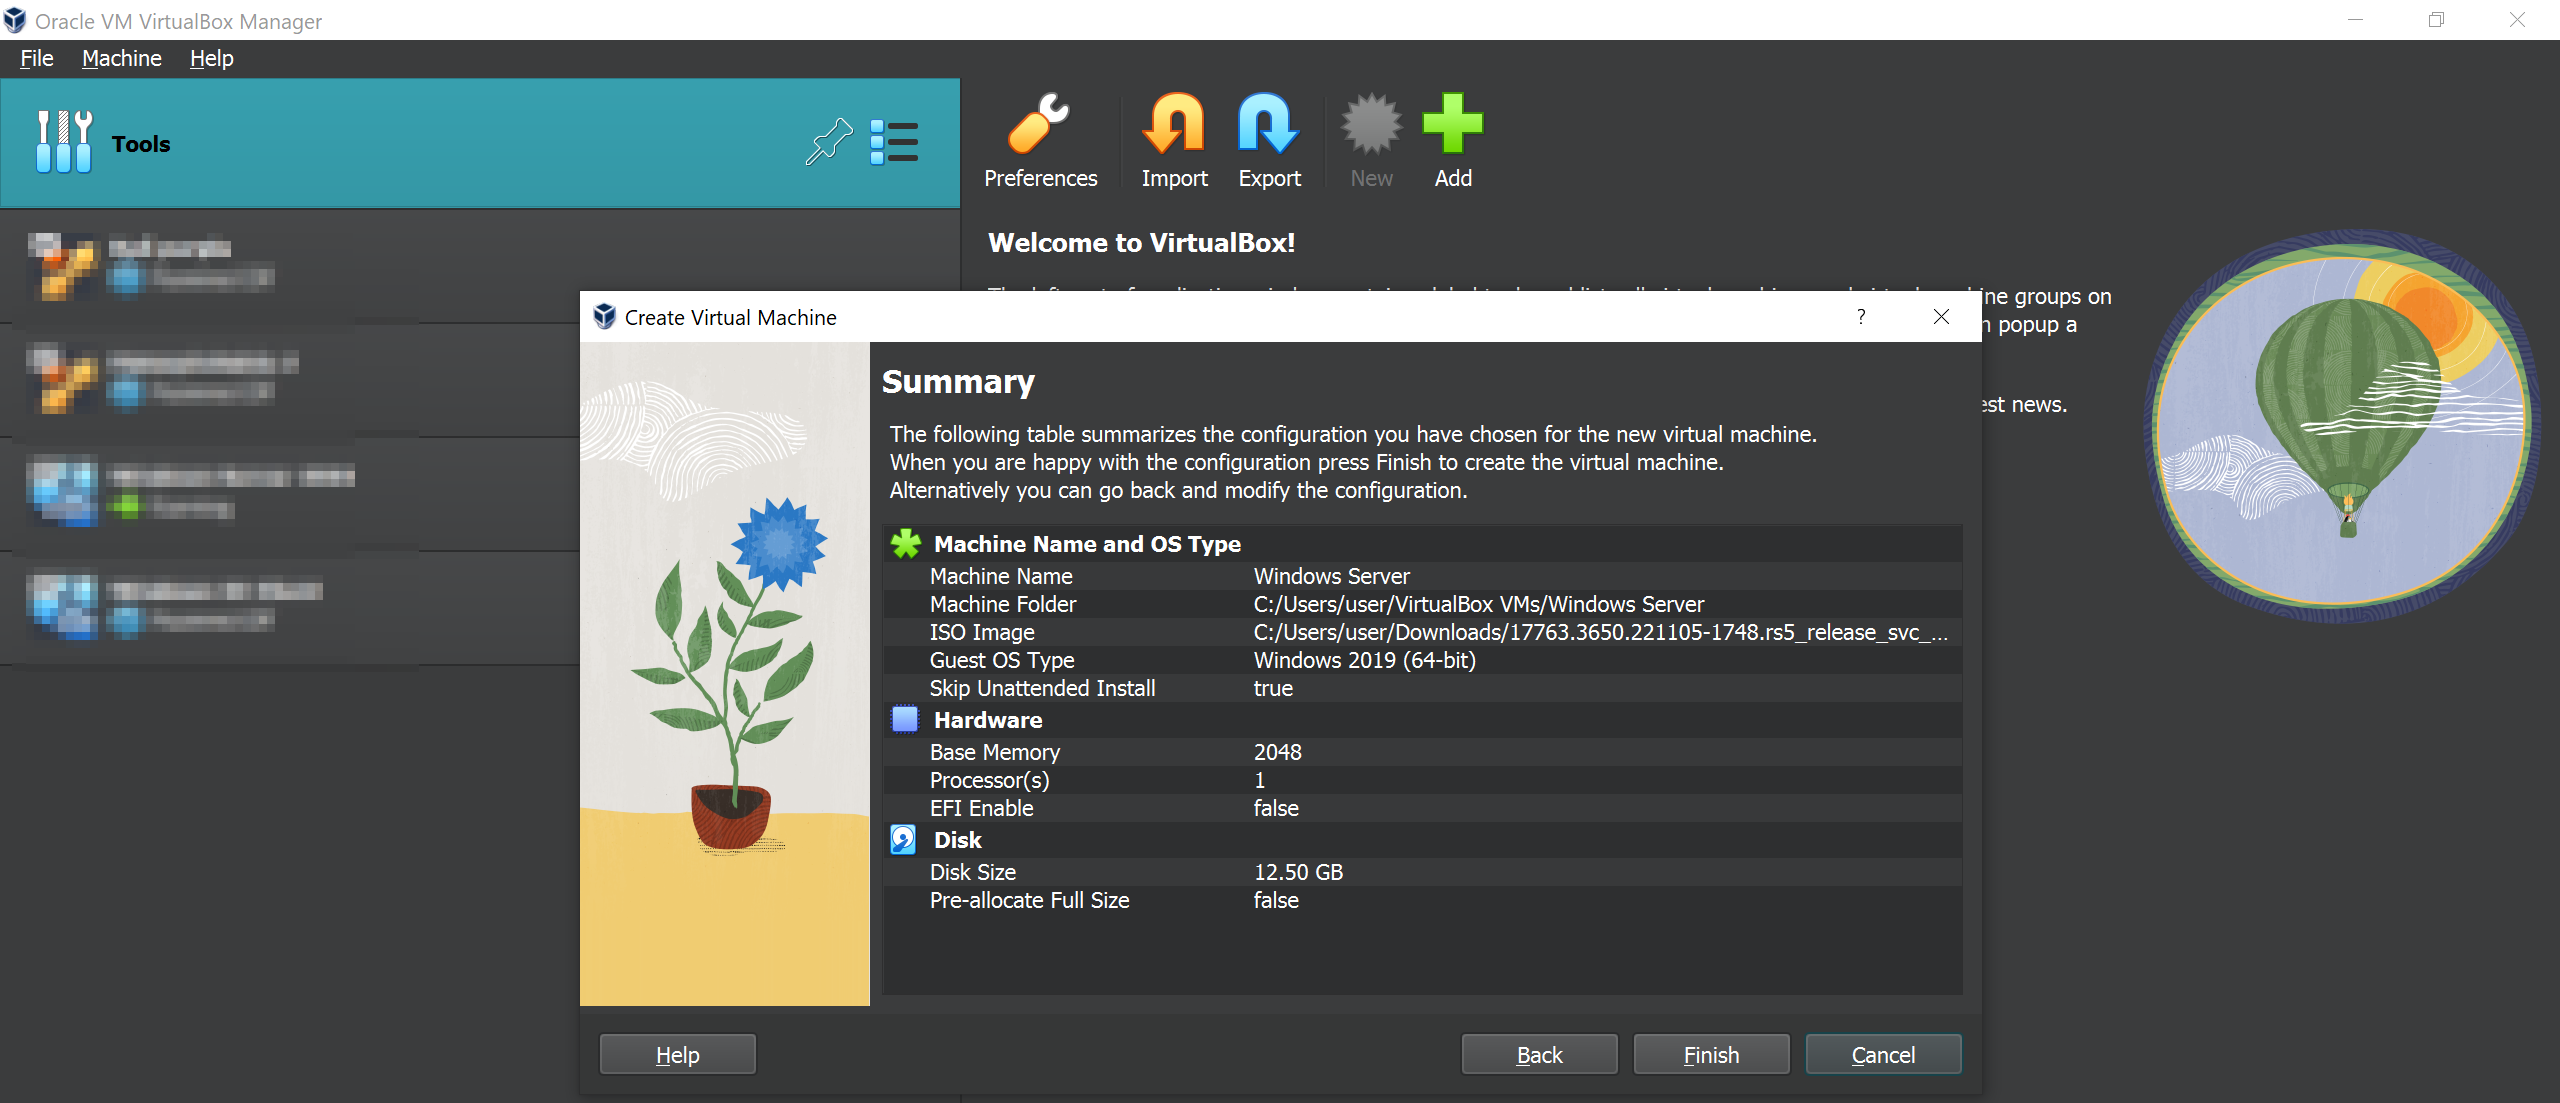
Choose your disk space too. 25GB should be more than enough because we really are not going to create very large files inside the server.

Lastly Click Finish and start the machine.
Setting Up
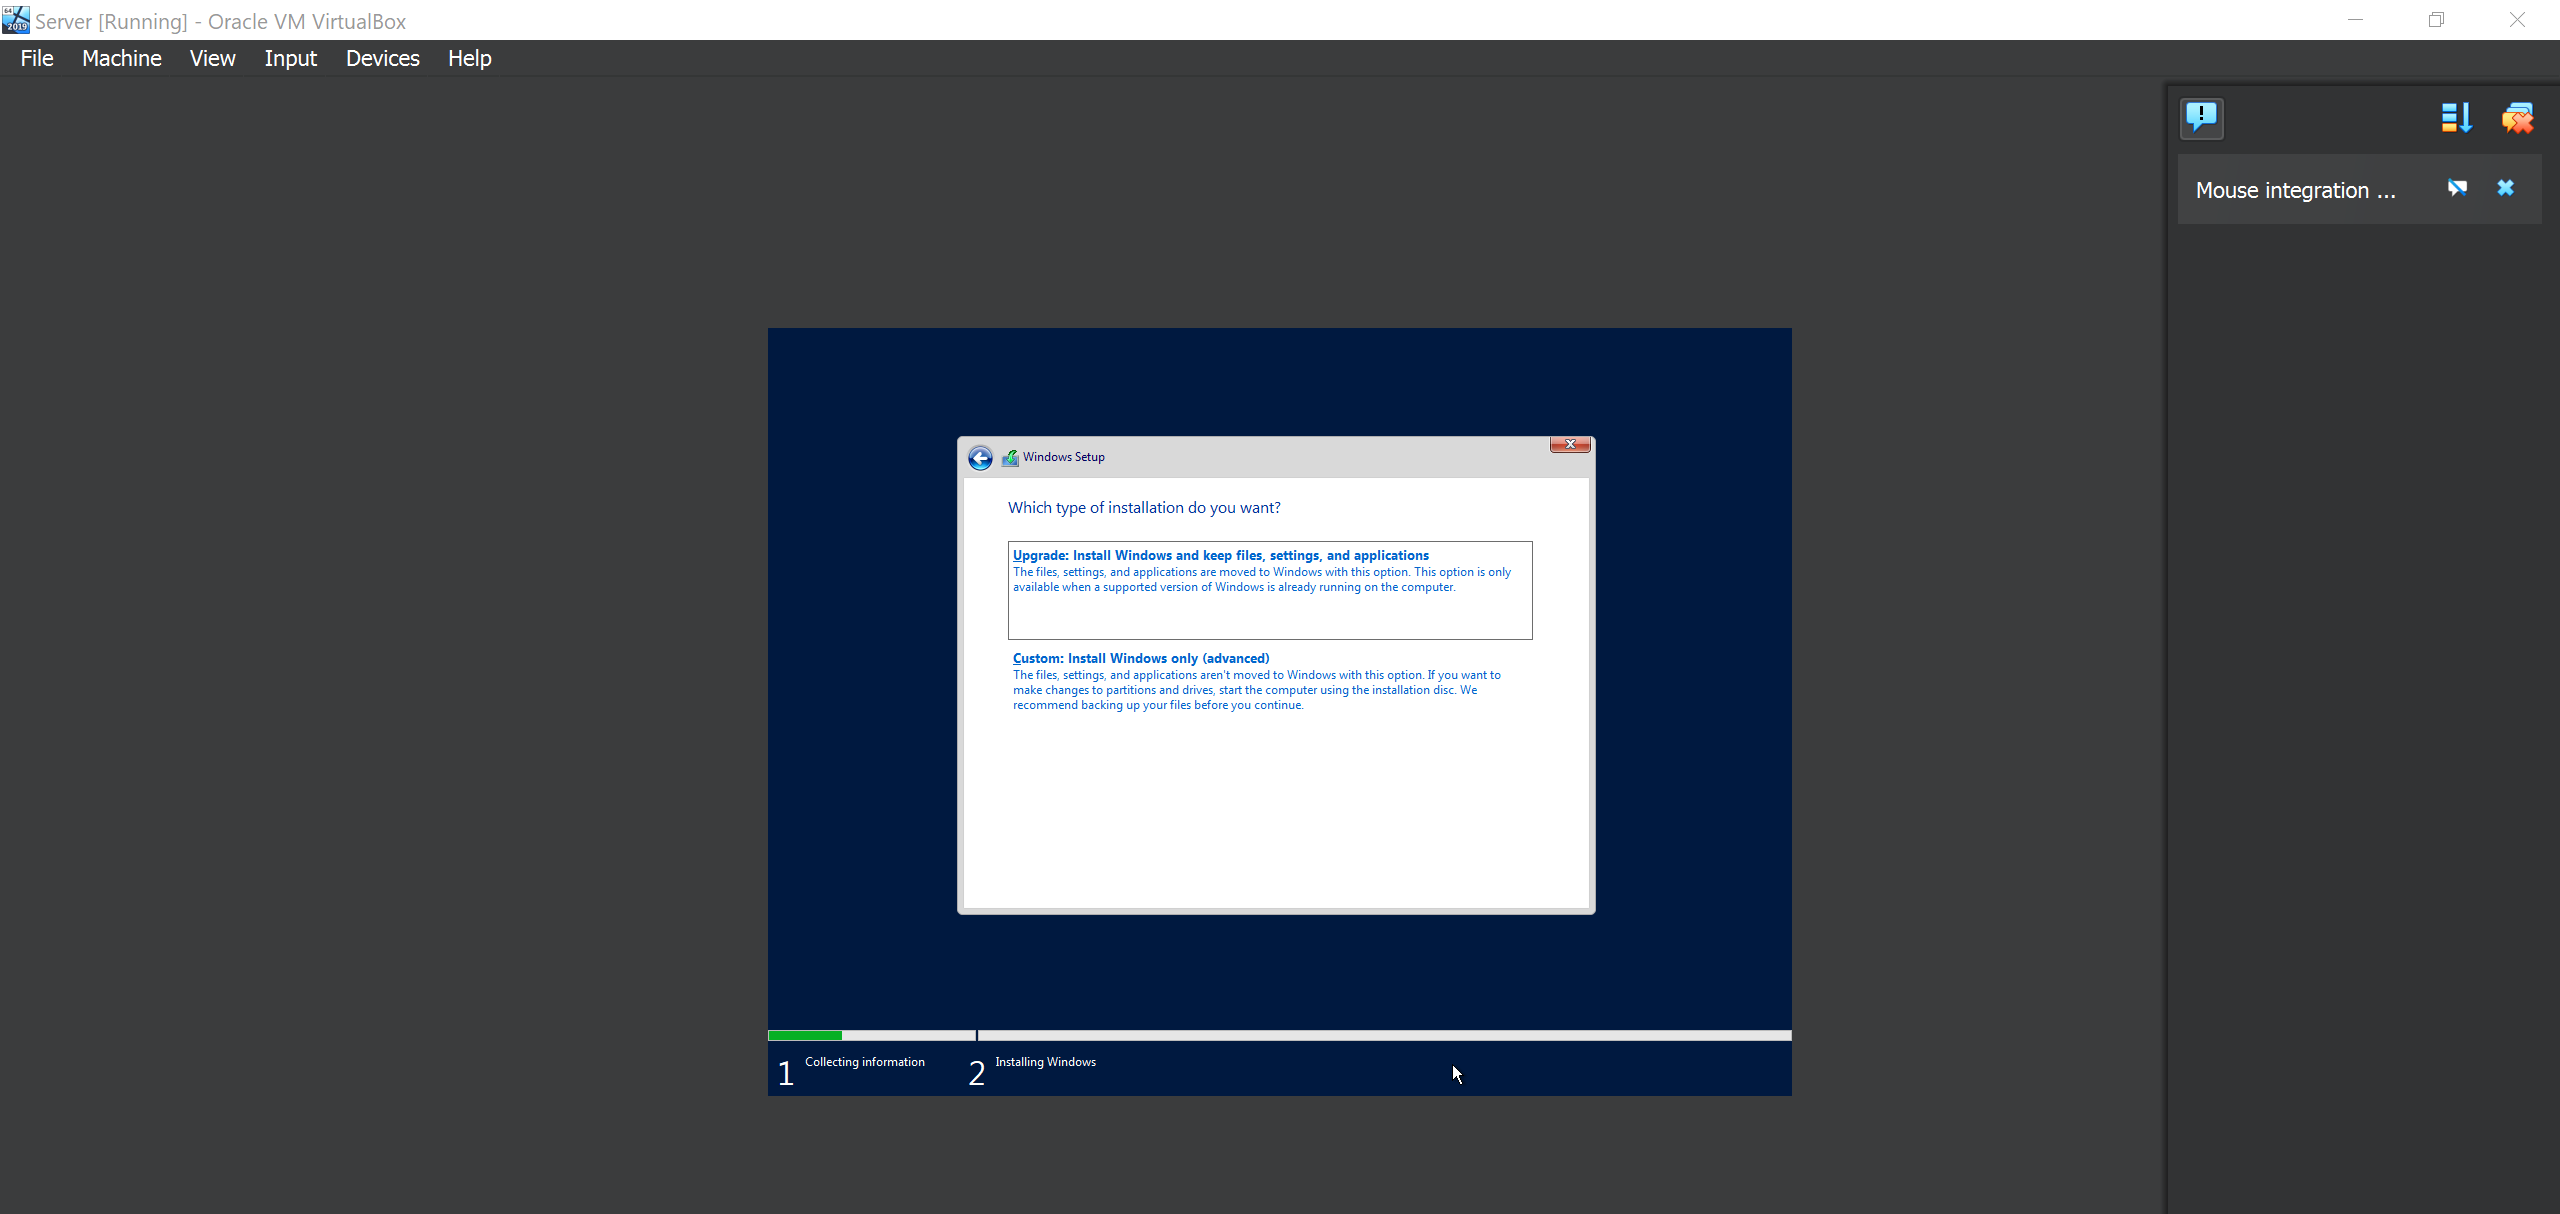
Once you the VM powers on the set up begins. Just follow the defaults selections. Select Language > Click Install.
On the operating system you want to install, make shure you select the Windows Server Desktop Experience because we want the Graphical Interface User(GUI) version.
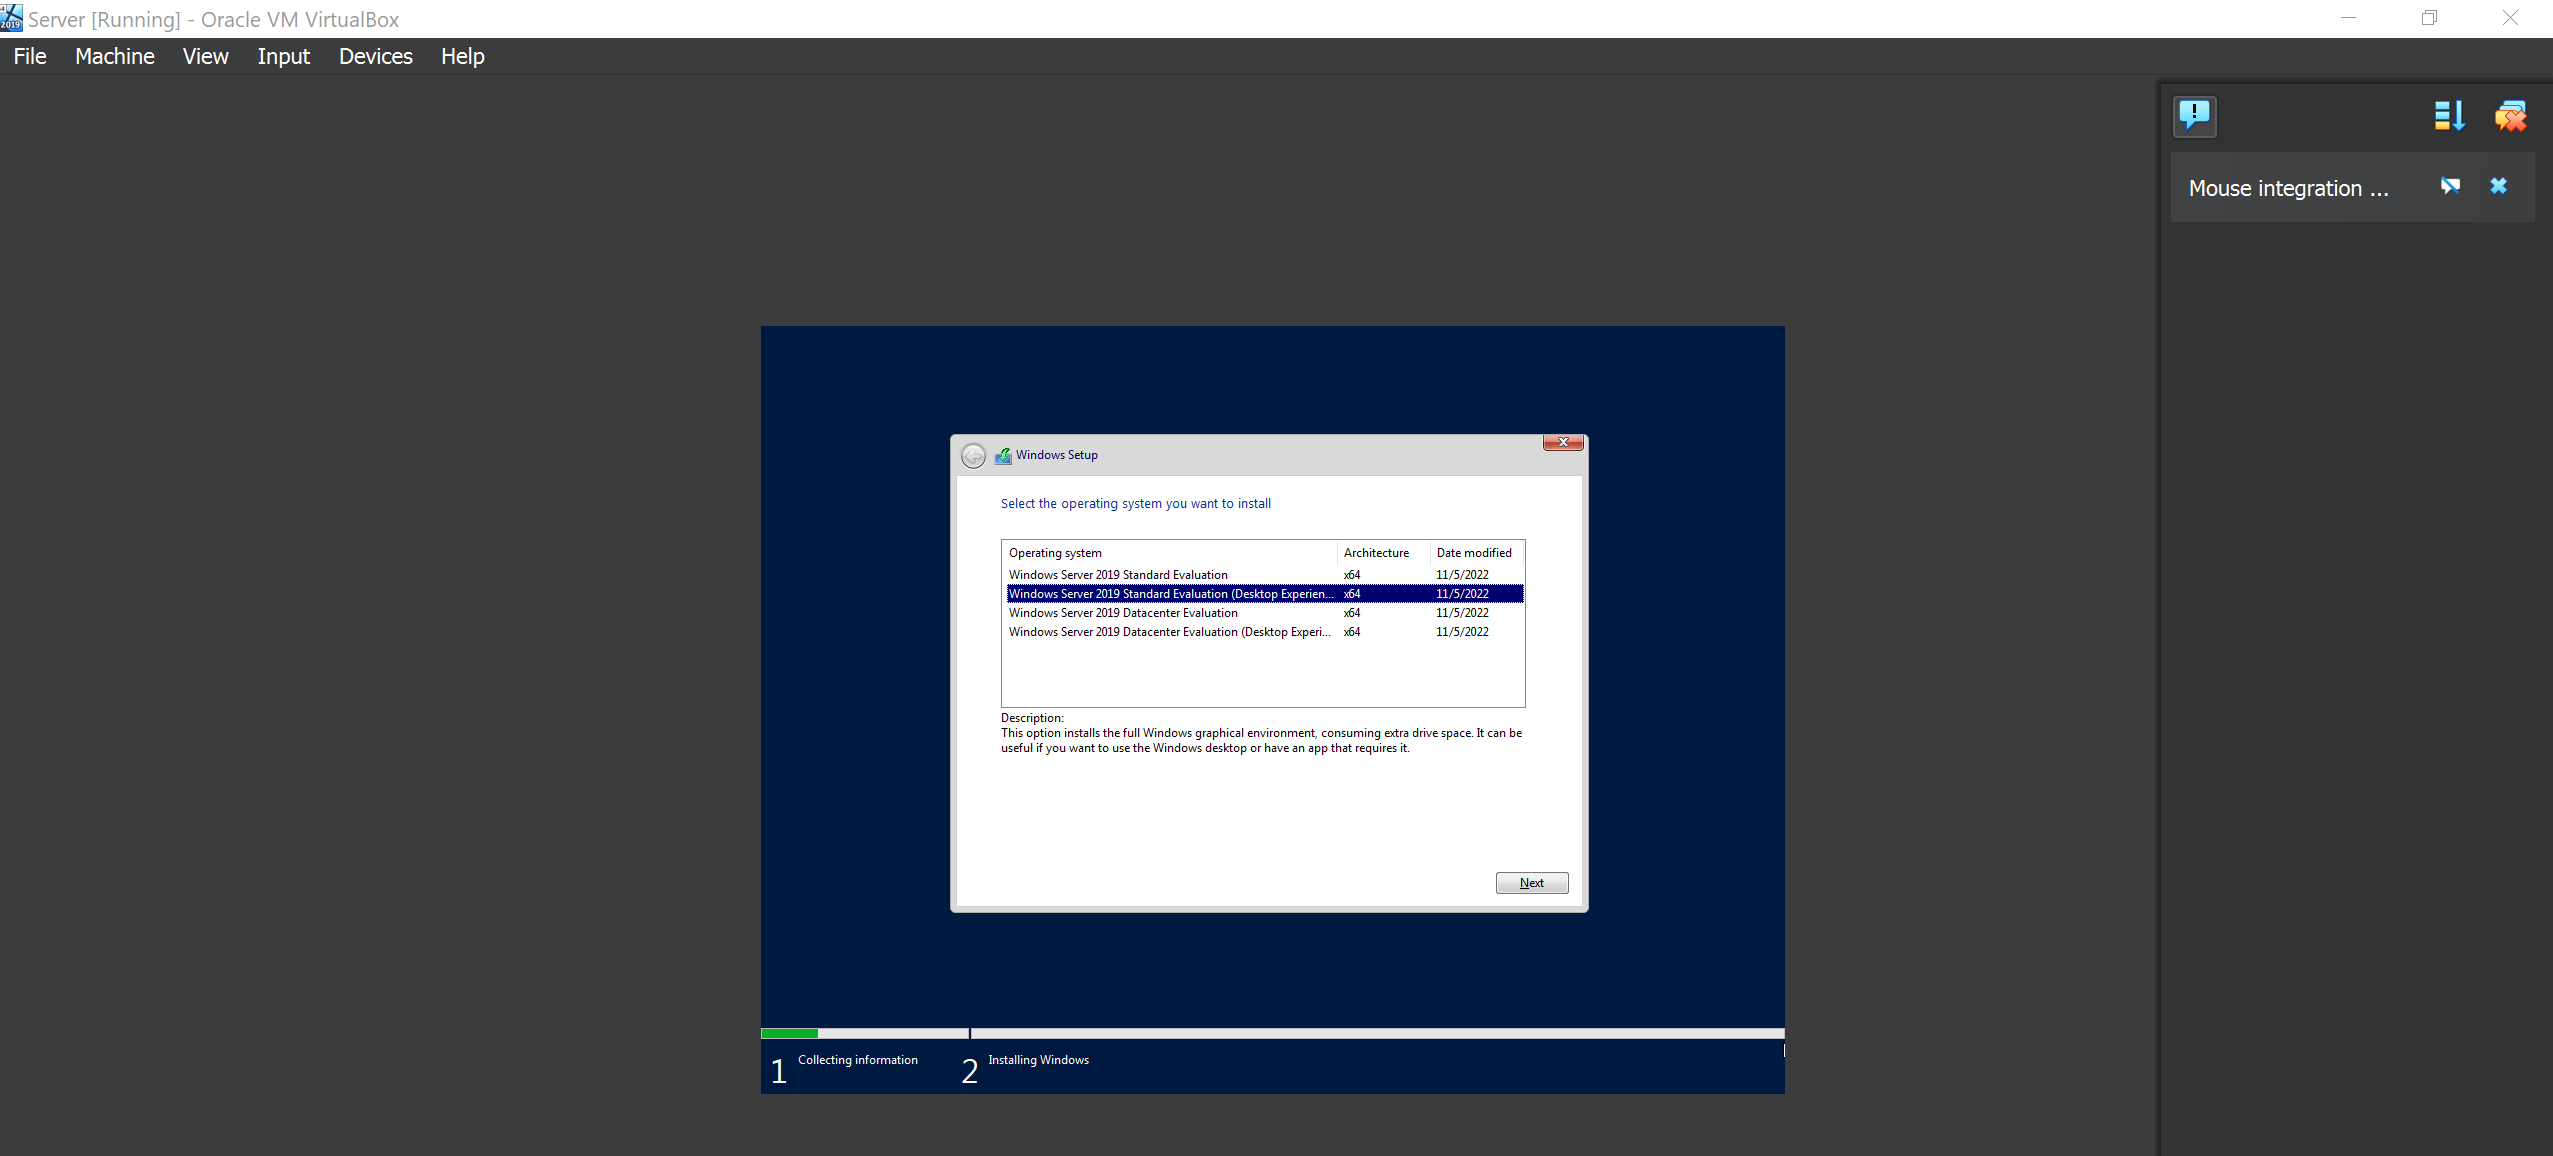
Aggree on the terms and continue. For the type of installation, use the Custom Install because this is the first time we are installing a windows machine.
Click Next on everything else and let it install. After everything installs you will be required to setup your Administrator Password. Make sure you note it down do that you don’t forget it.
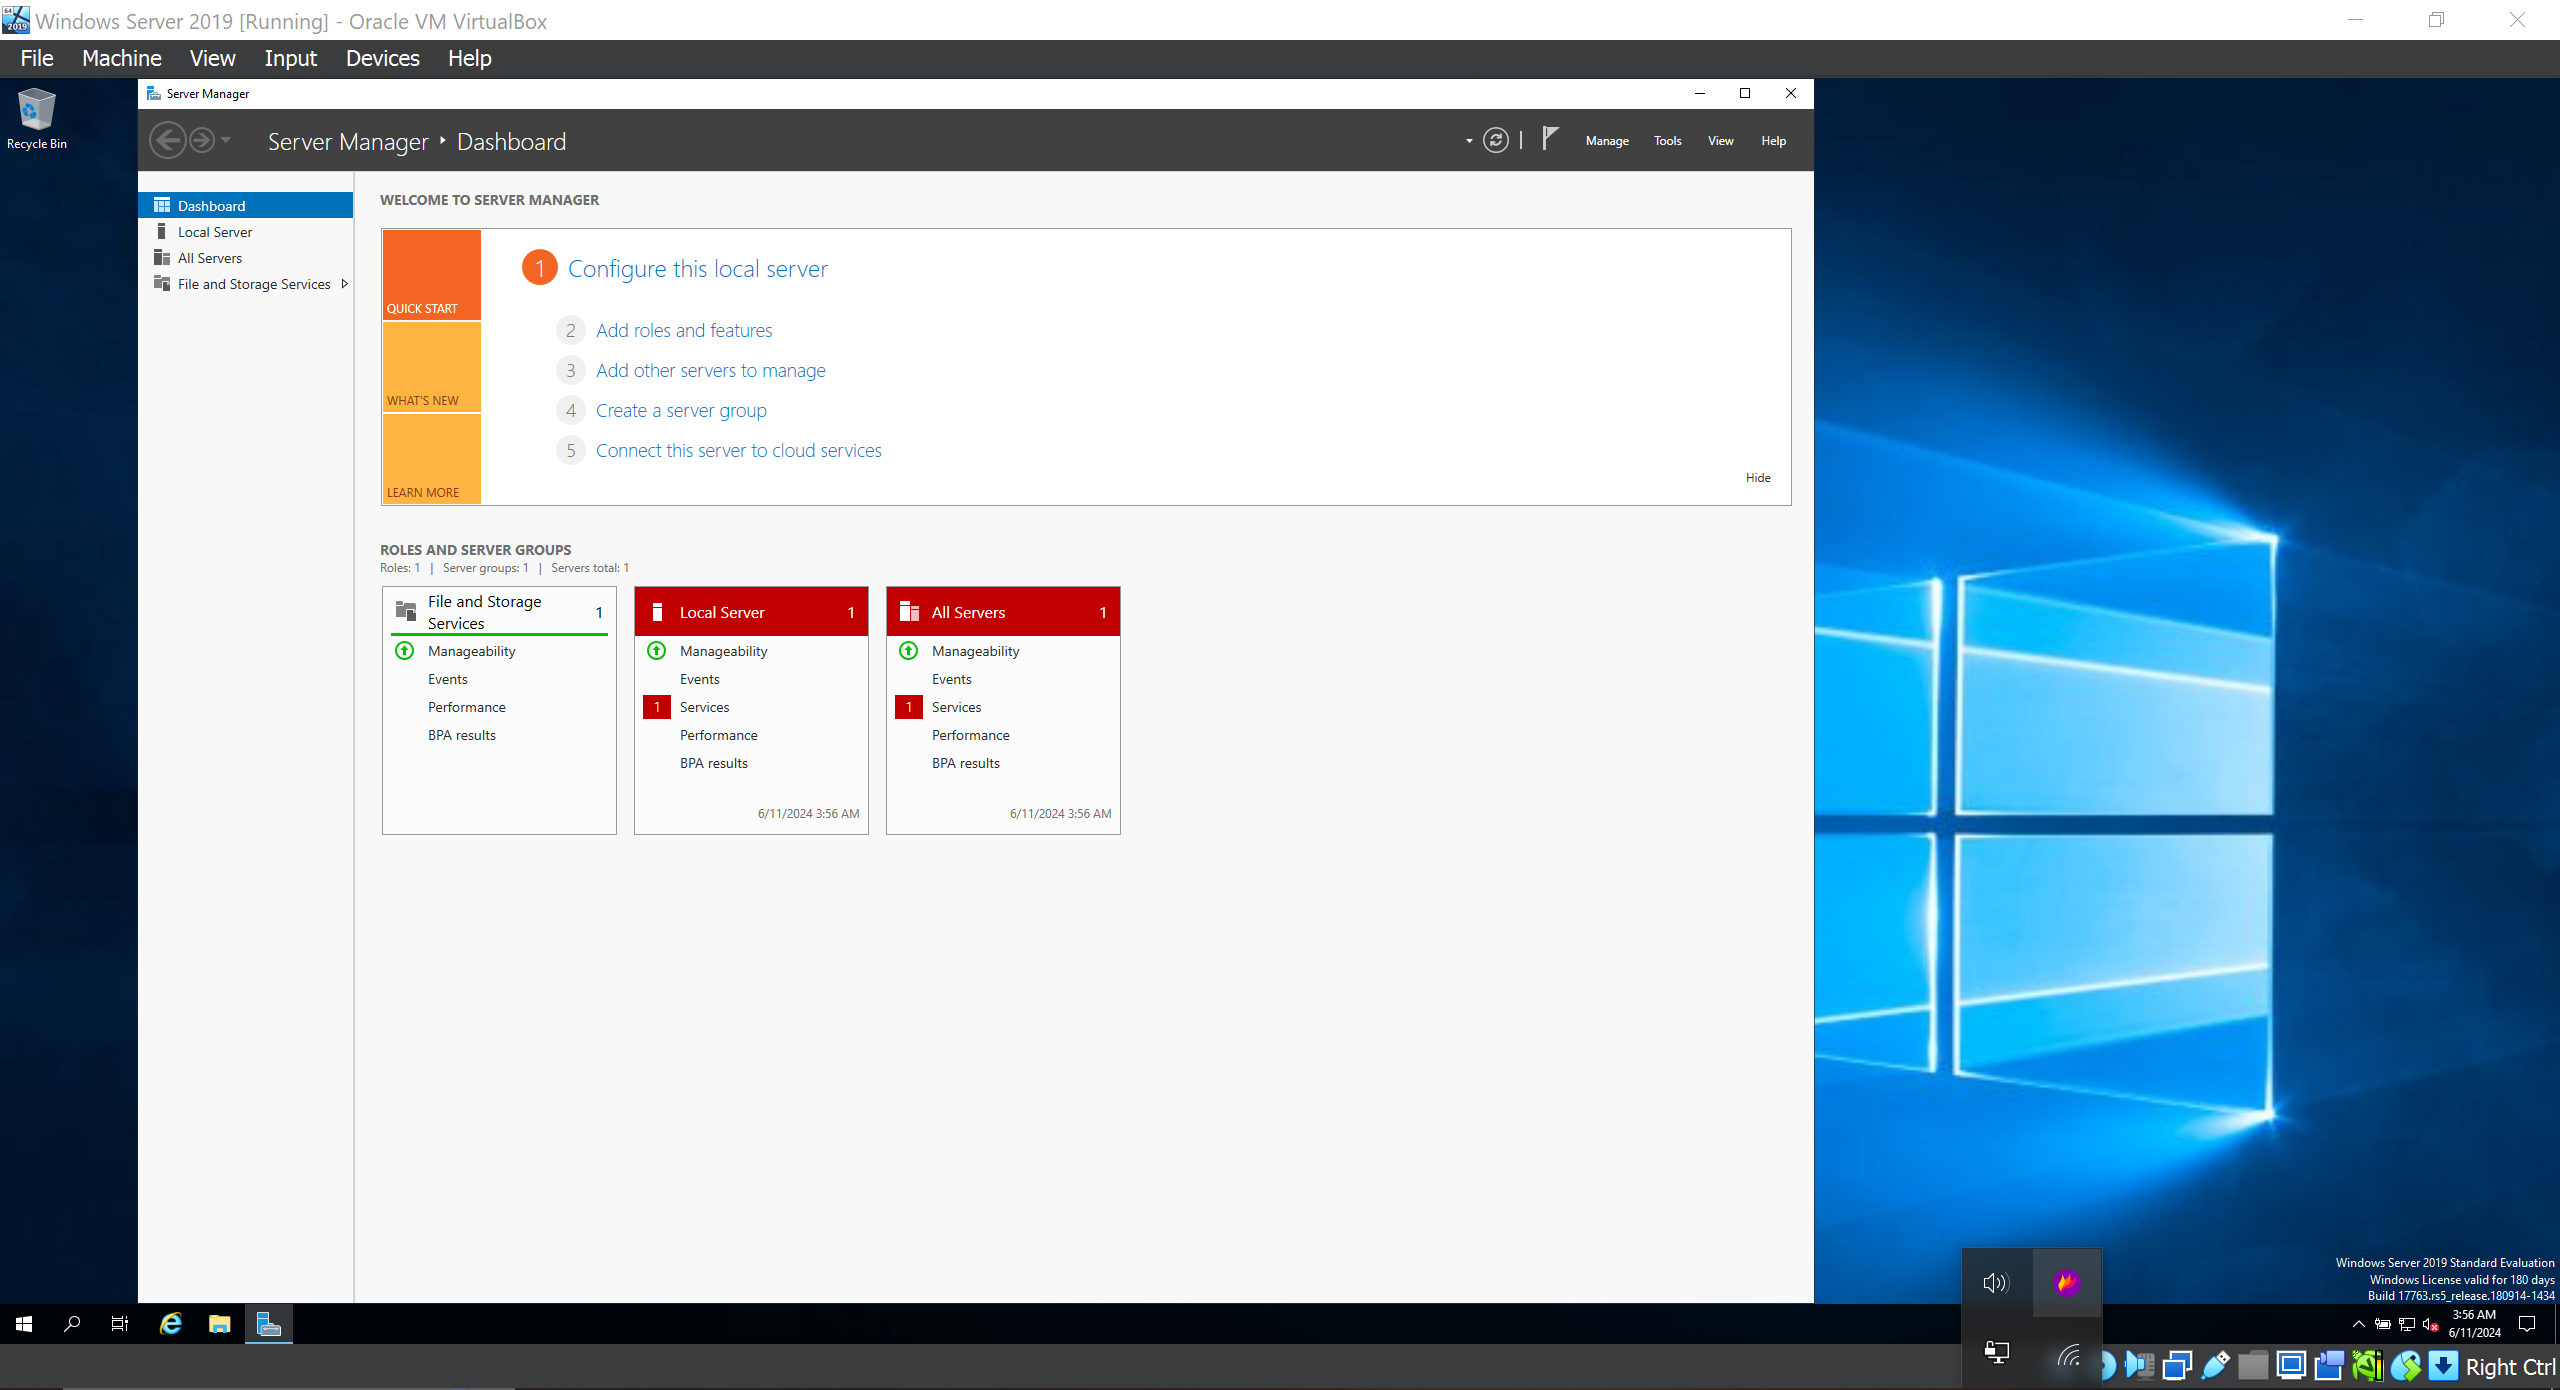
Finally you will have a similar screen to this after you’ve logged in!
Note that after successfull installation your screen will be small because you have not yet install the Geust Additions. Just install that from Devices > Install Guest Additions CD Image. Navigate to your This PC and you’ll see a mounted VirtualBox Addditions drive. Run the setup64 executable and this will give you a for full screen display experience.
What next?
After a successfull installation i renamed my PC into ALLSAFE-DC to signify it’s a domain controller. I’ll be using the Mr Robot theme for my namings throughout the setup.![]()
Installing the Active Directory Domain Services.
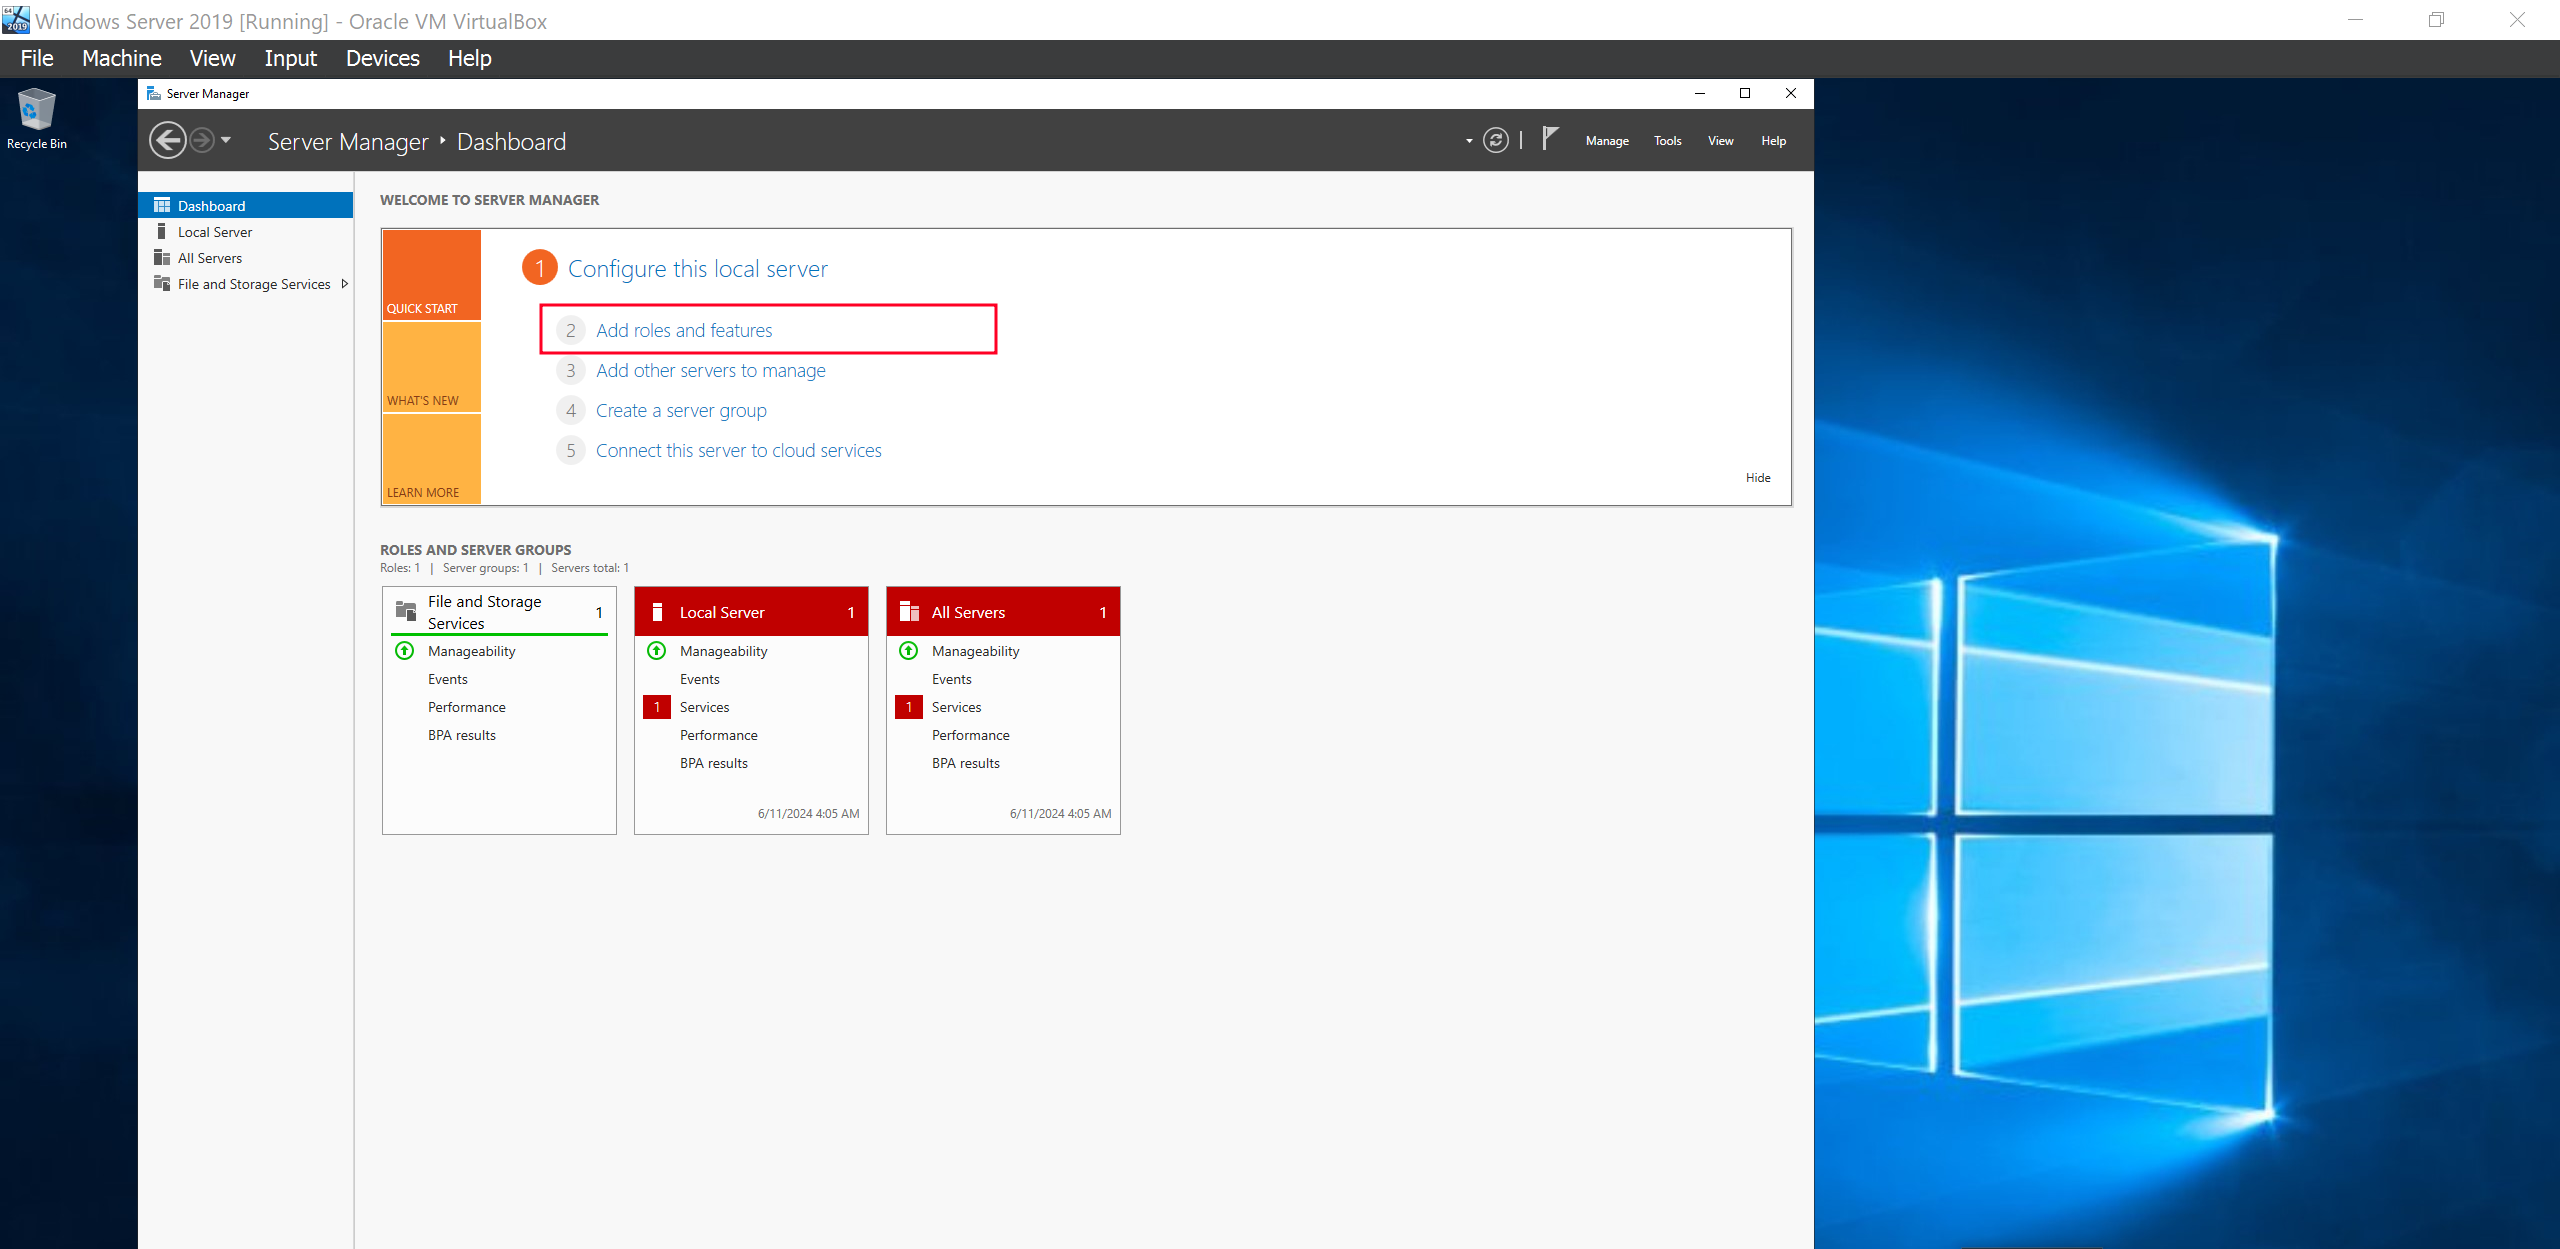
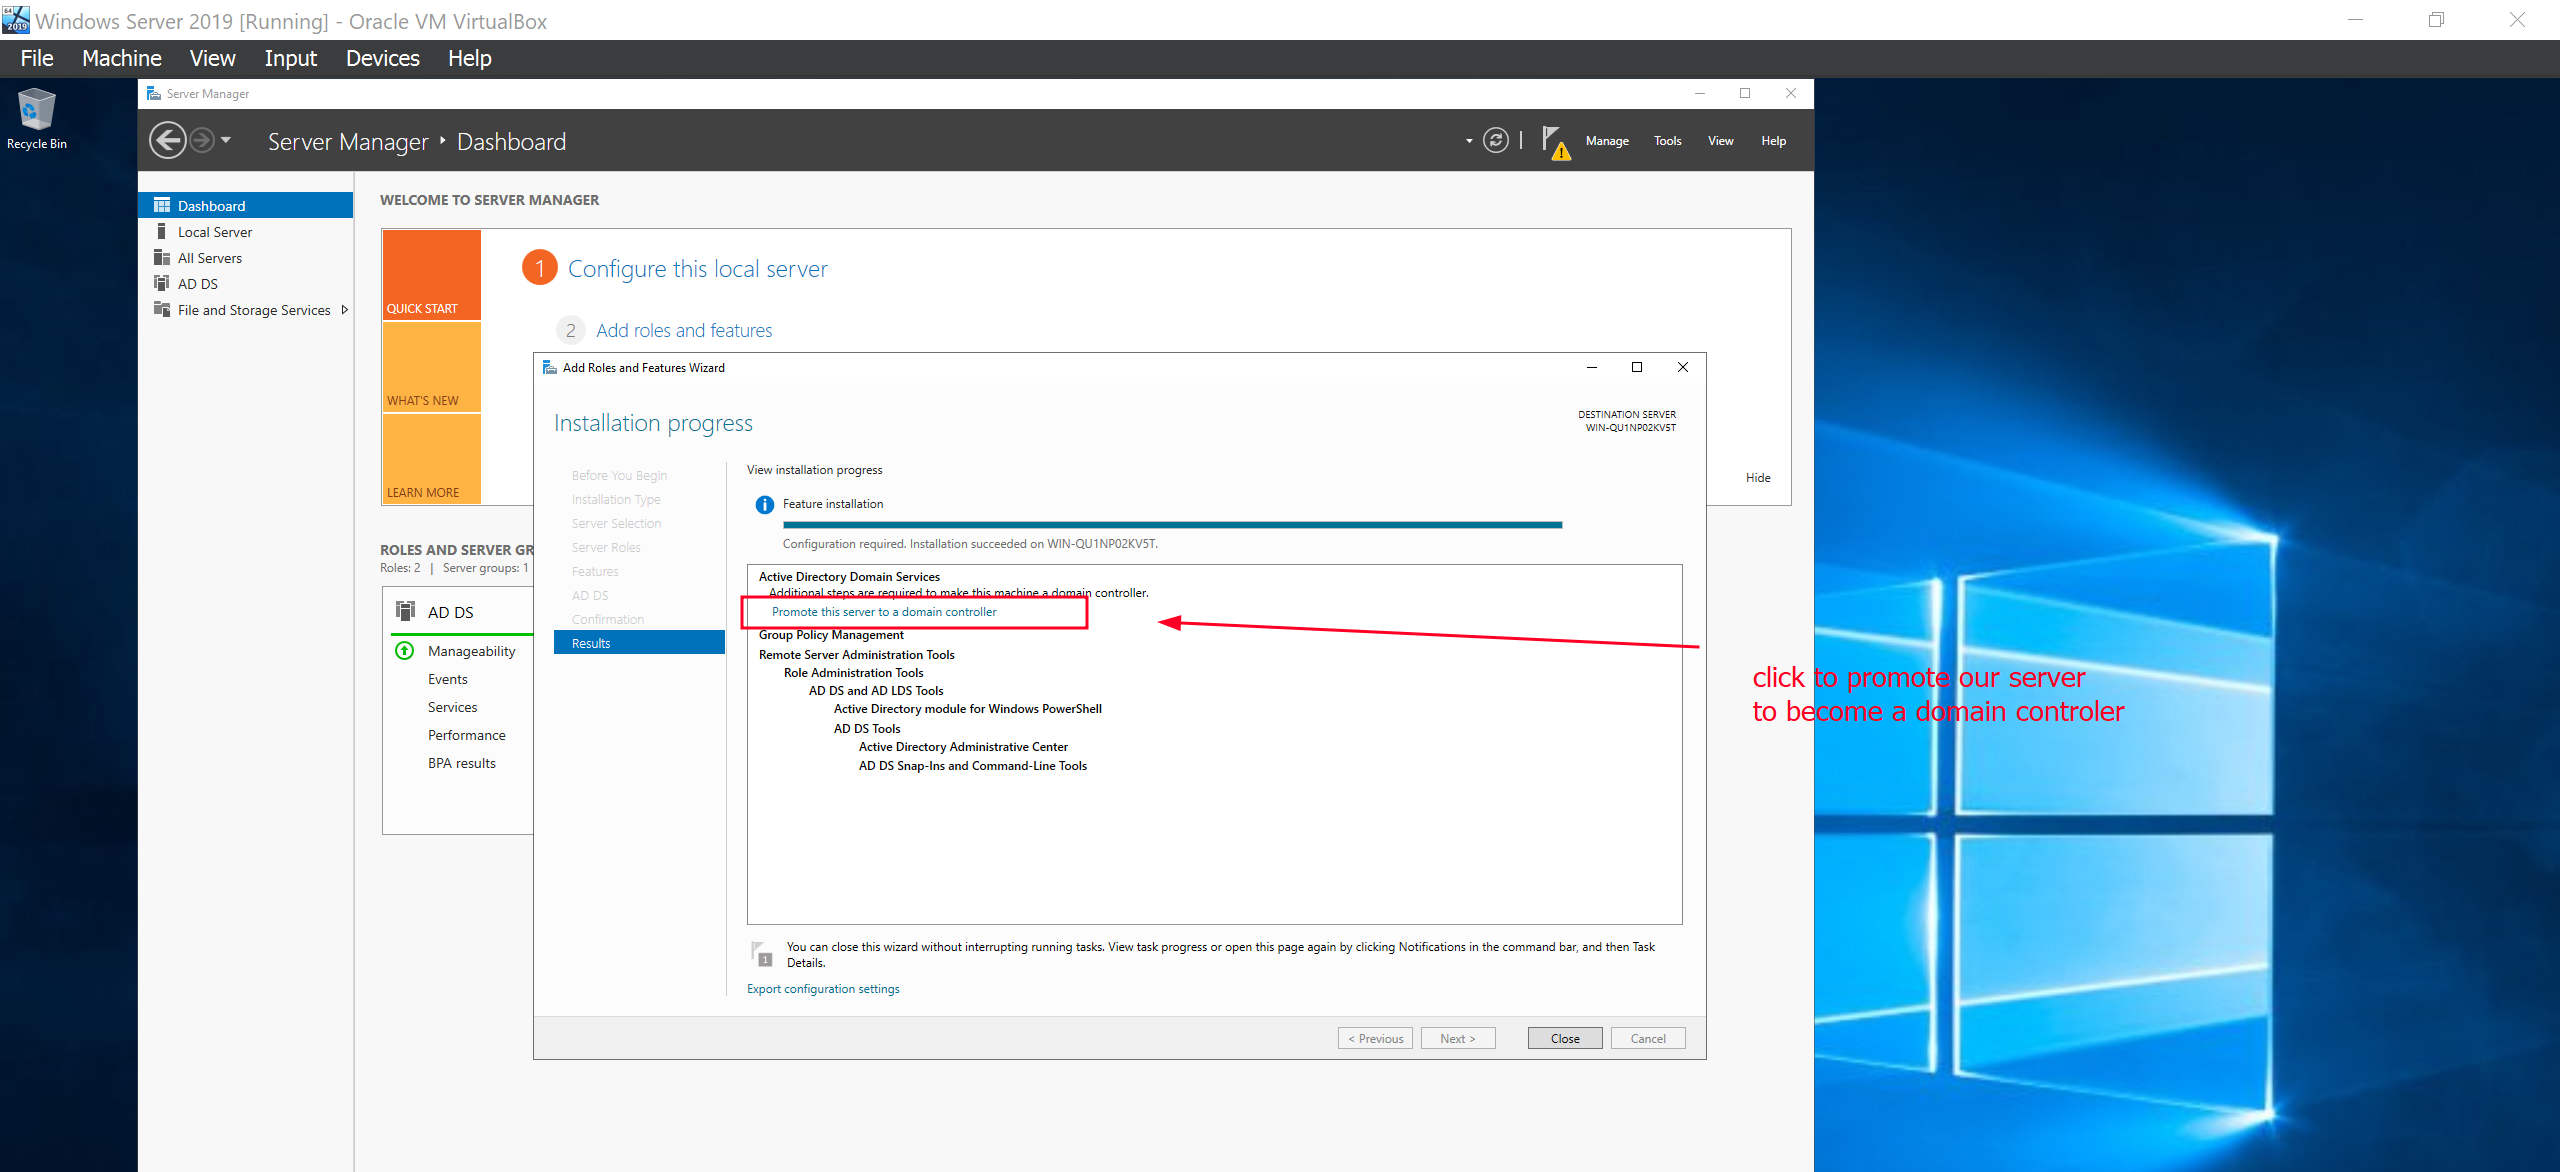
The next thing we want to do is to install the Active Directory Domain Services on our Domain Controller.
Click Add Roles and Features
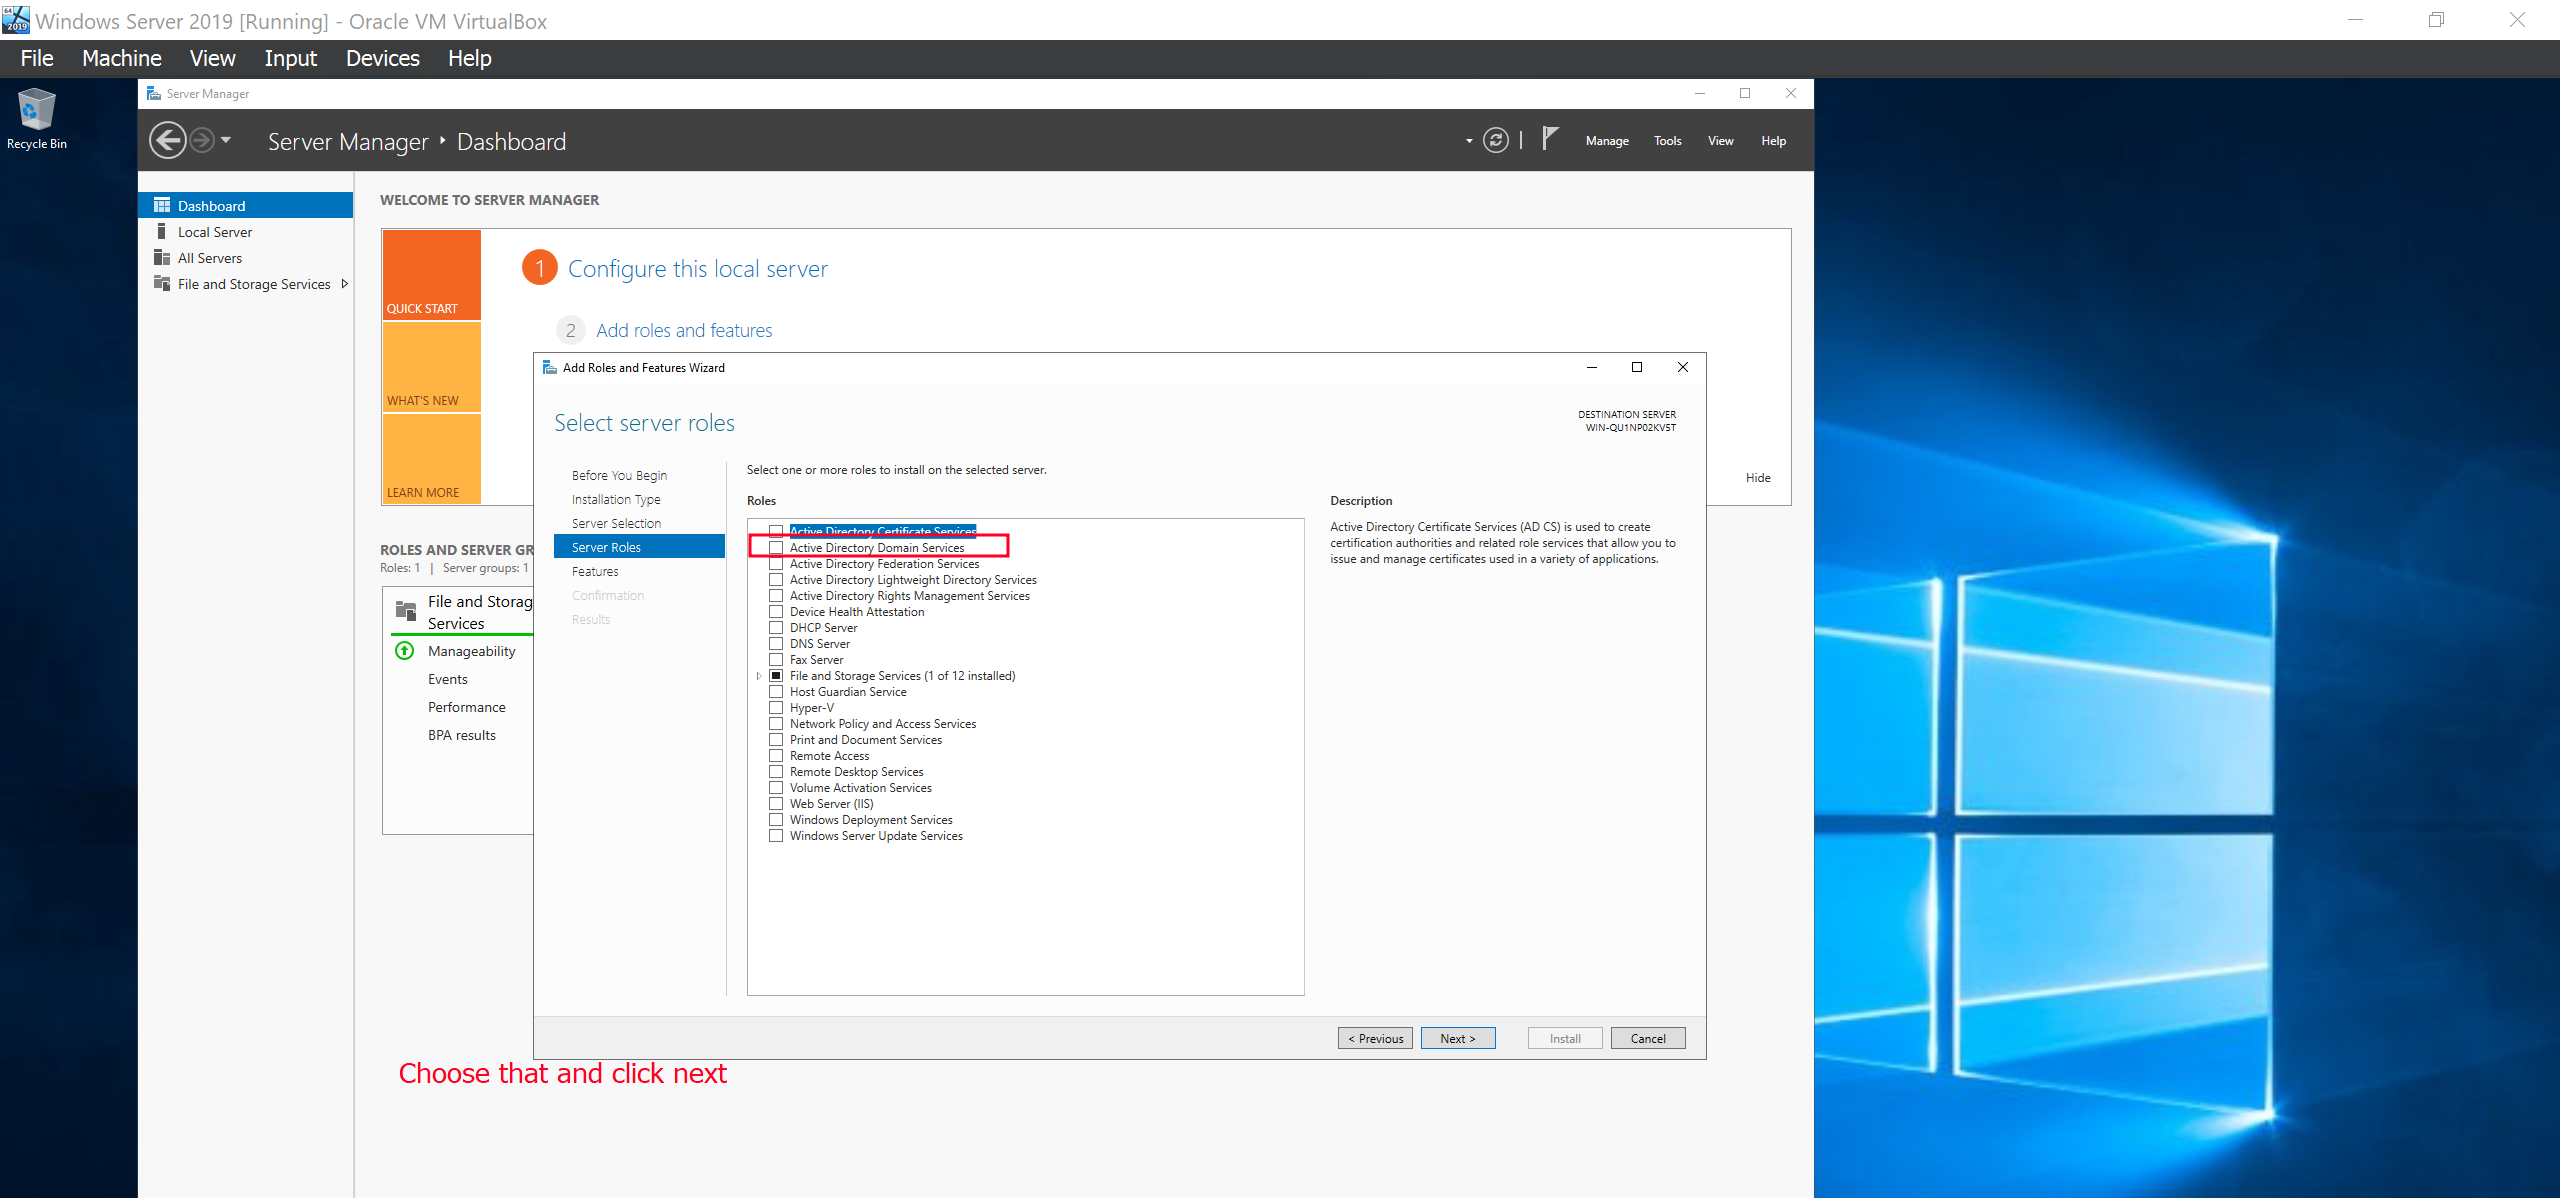
Click Next and Next…Then on the server roles, select the Active Directory Domain Services. Add it as a feature then install.
The next is is that we want to make our server be the domain controller. After the service has been installed youll be prompted to promote it to become the domain controller. Click it.
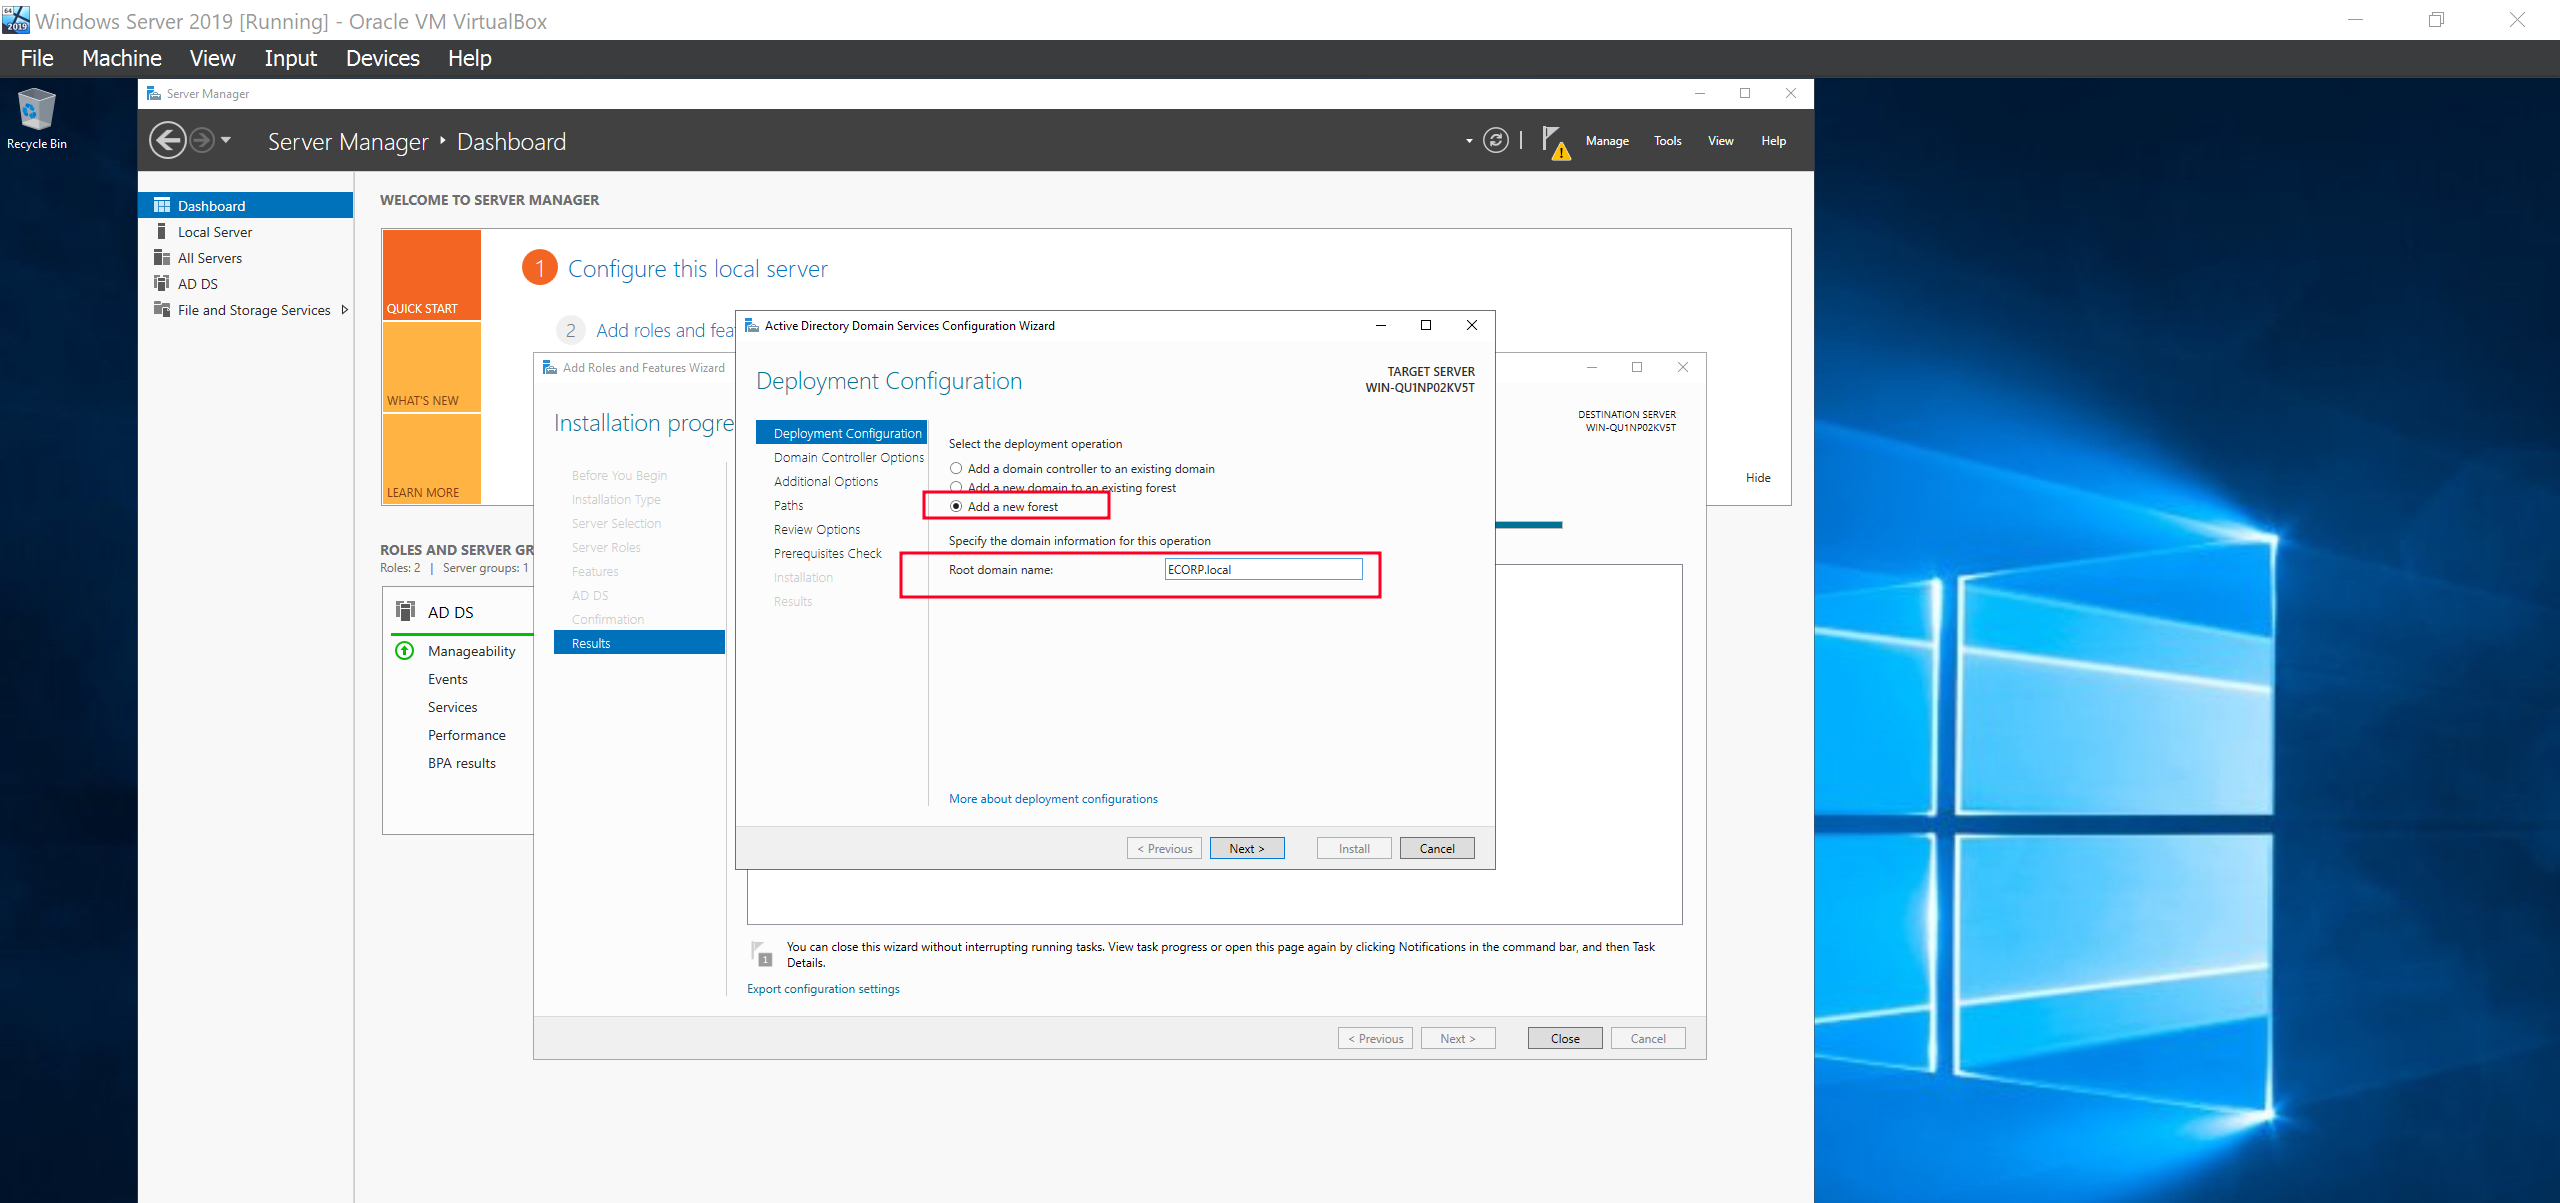
Add a new forest then choose a name for your root domain. Again i will proceed with my theme ECORP.local. Click Next.
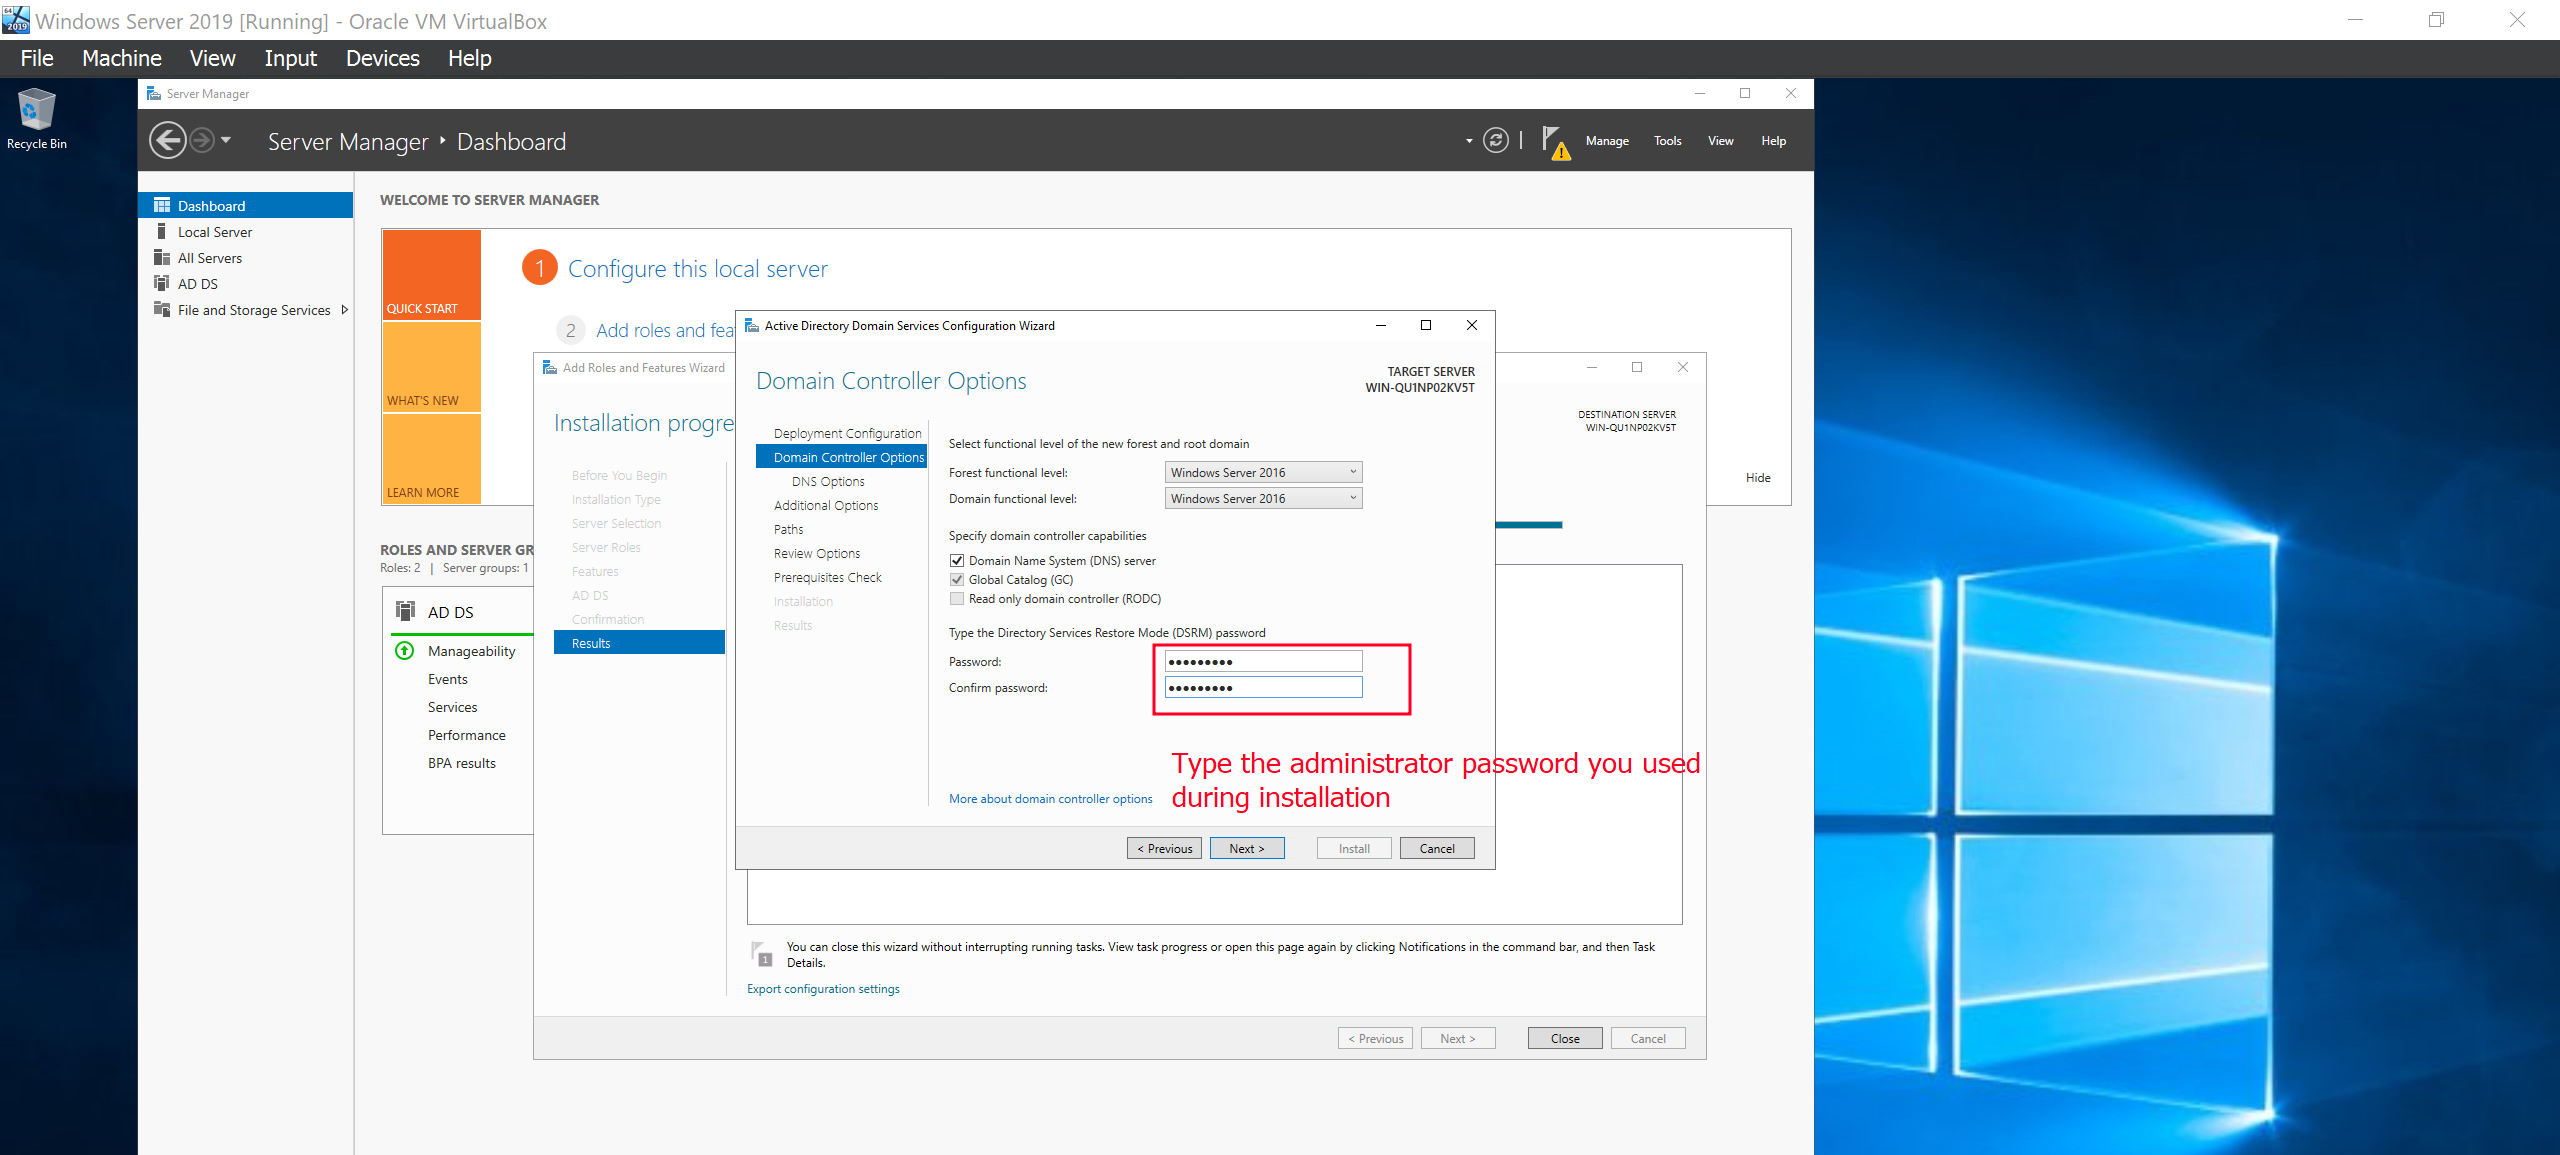
You will be required to type in the Administrator password that you set during installation. Enter it and click Next..Next..
A prerequisite check will be performed and after it passes successfully. you will click install.
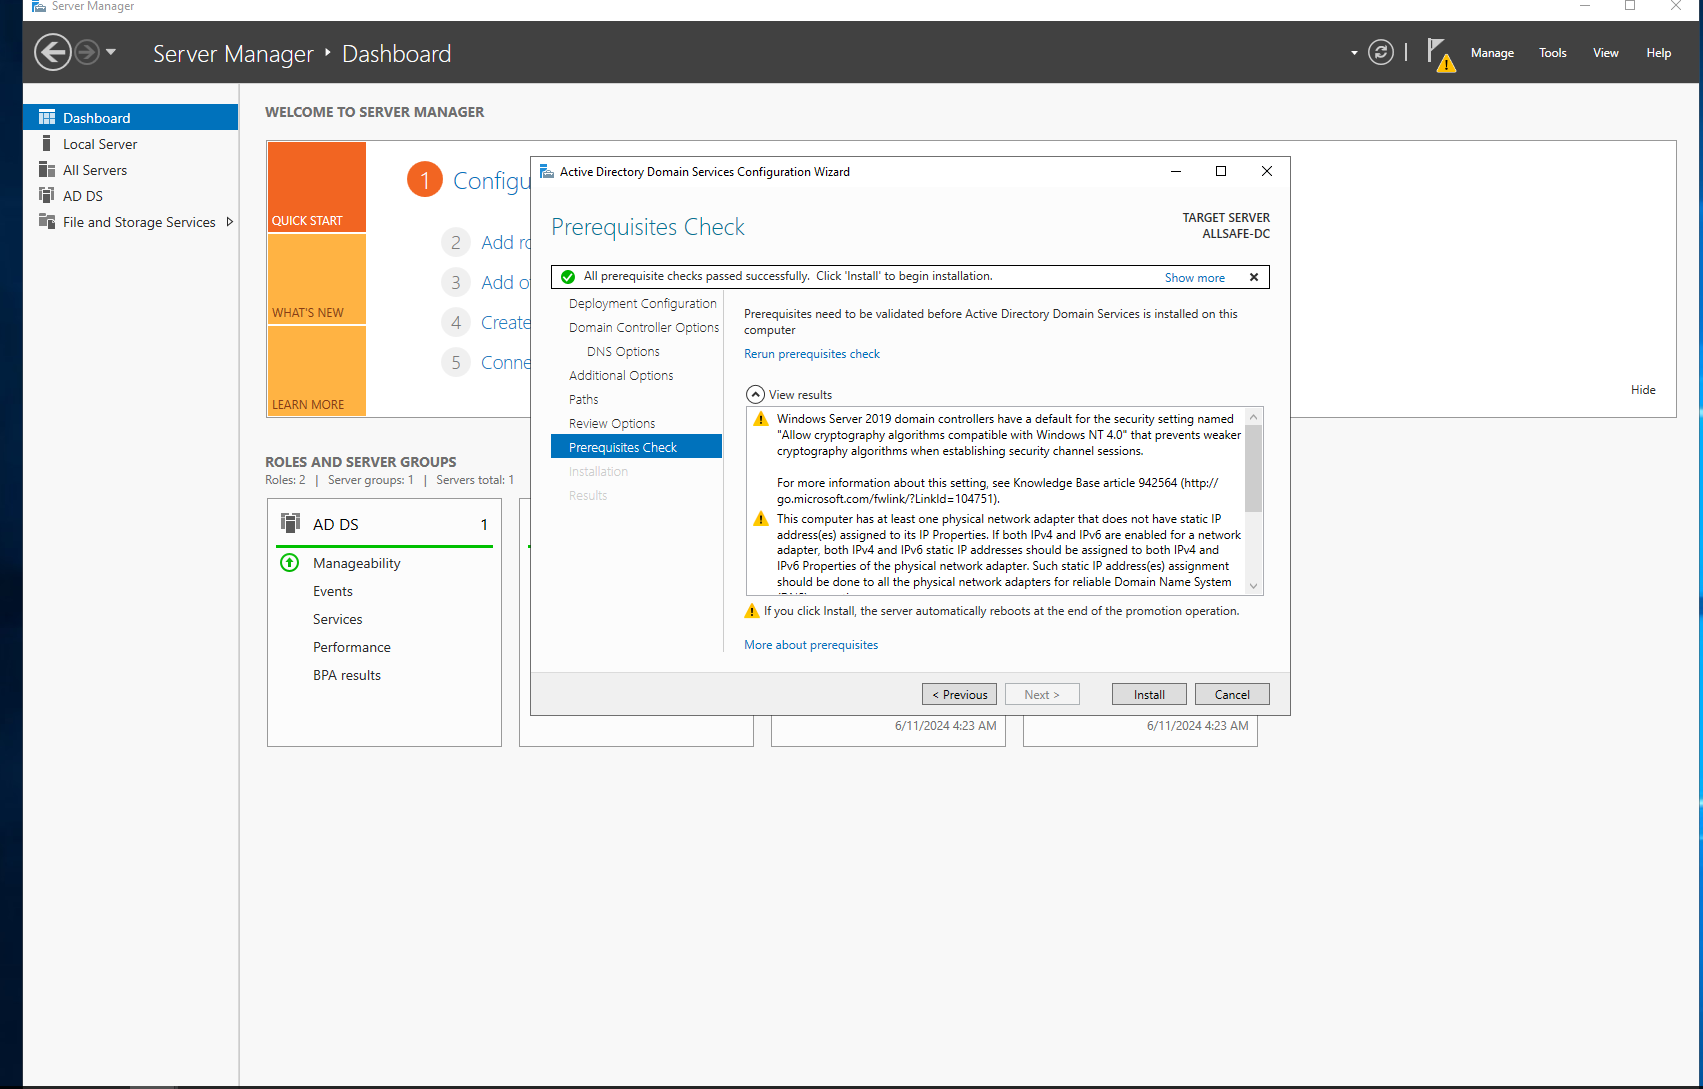
Your machine will restart immediately after the install and you will be able to login to the domain now as the Administrator.
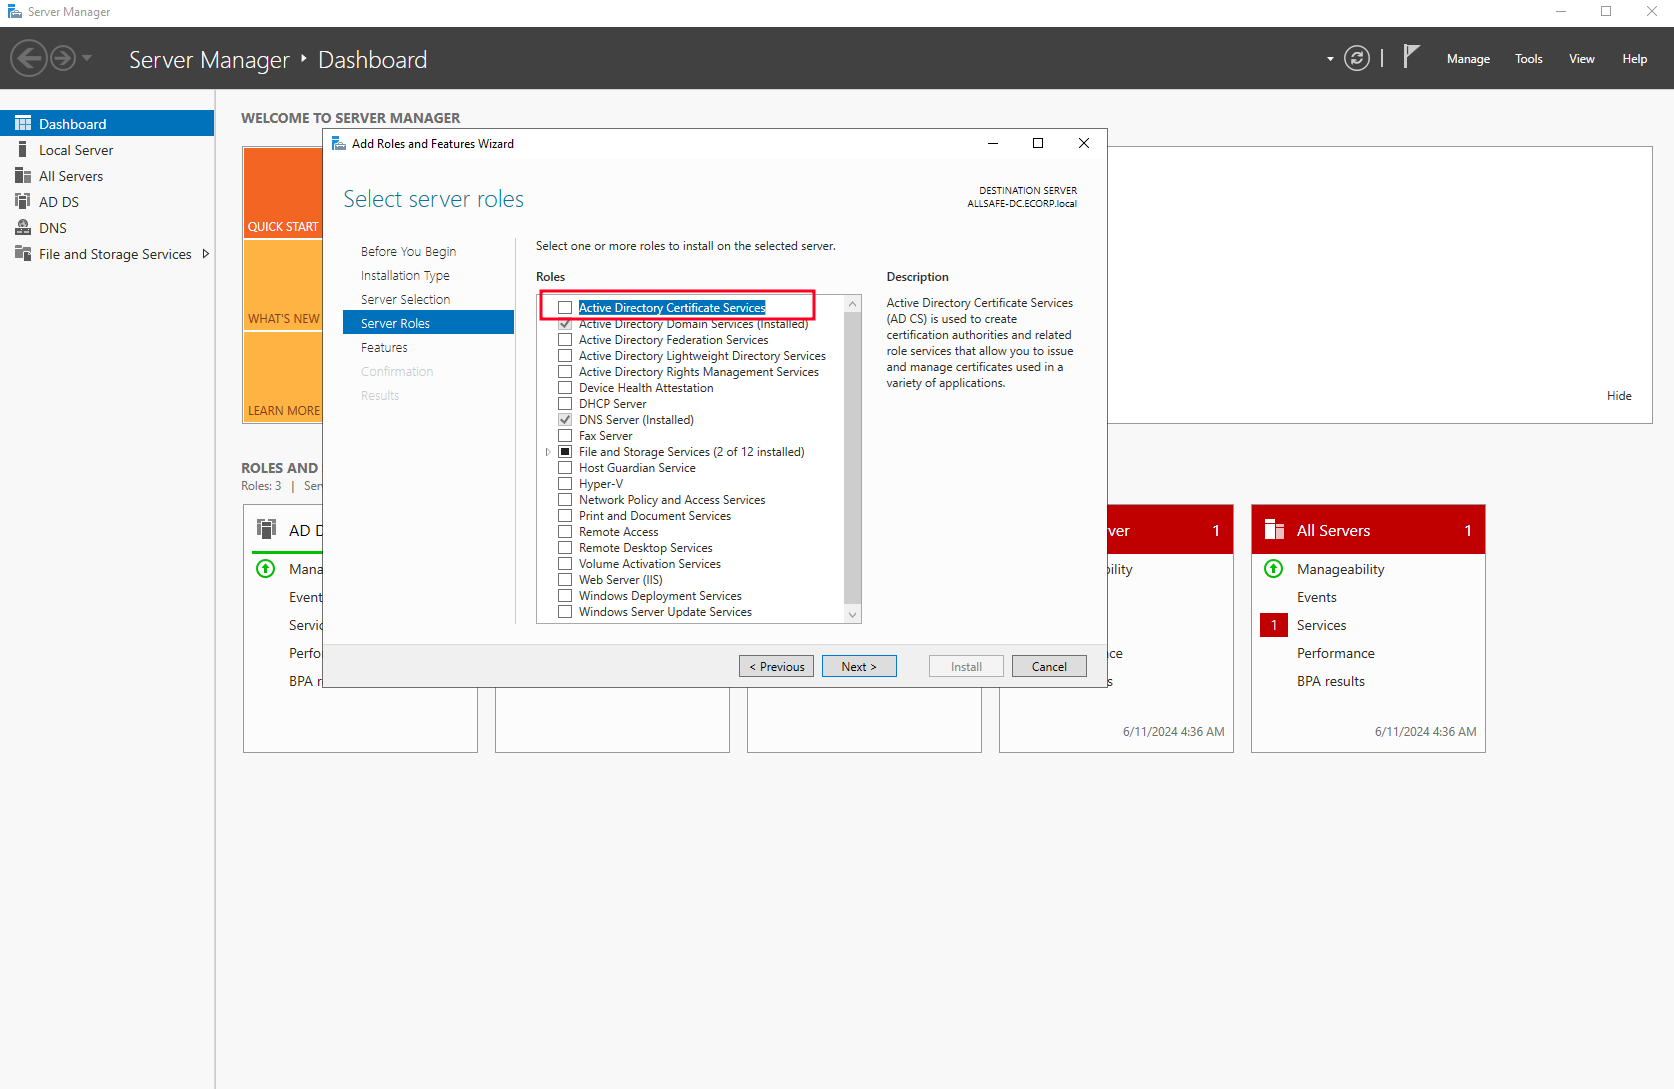
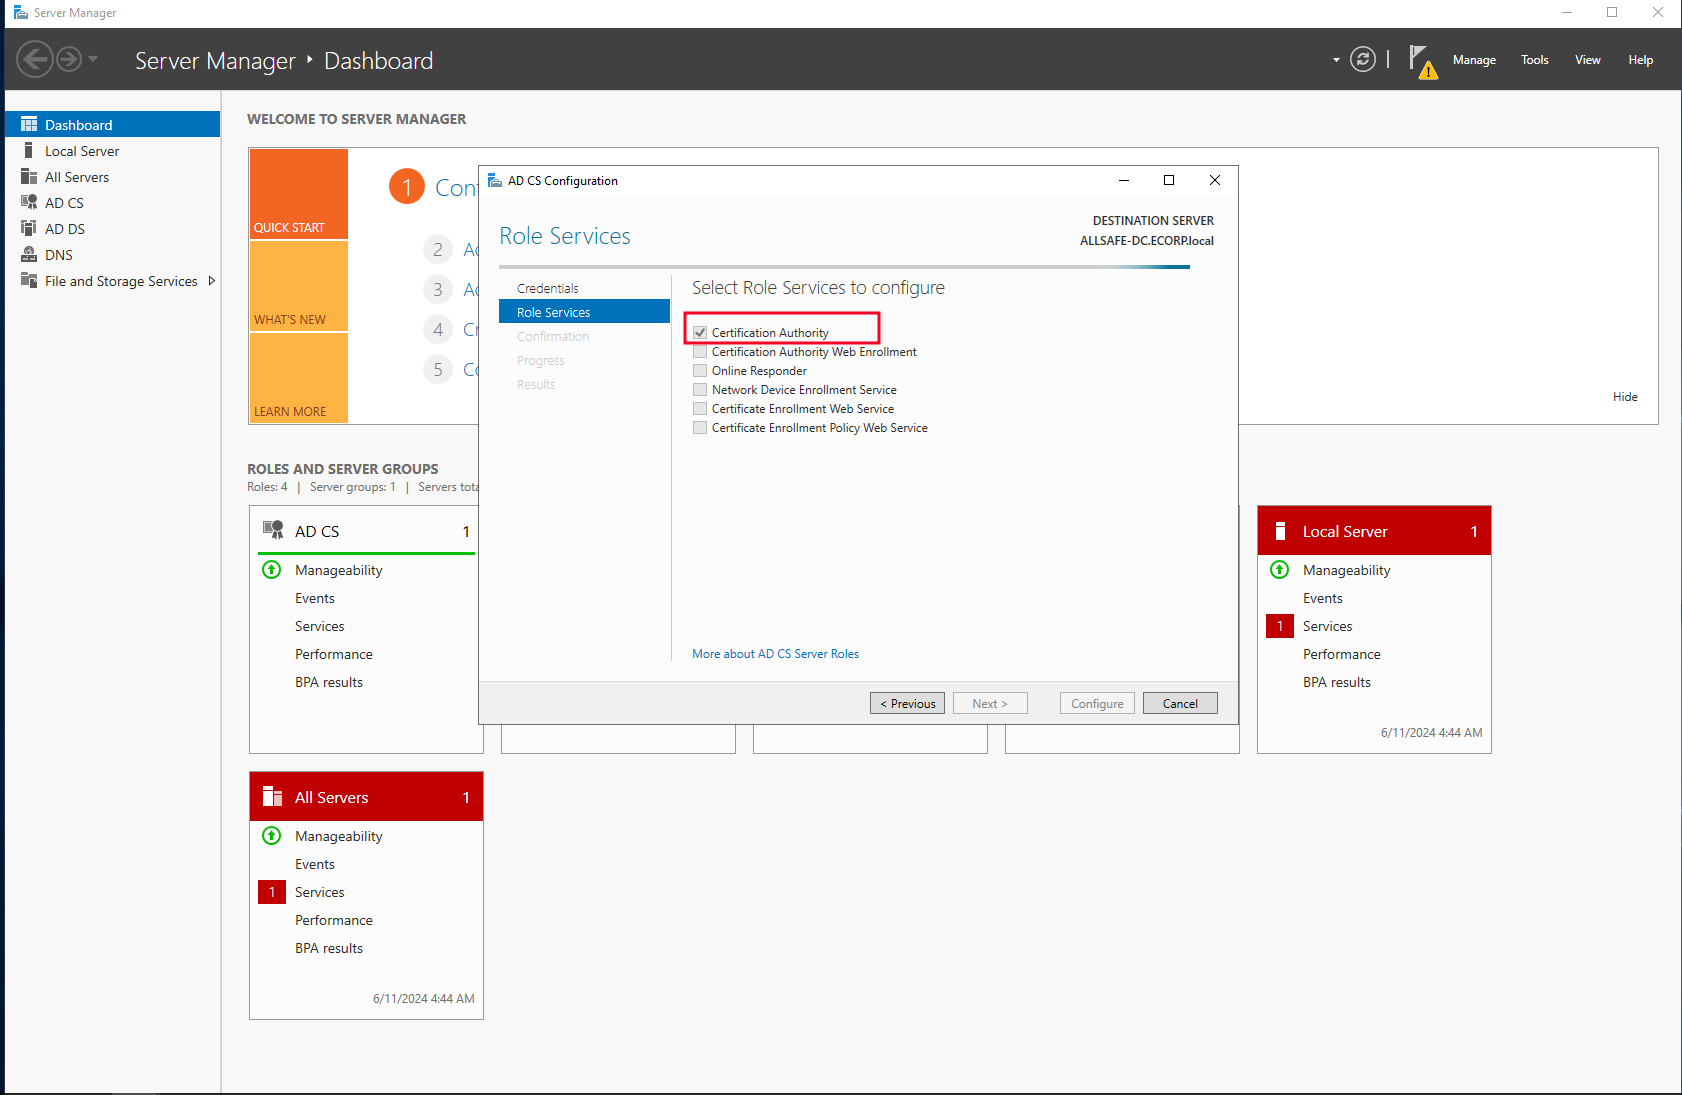
Installing the Active Directory Certificate Services
The Active Directory certificate services are used to provide digital certificates that can be used for things like Identity verification and encryption in Active Directory enviroments.
So on the Server Roles again select “Active Directory Certificate Services” and simply follow the default configuration to the end.
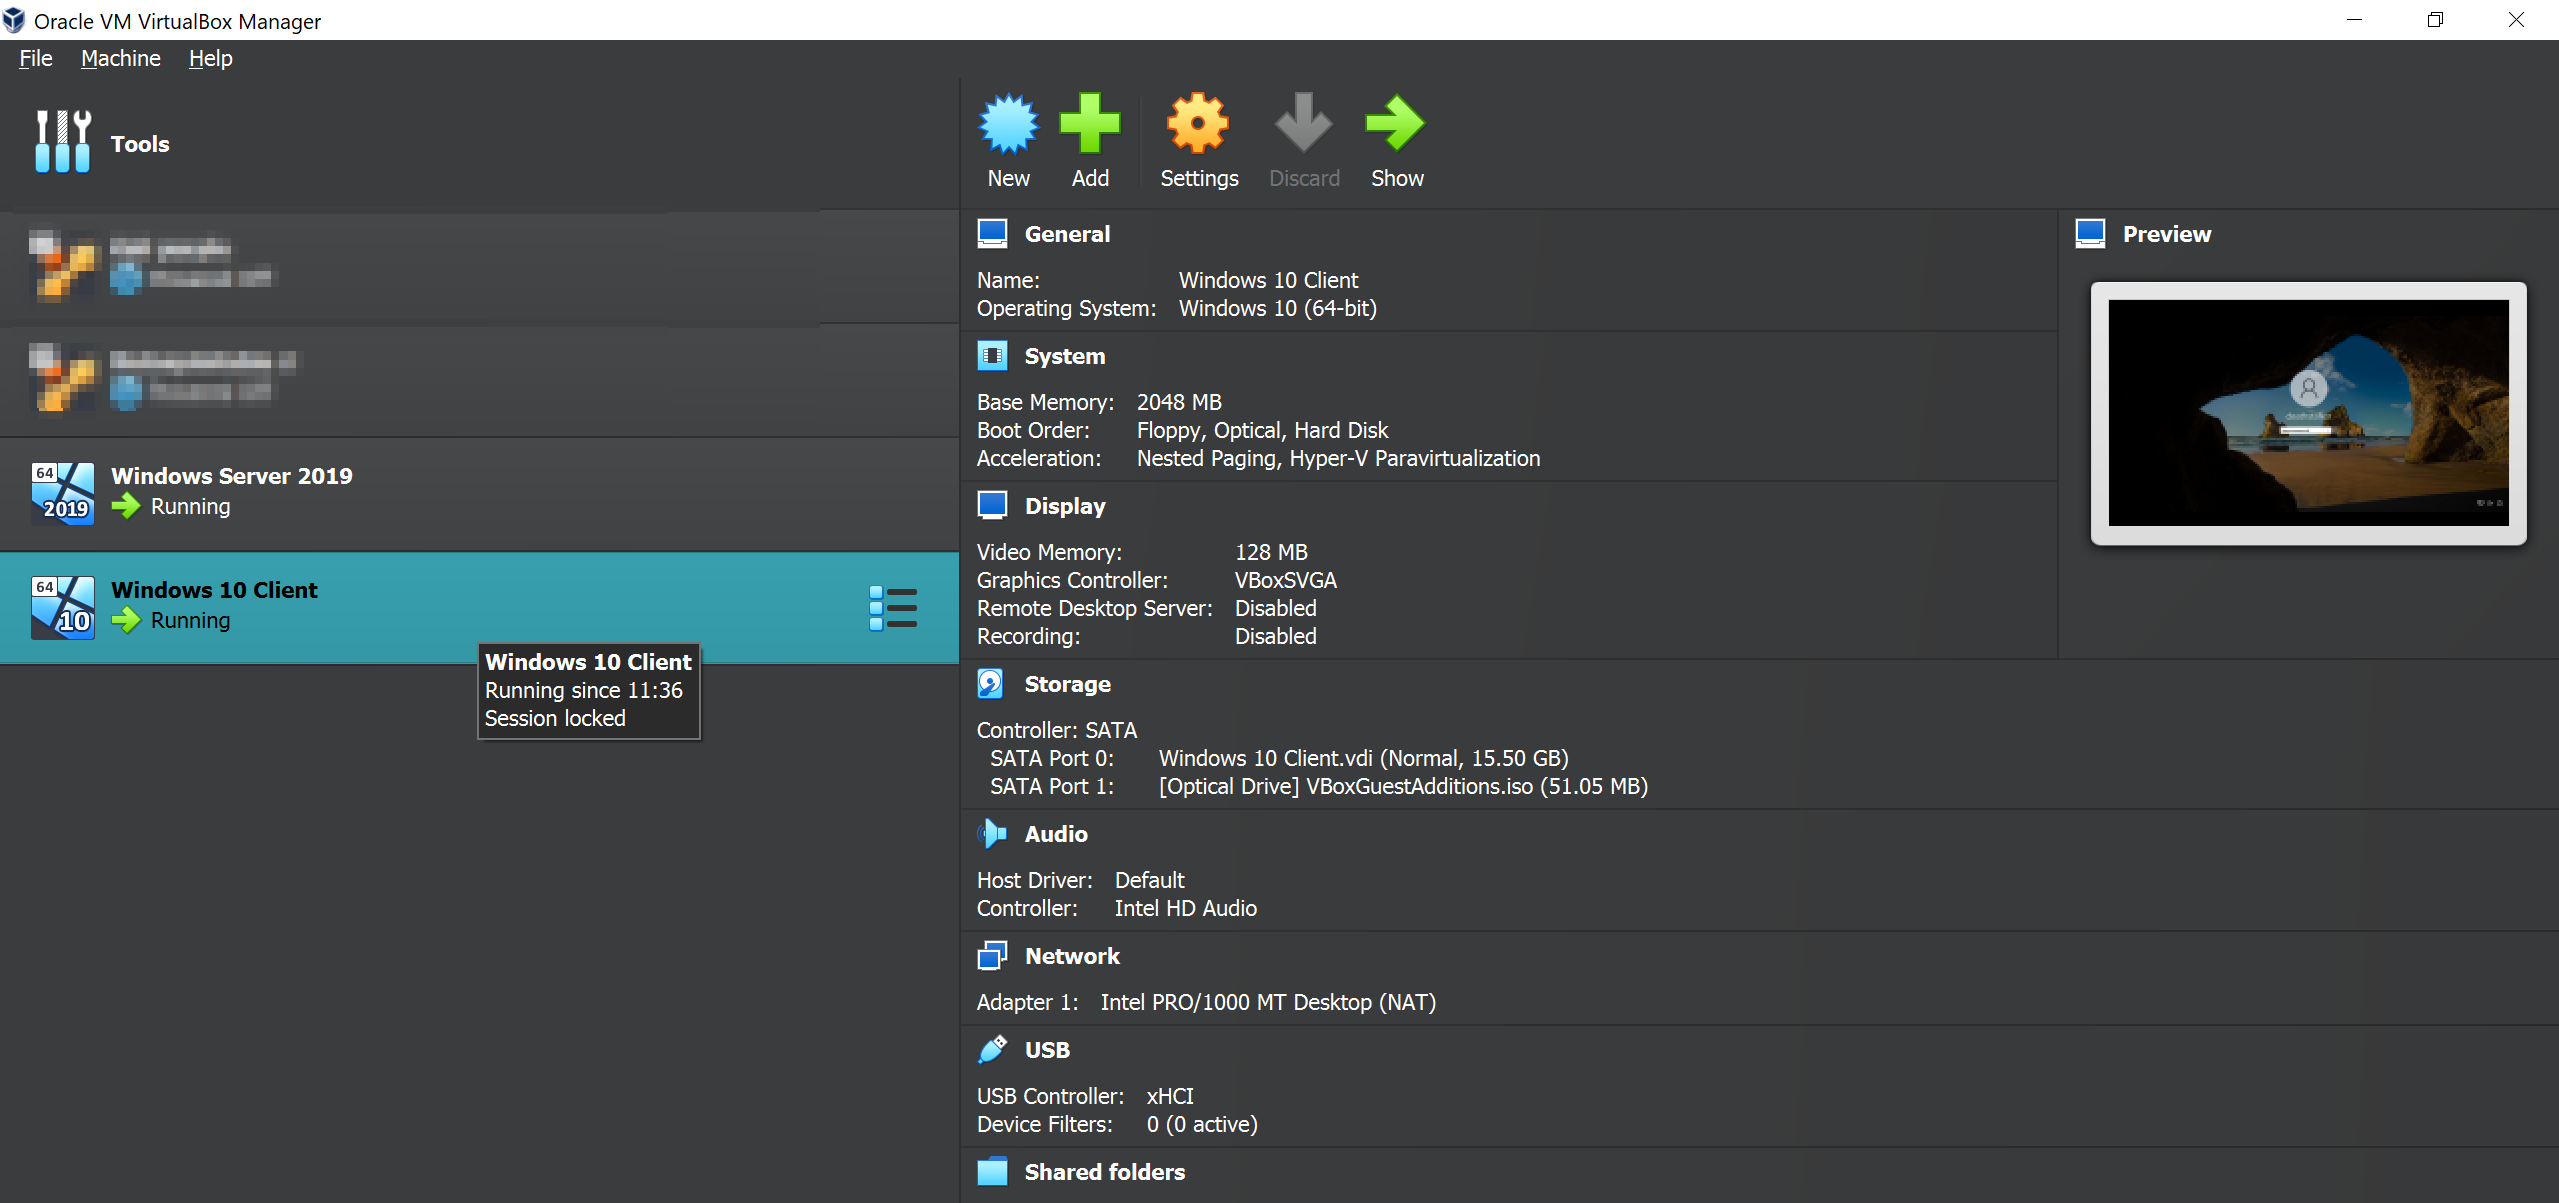
Installing Windows 10 Workstation
This simple. Just follow the same setup process to where you will be required to create a microsoft account. You don’t need to create one. Just proceed with creating a Local User.
SetUp sor far
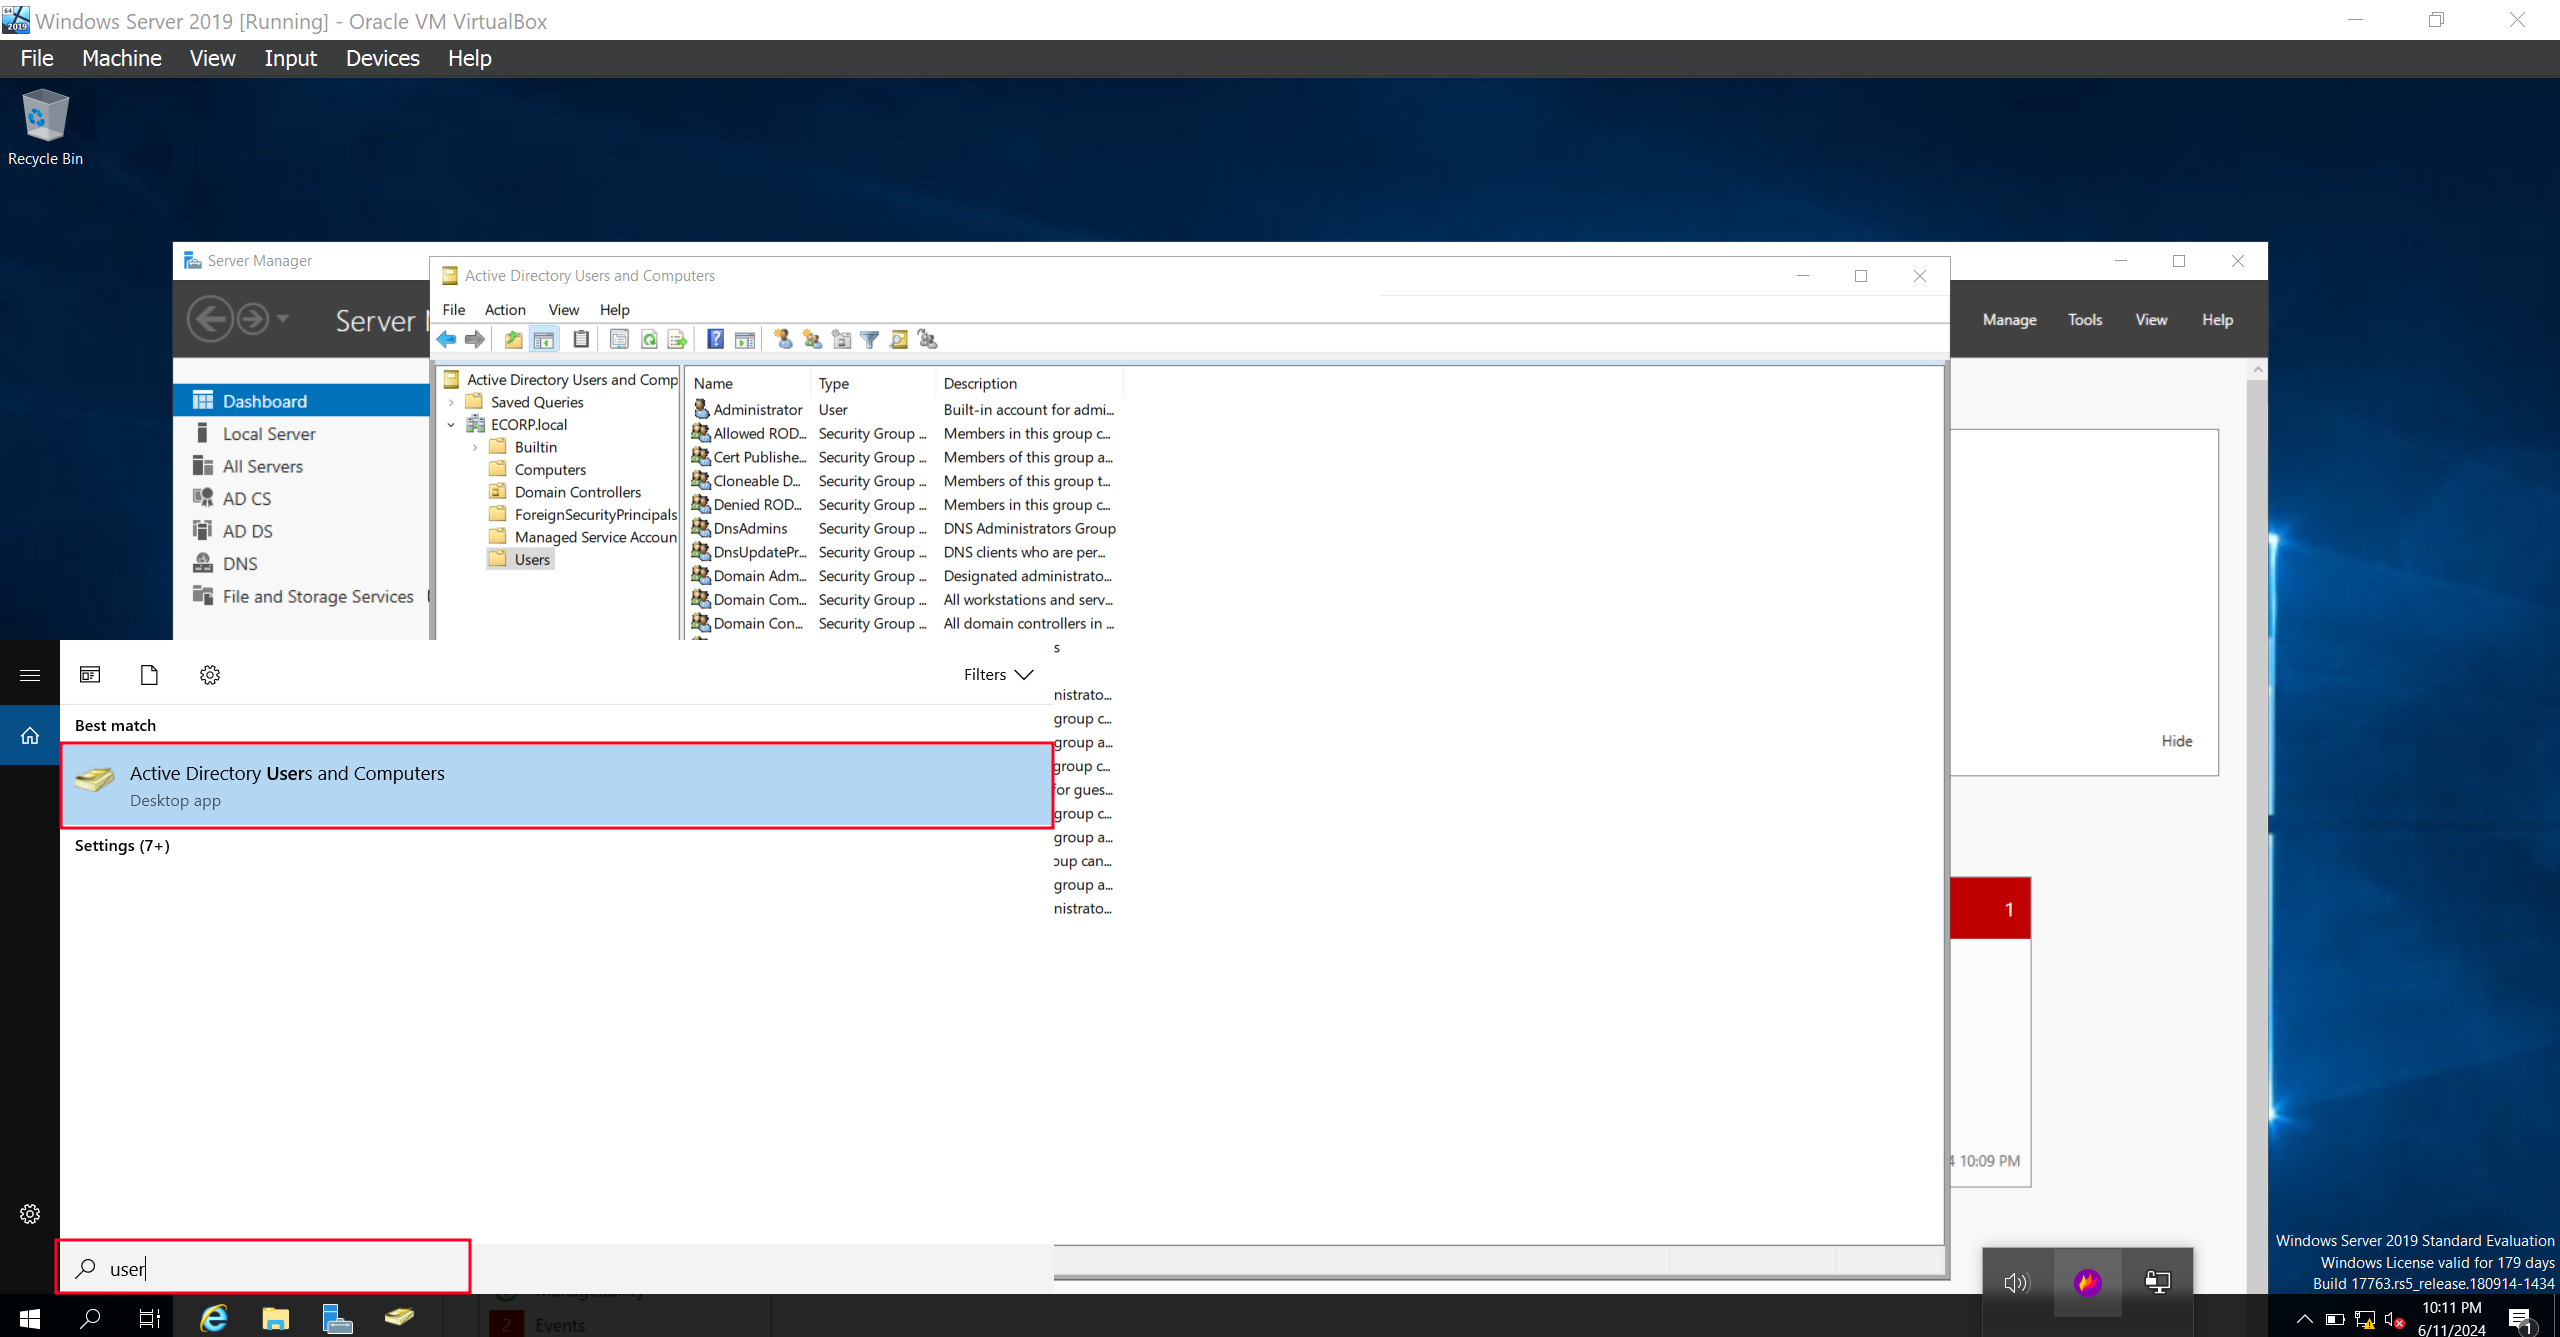
Setting Up Users, Groups and Policies
Last time we established that users are the main reason why we care about Active Directory. So, let’s set up some users, group them and enforce some policies.
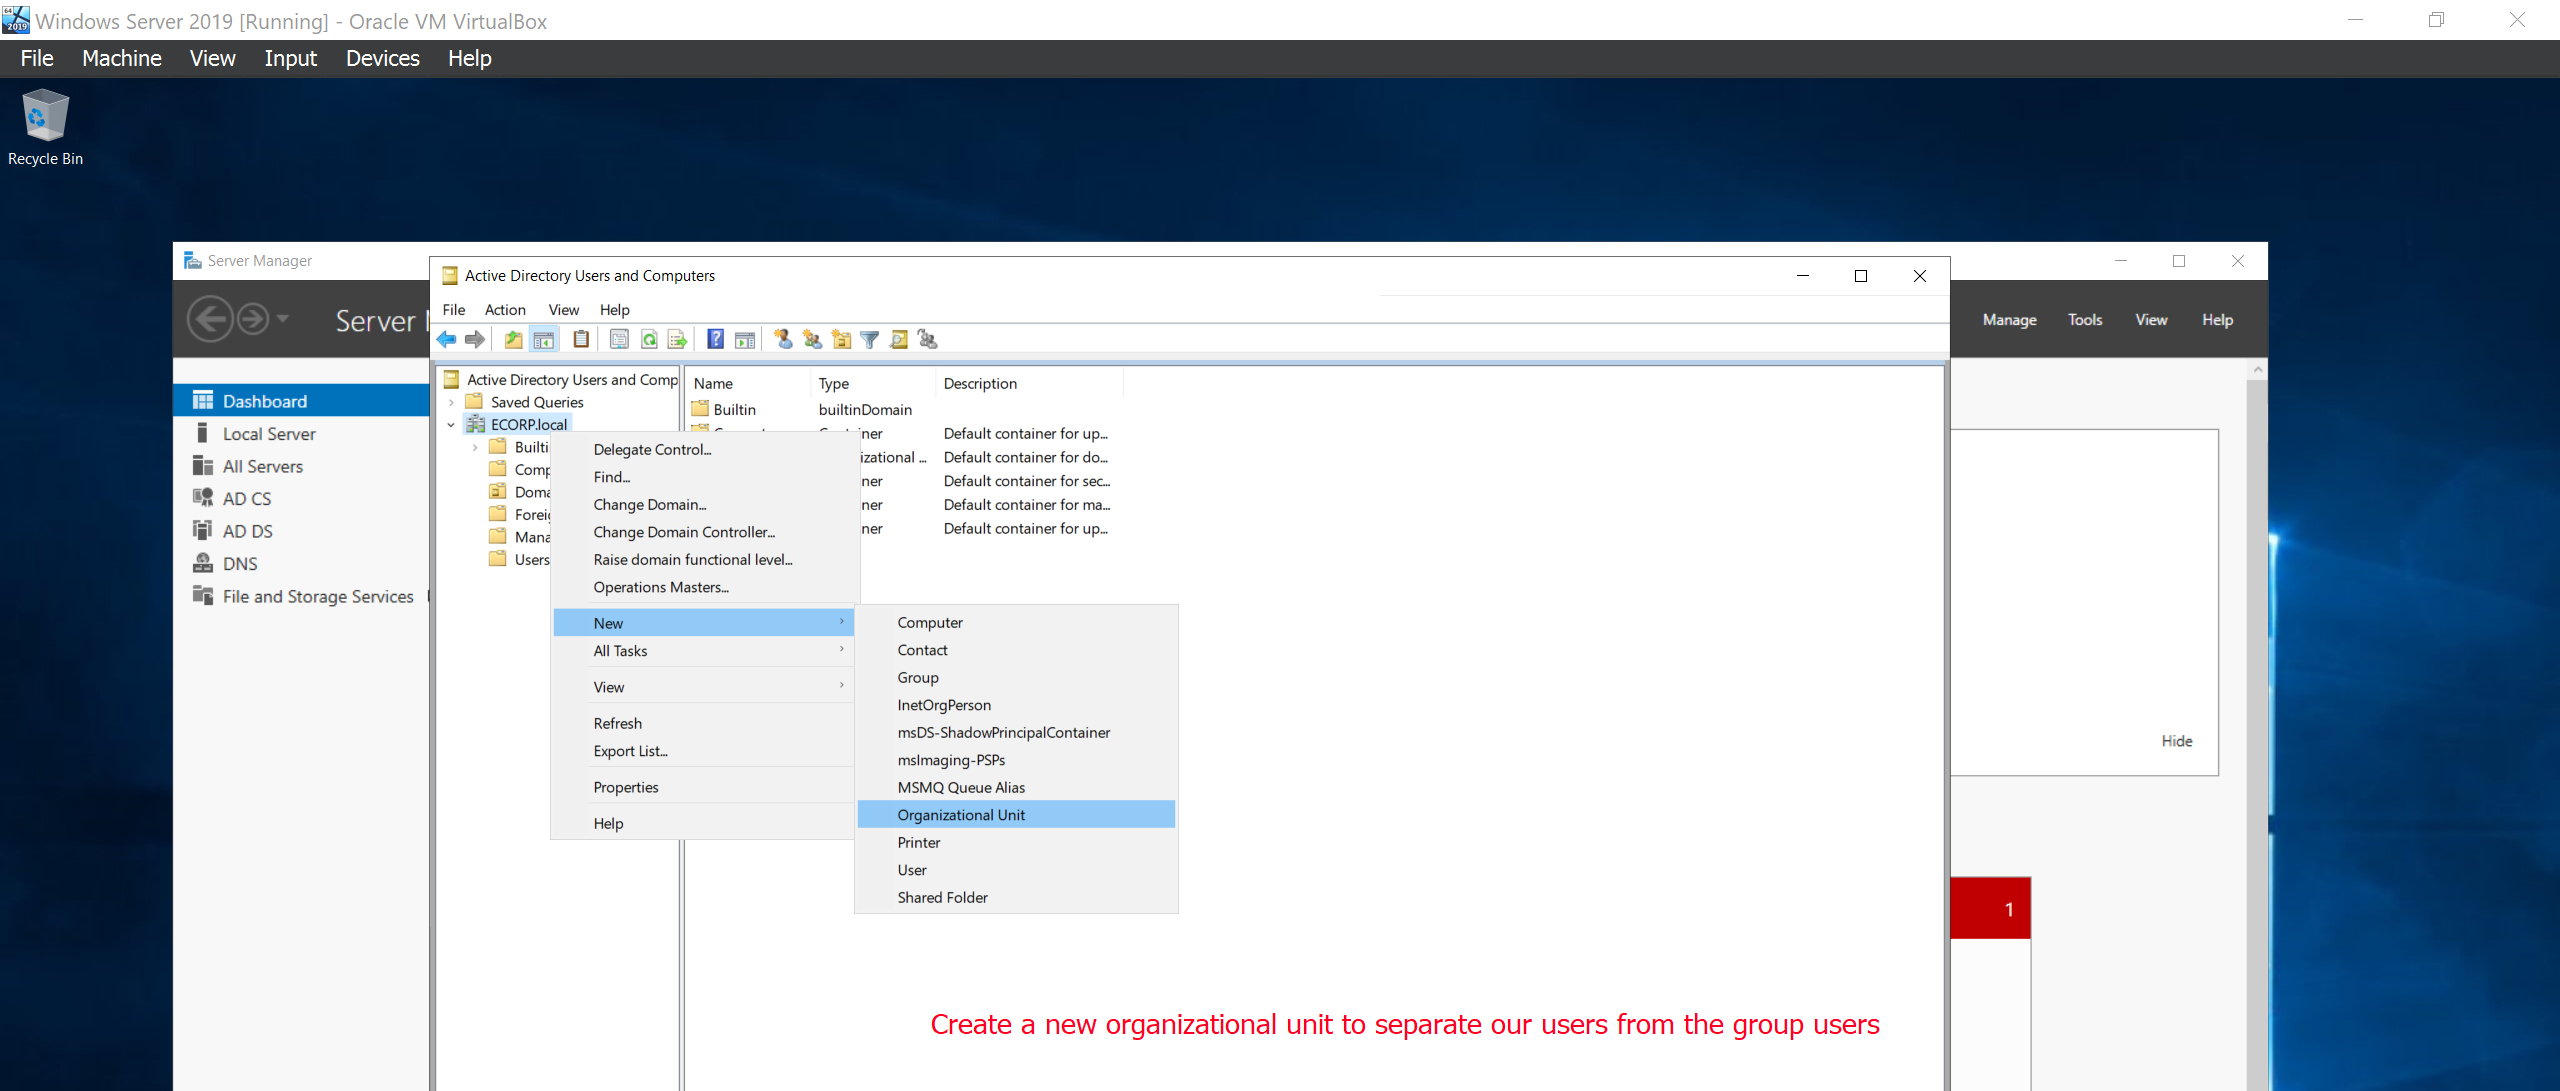
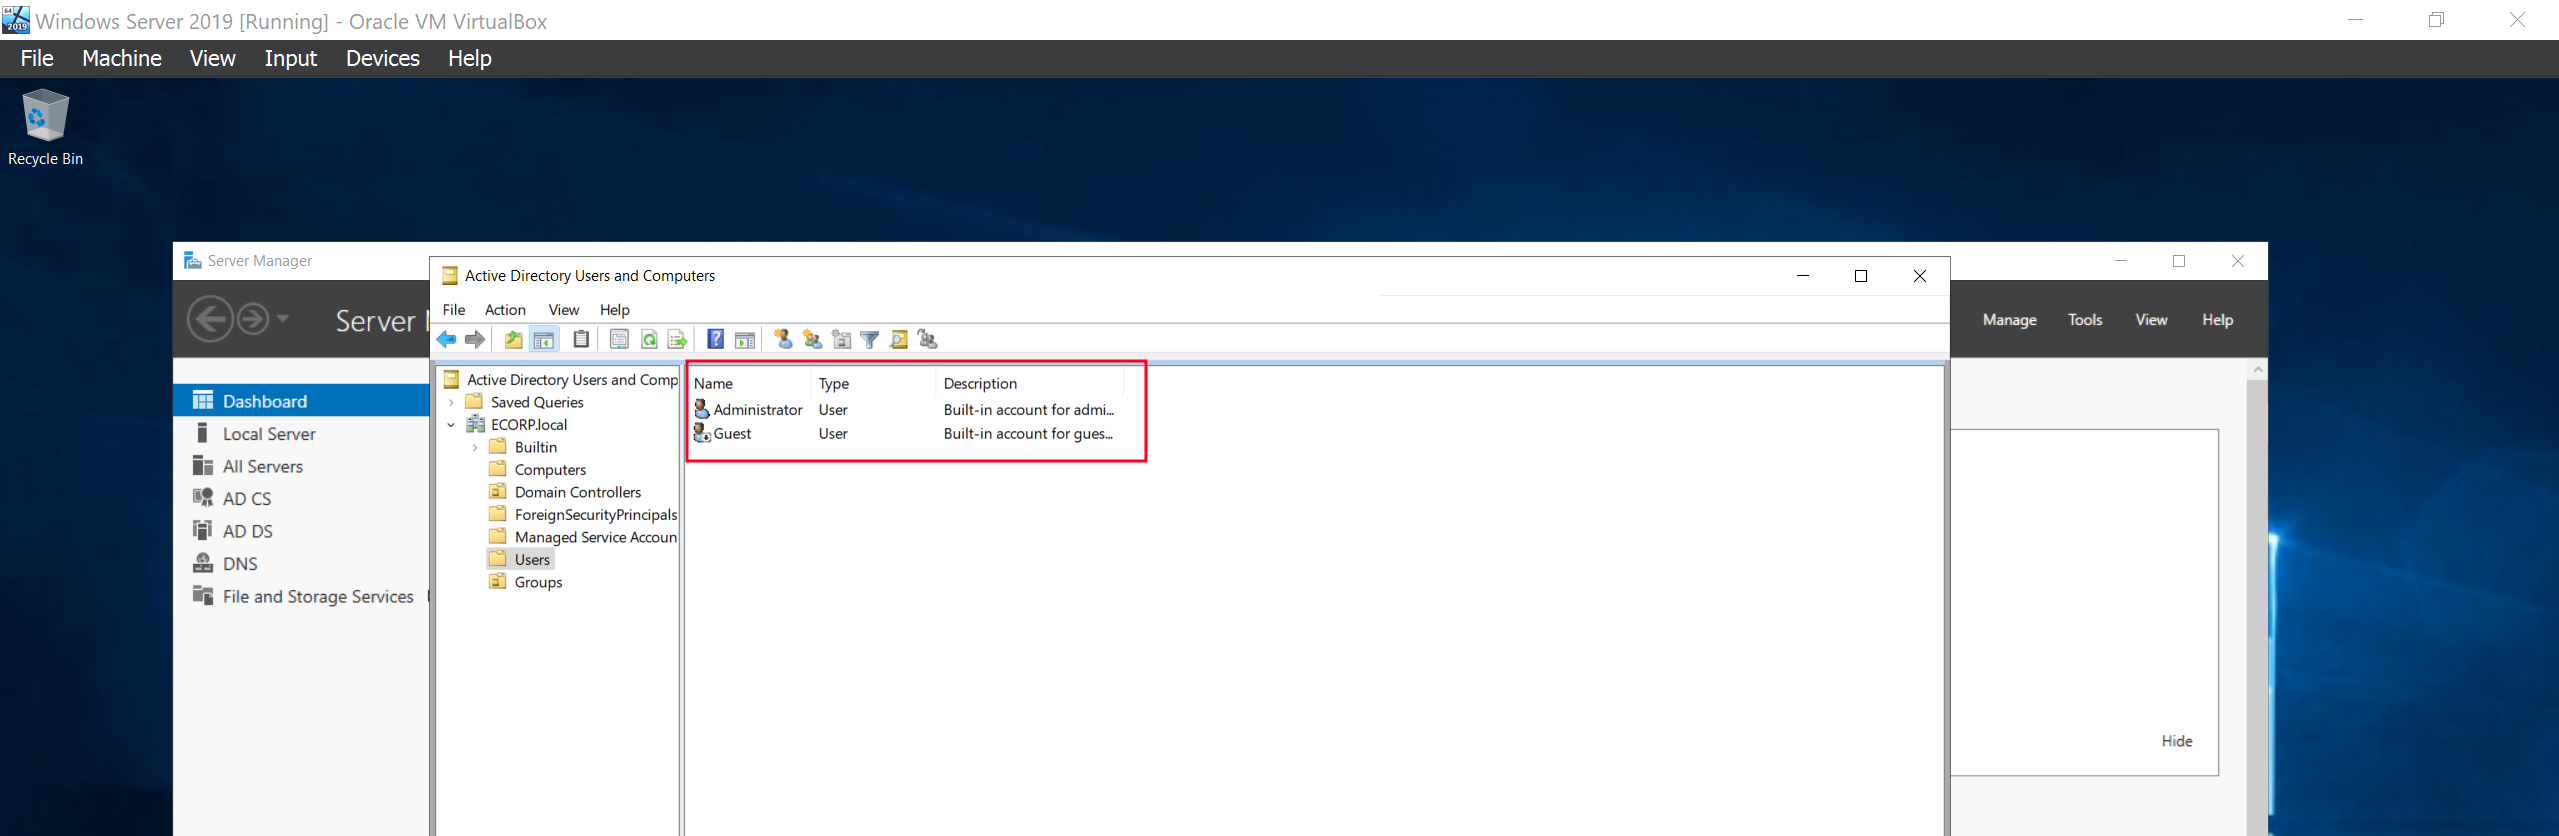
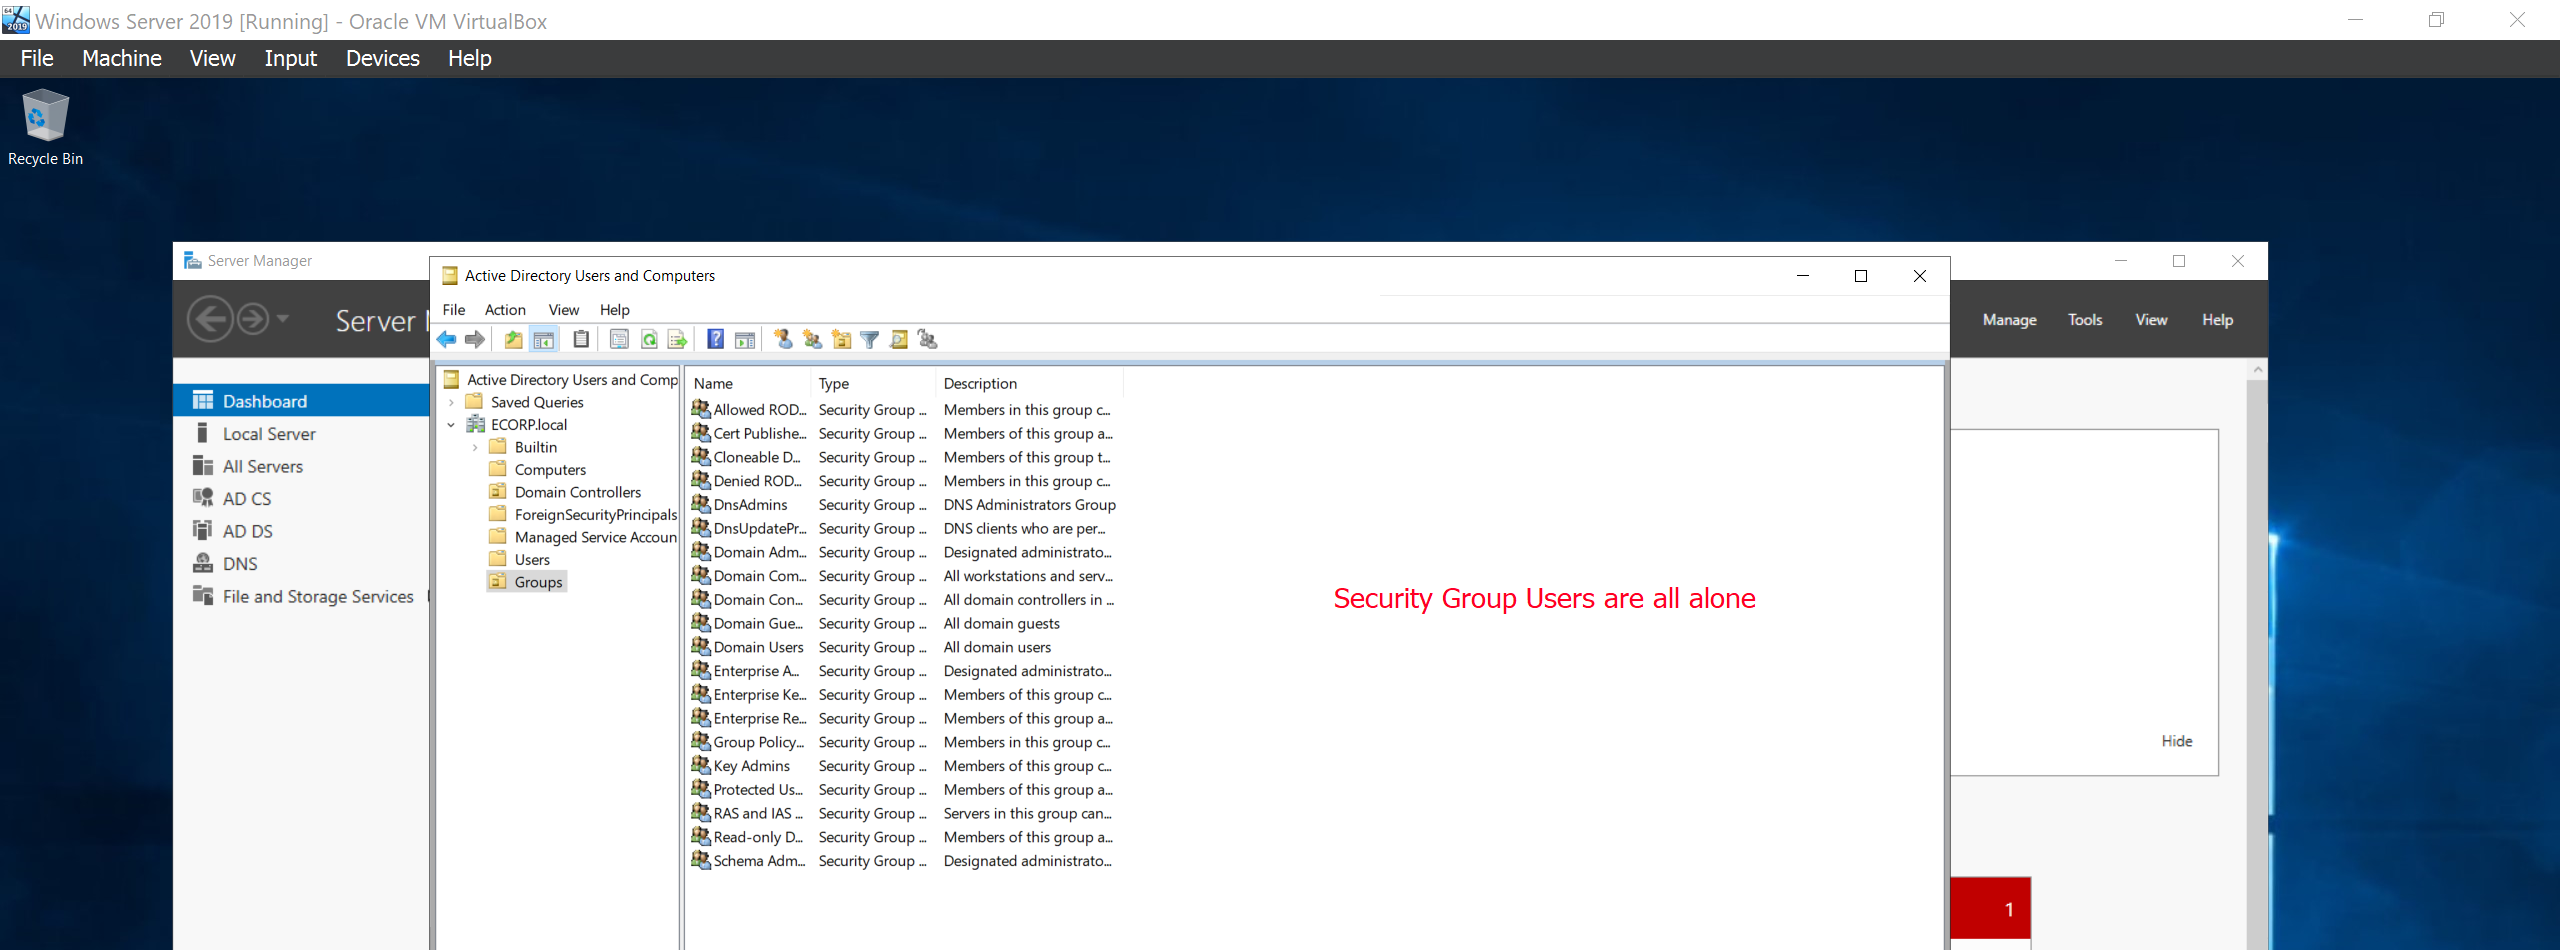
We can notice that the Default users together with the Security group users like Domain Admins are all bundled together. We can tidy that up by separating them. We’ll proceed to creating a “Group” organizational unit that will store all Security group users together.
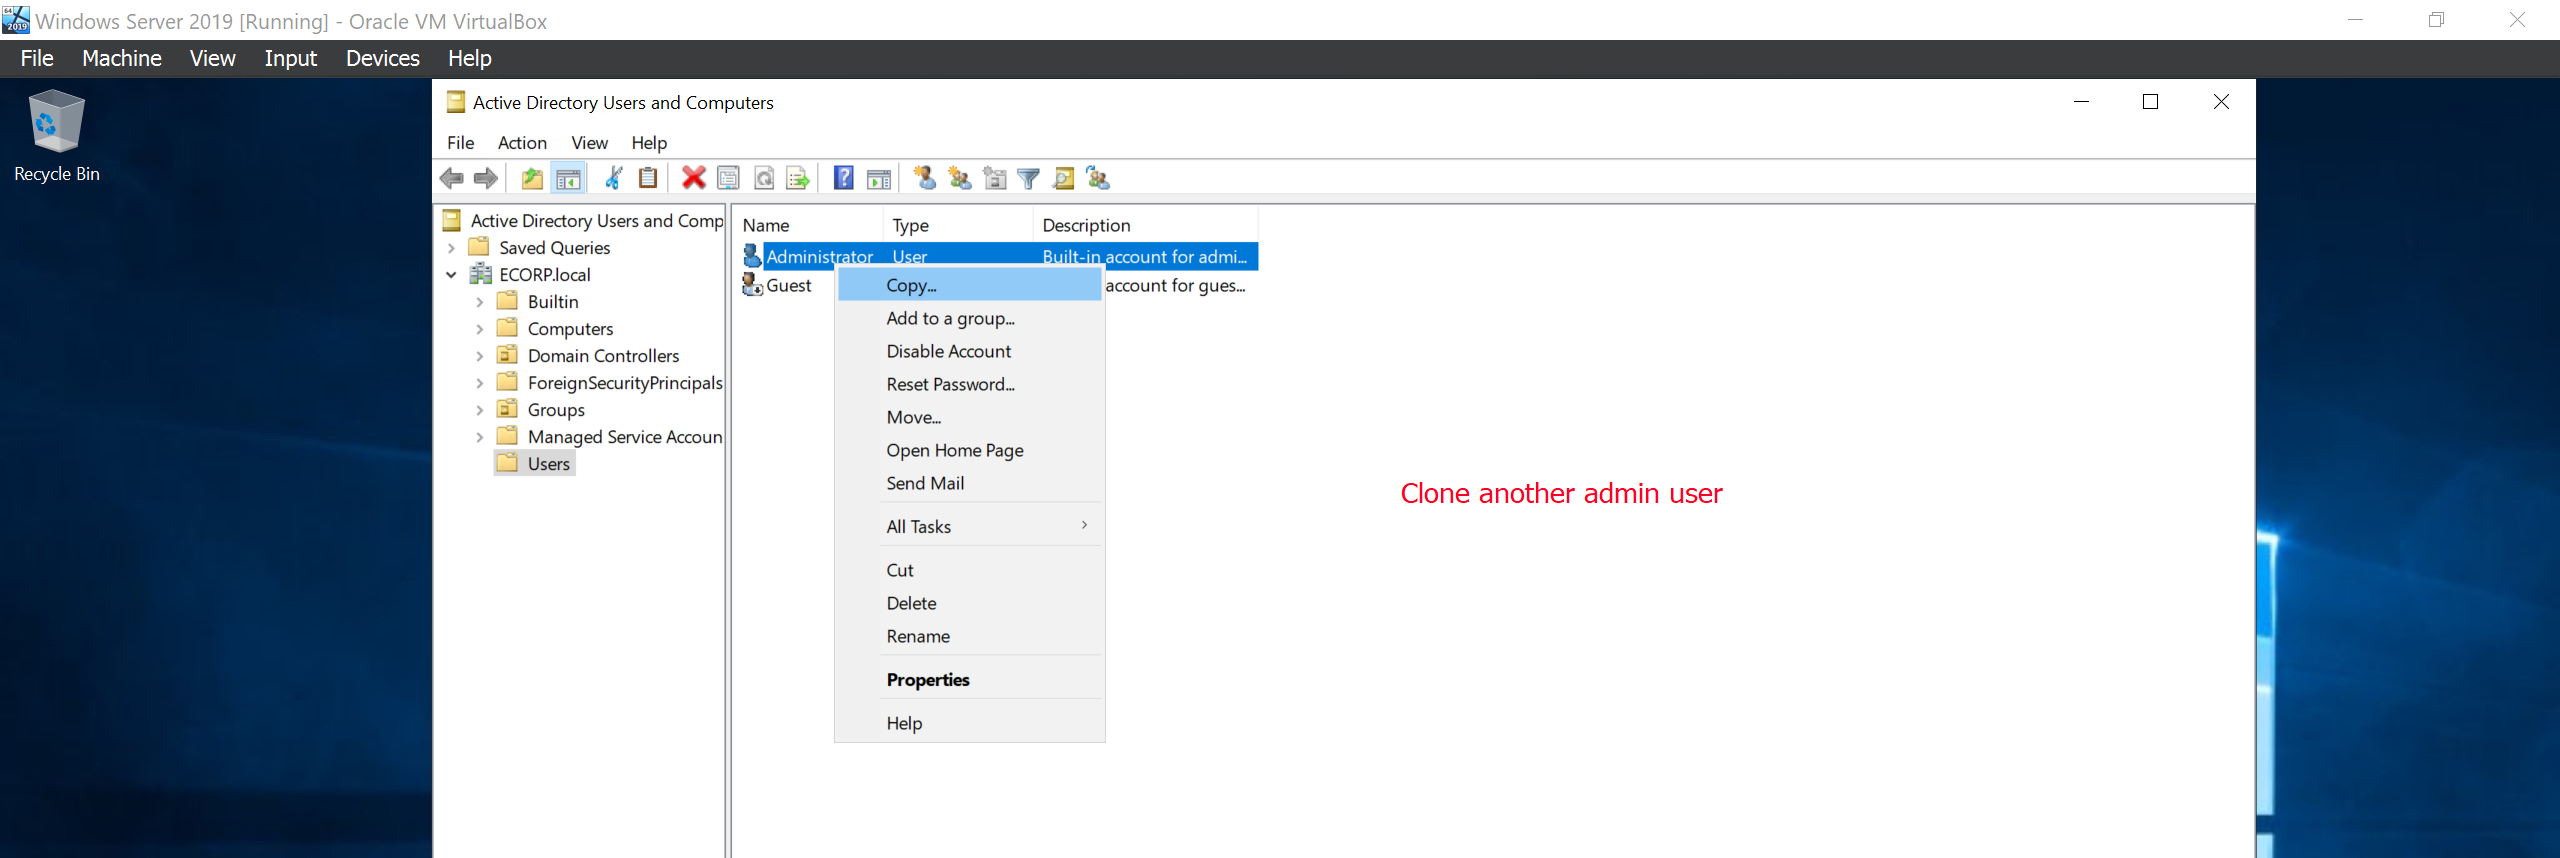
Next we’ll create a two copies of the Administrator to clone another Admin user called Mr Robot and a service account called SQLService which will be sued to run the SQL Service.
We can see below that Mr Robot and the SQLService account were created successfully. To fully setup the service account we will run the following commands on the command prompt.
setspn -a ALLSAFE-DC/SQLService.ECORP.local:1337 ECORP\SQLService
setspn -T ECORP.local -Q */*
The first command adds a Service Principal Name to the SQLService account. SPNs are unique identifiers for services running on servers. This is used to ensure that Kerberos authentication can correctly identify and authenticate to the SQL Service running on SQLService.ECORP.local on port 1337. The second command queries and lists all SPNs in the ECORP.local domain to check if the SPN was registered successfully.

Next we will create two other low level users Tyrell Wellic and Elliot ALderson.

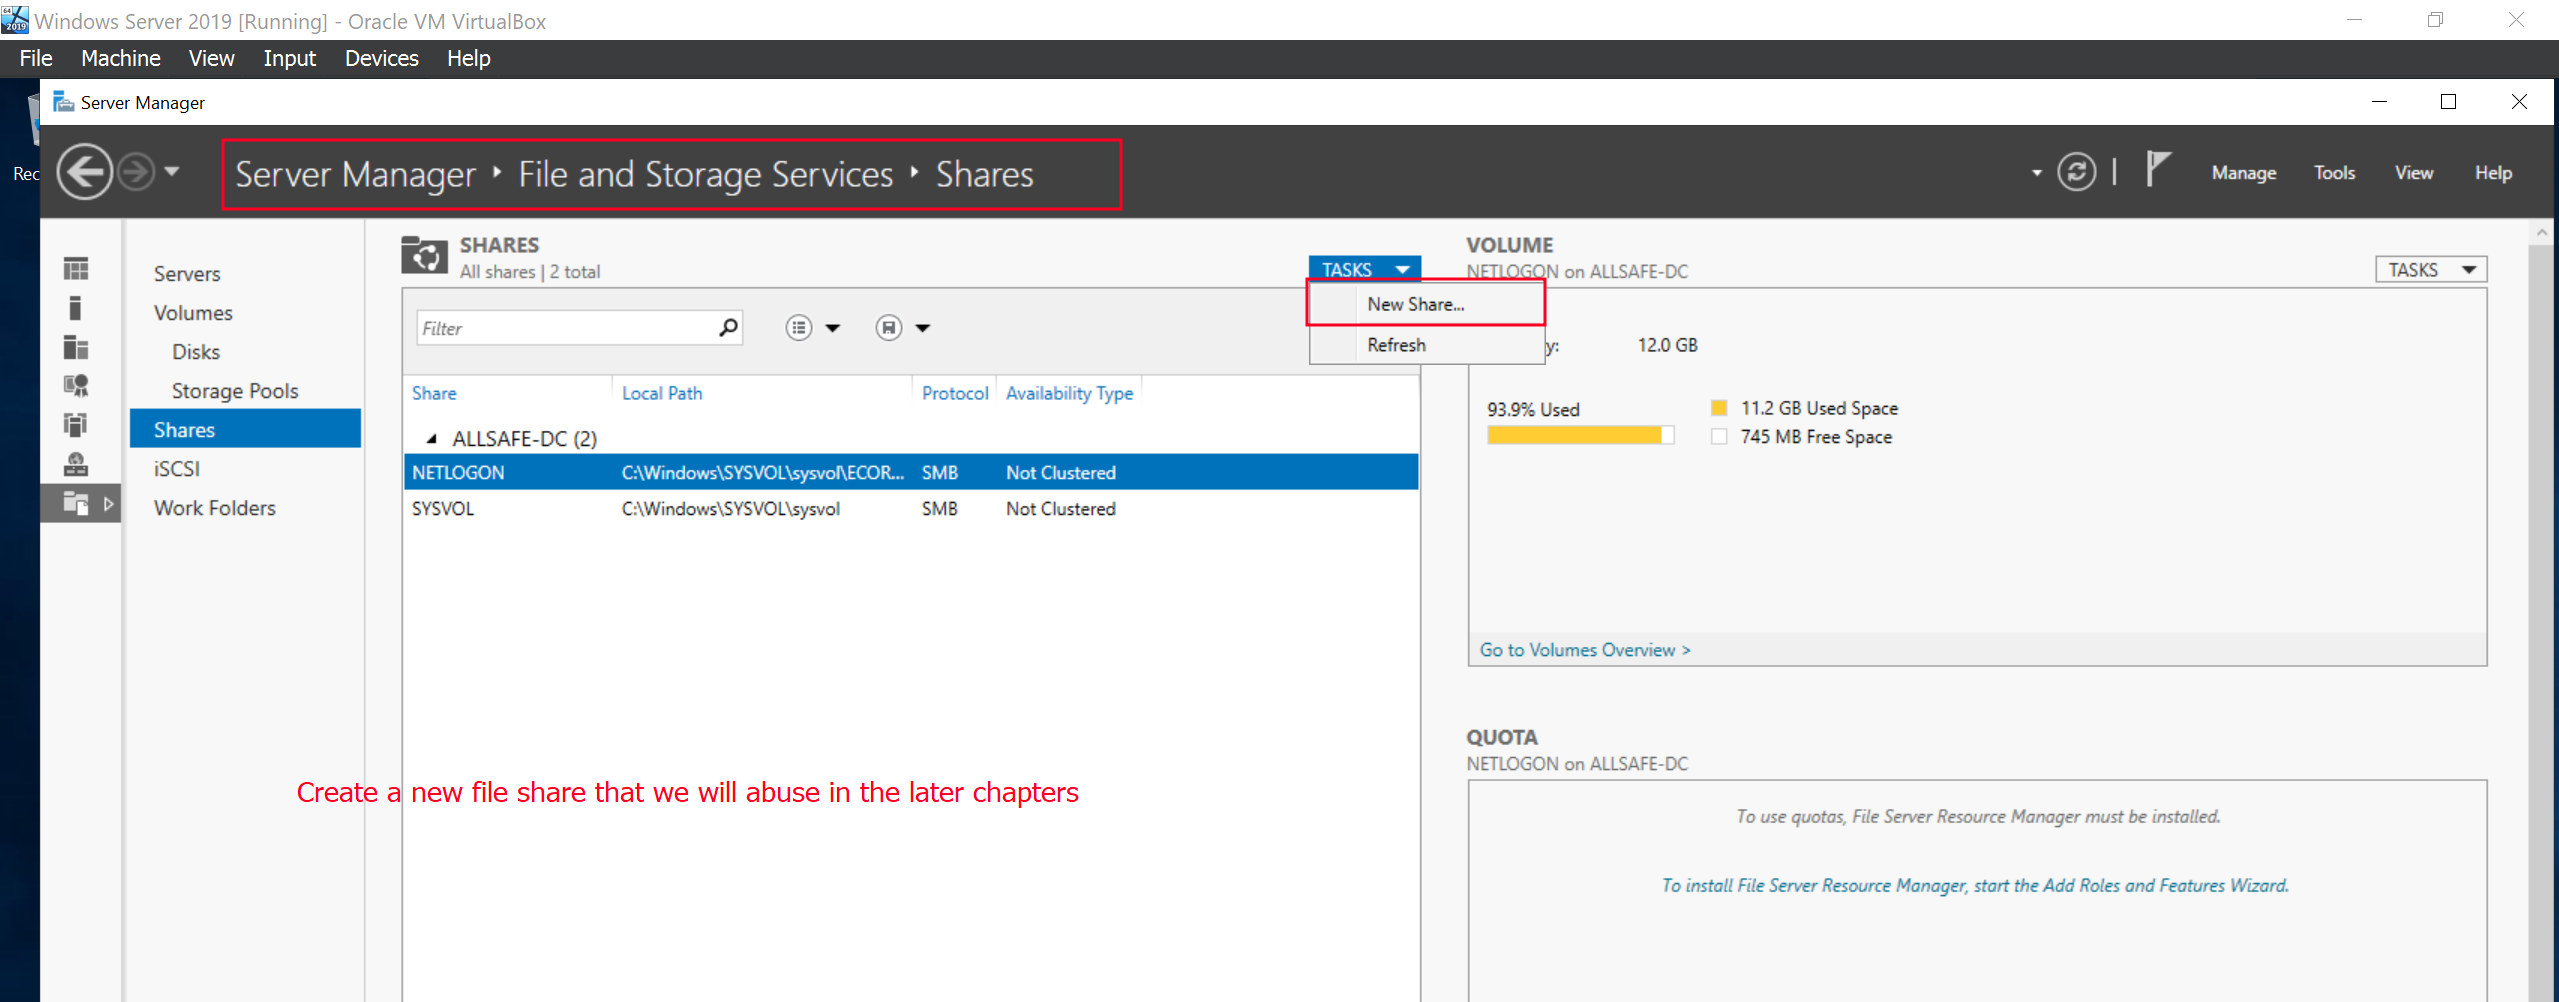
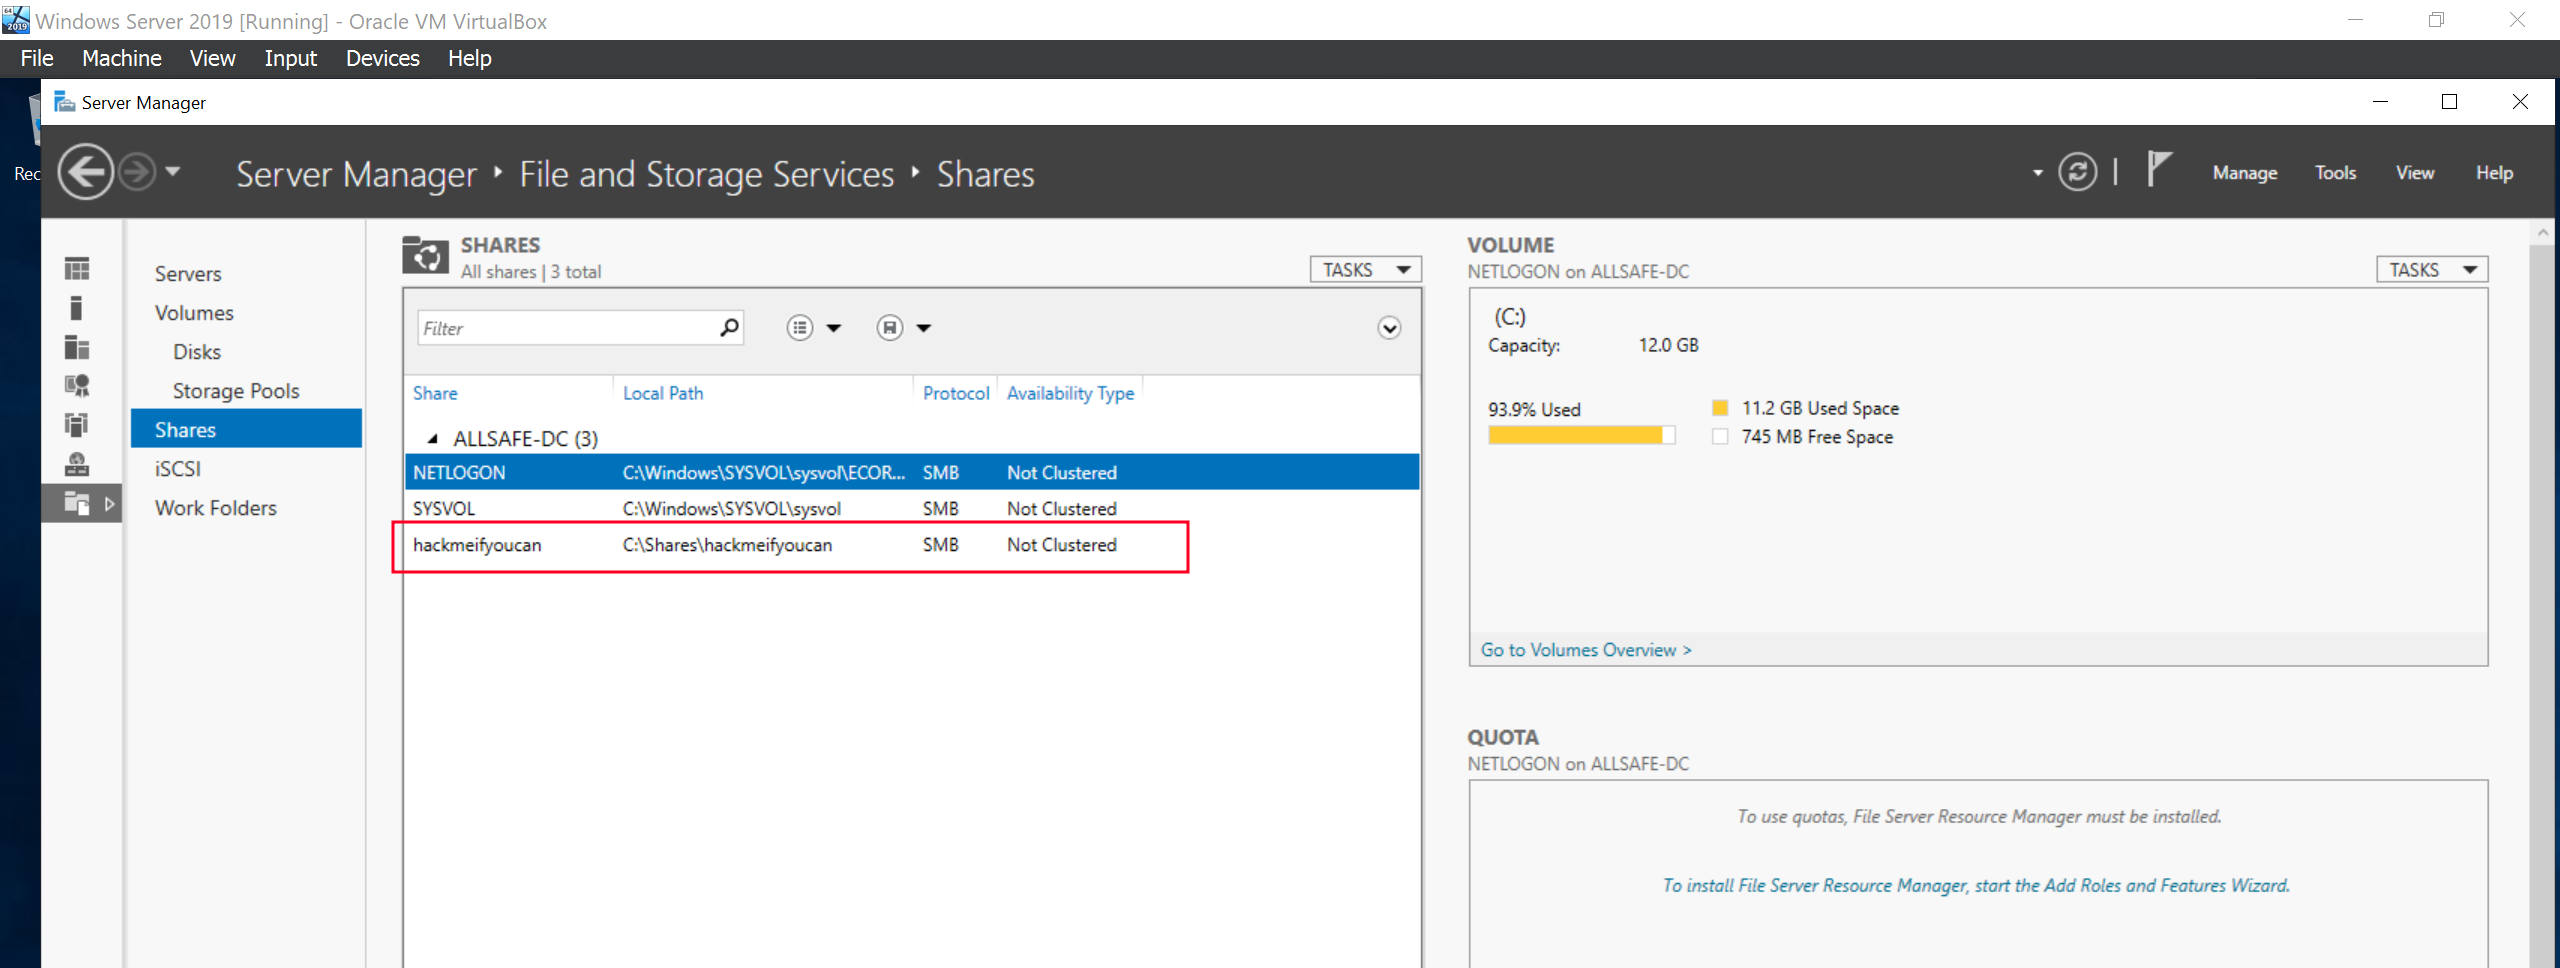
Creating a File Share
We are going to create a file share called hackmeifyoucan that we will abuse during our attacks in the later chapters.
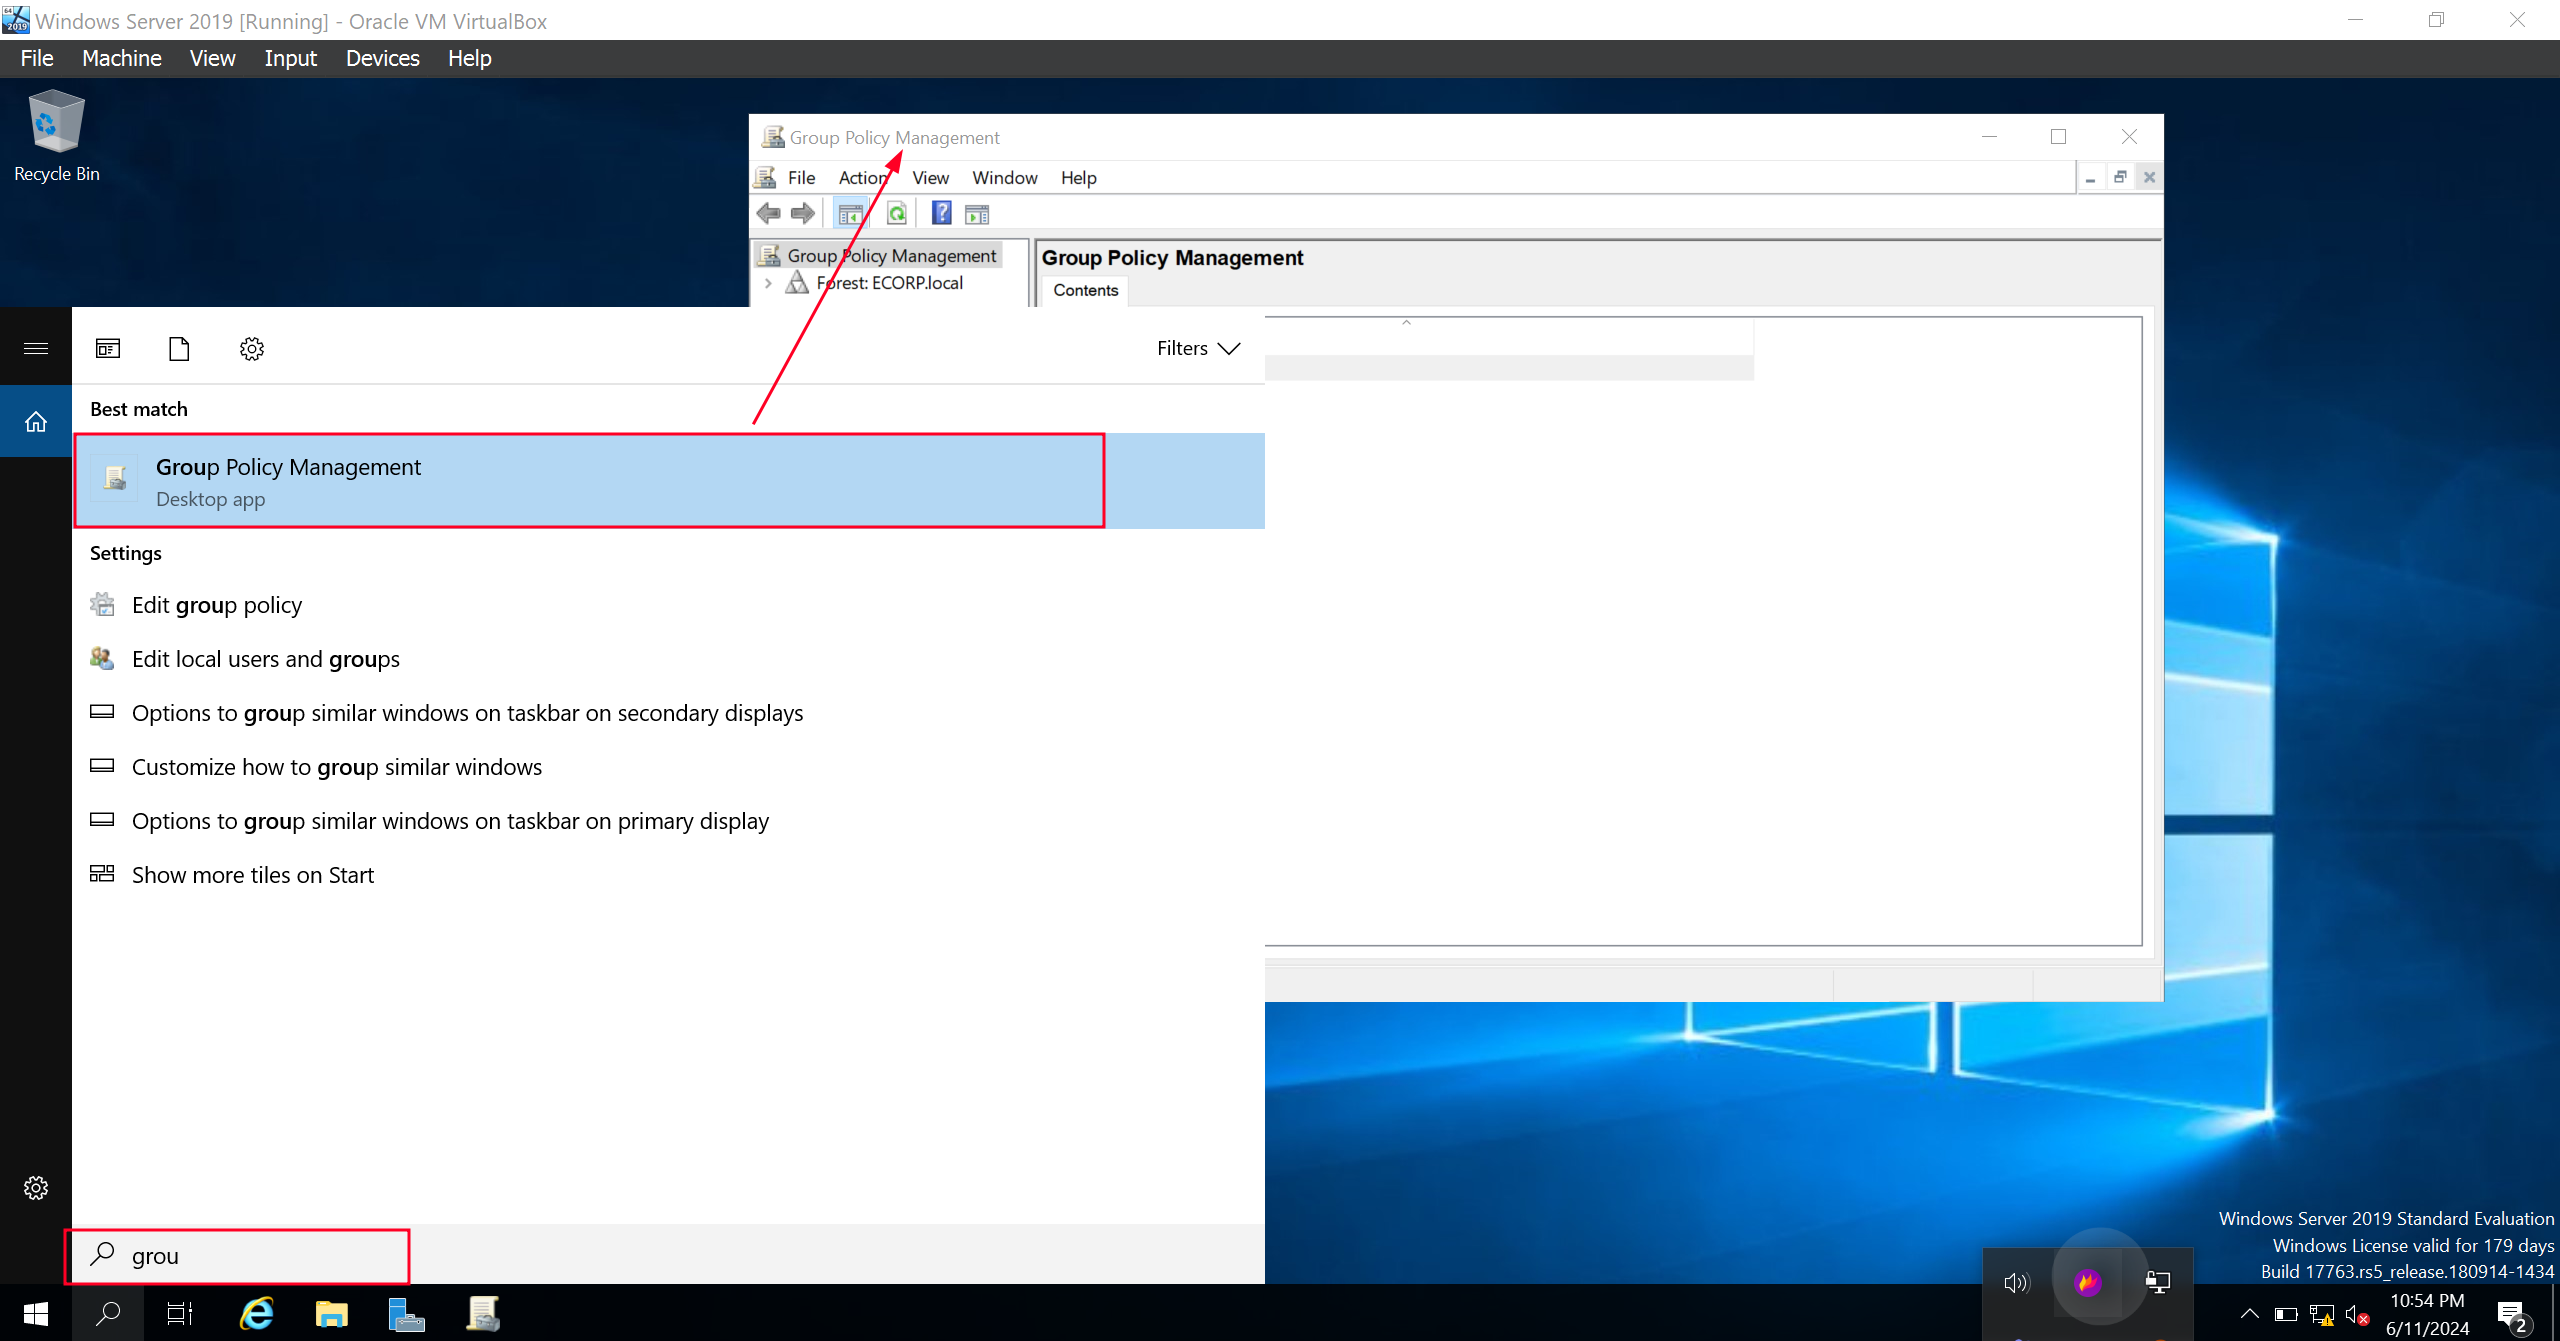
Creating Group Policies
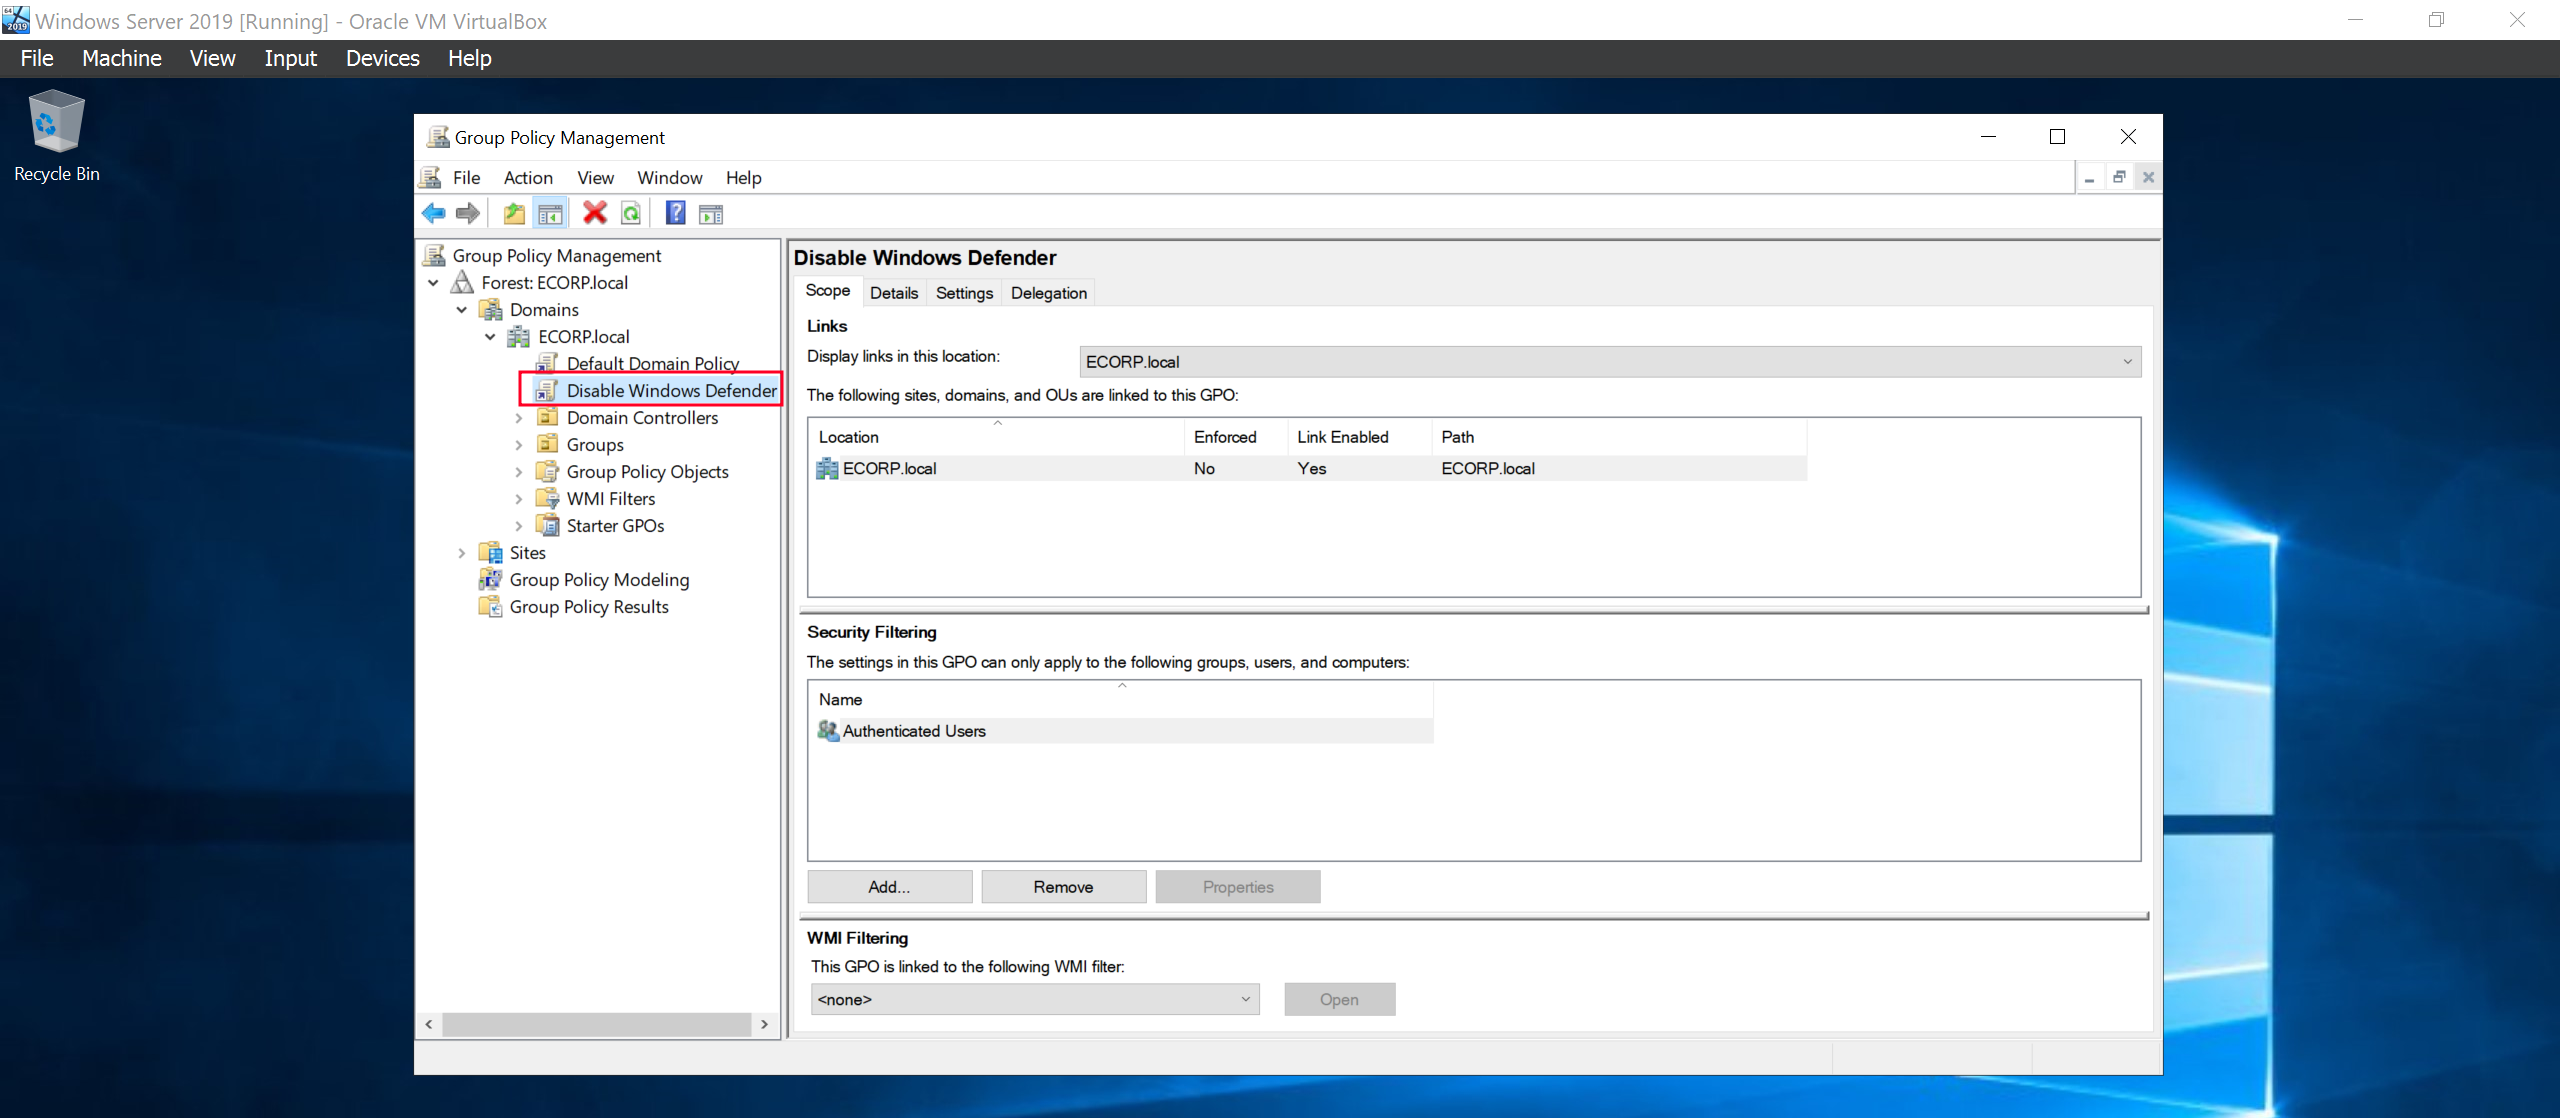
Lastly we will create Group Policy Object(GPO) for the whole domain, We could create GPOs for specific OU but we’ll just create one for the whole domain. Our group policy will be to disable windows defender on our lab environment so that we can successfully run attacks withount having to care about the Windows Antivirus yelling to us “I’ve blocked a malware!!!”
Search for group policy in the search icon.
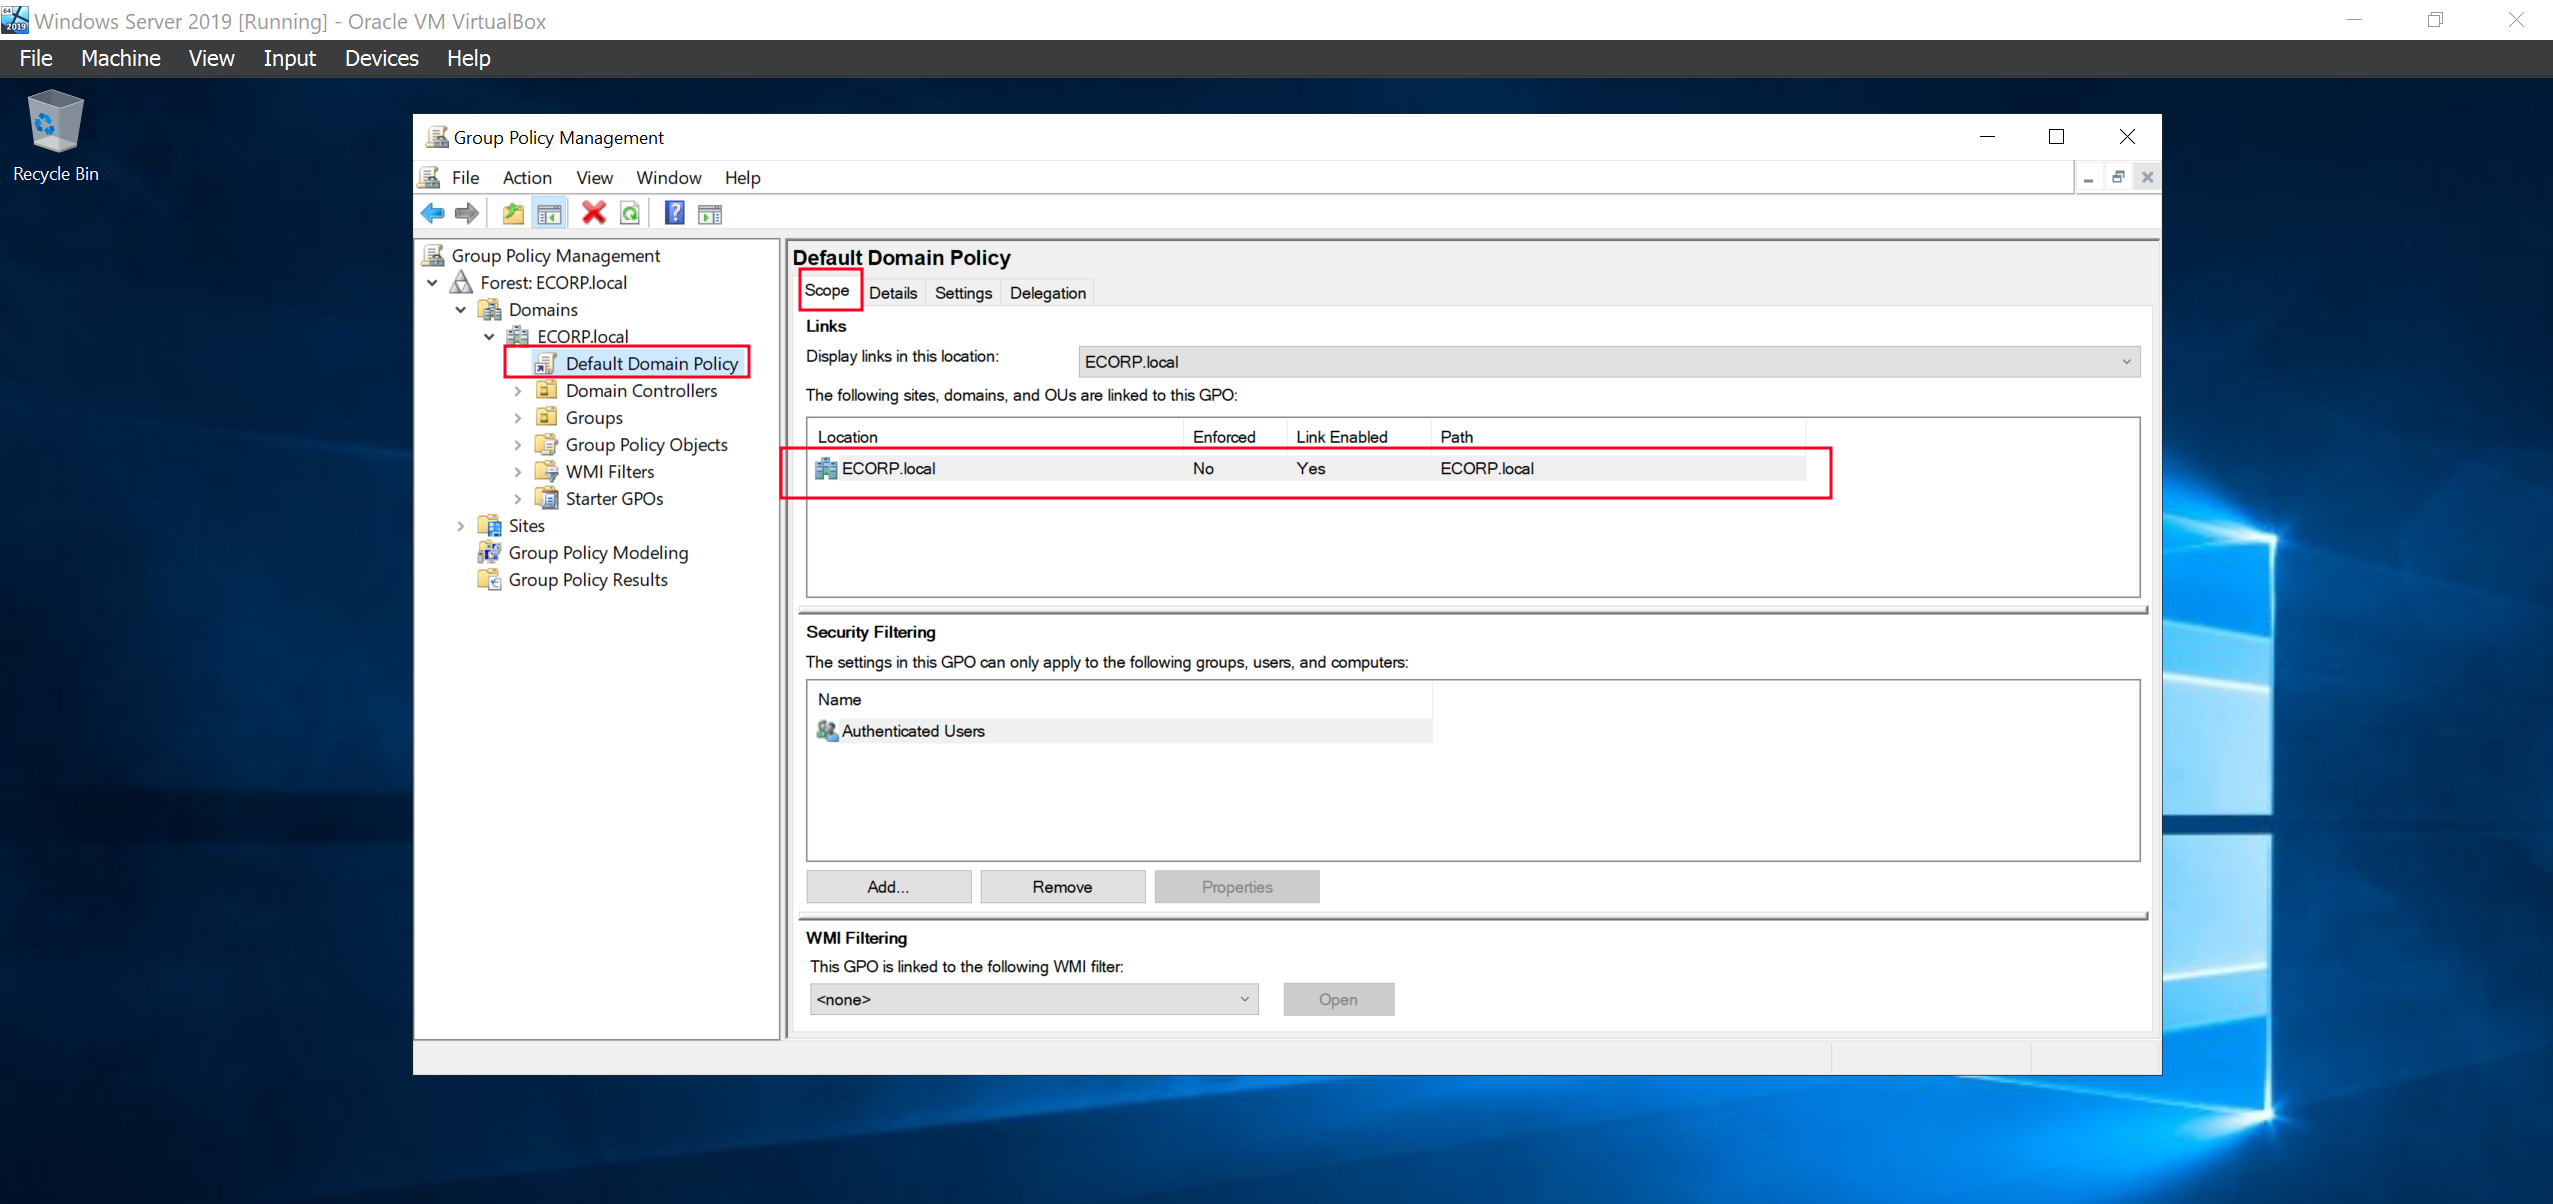
We can see there is already a Domain group policy. We can confirm the scope and it’s our ECORP.local domain.
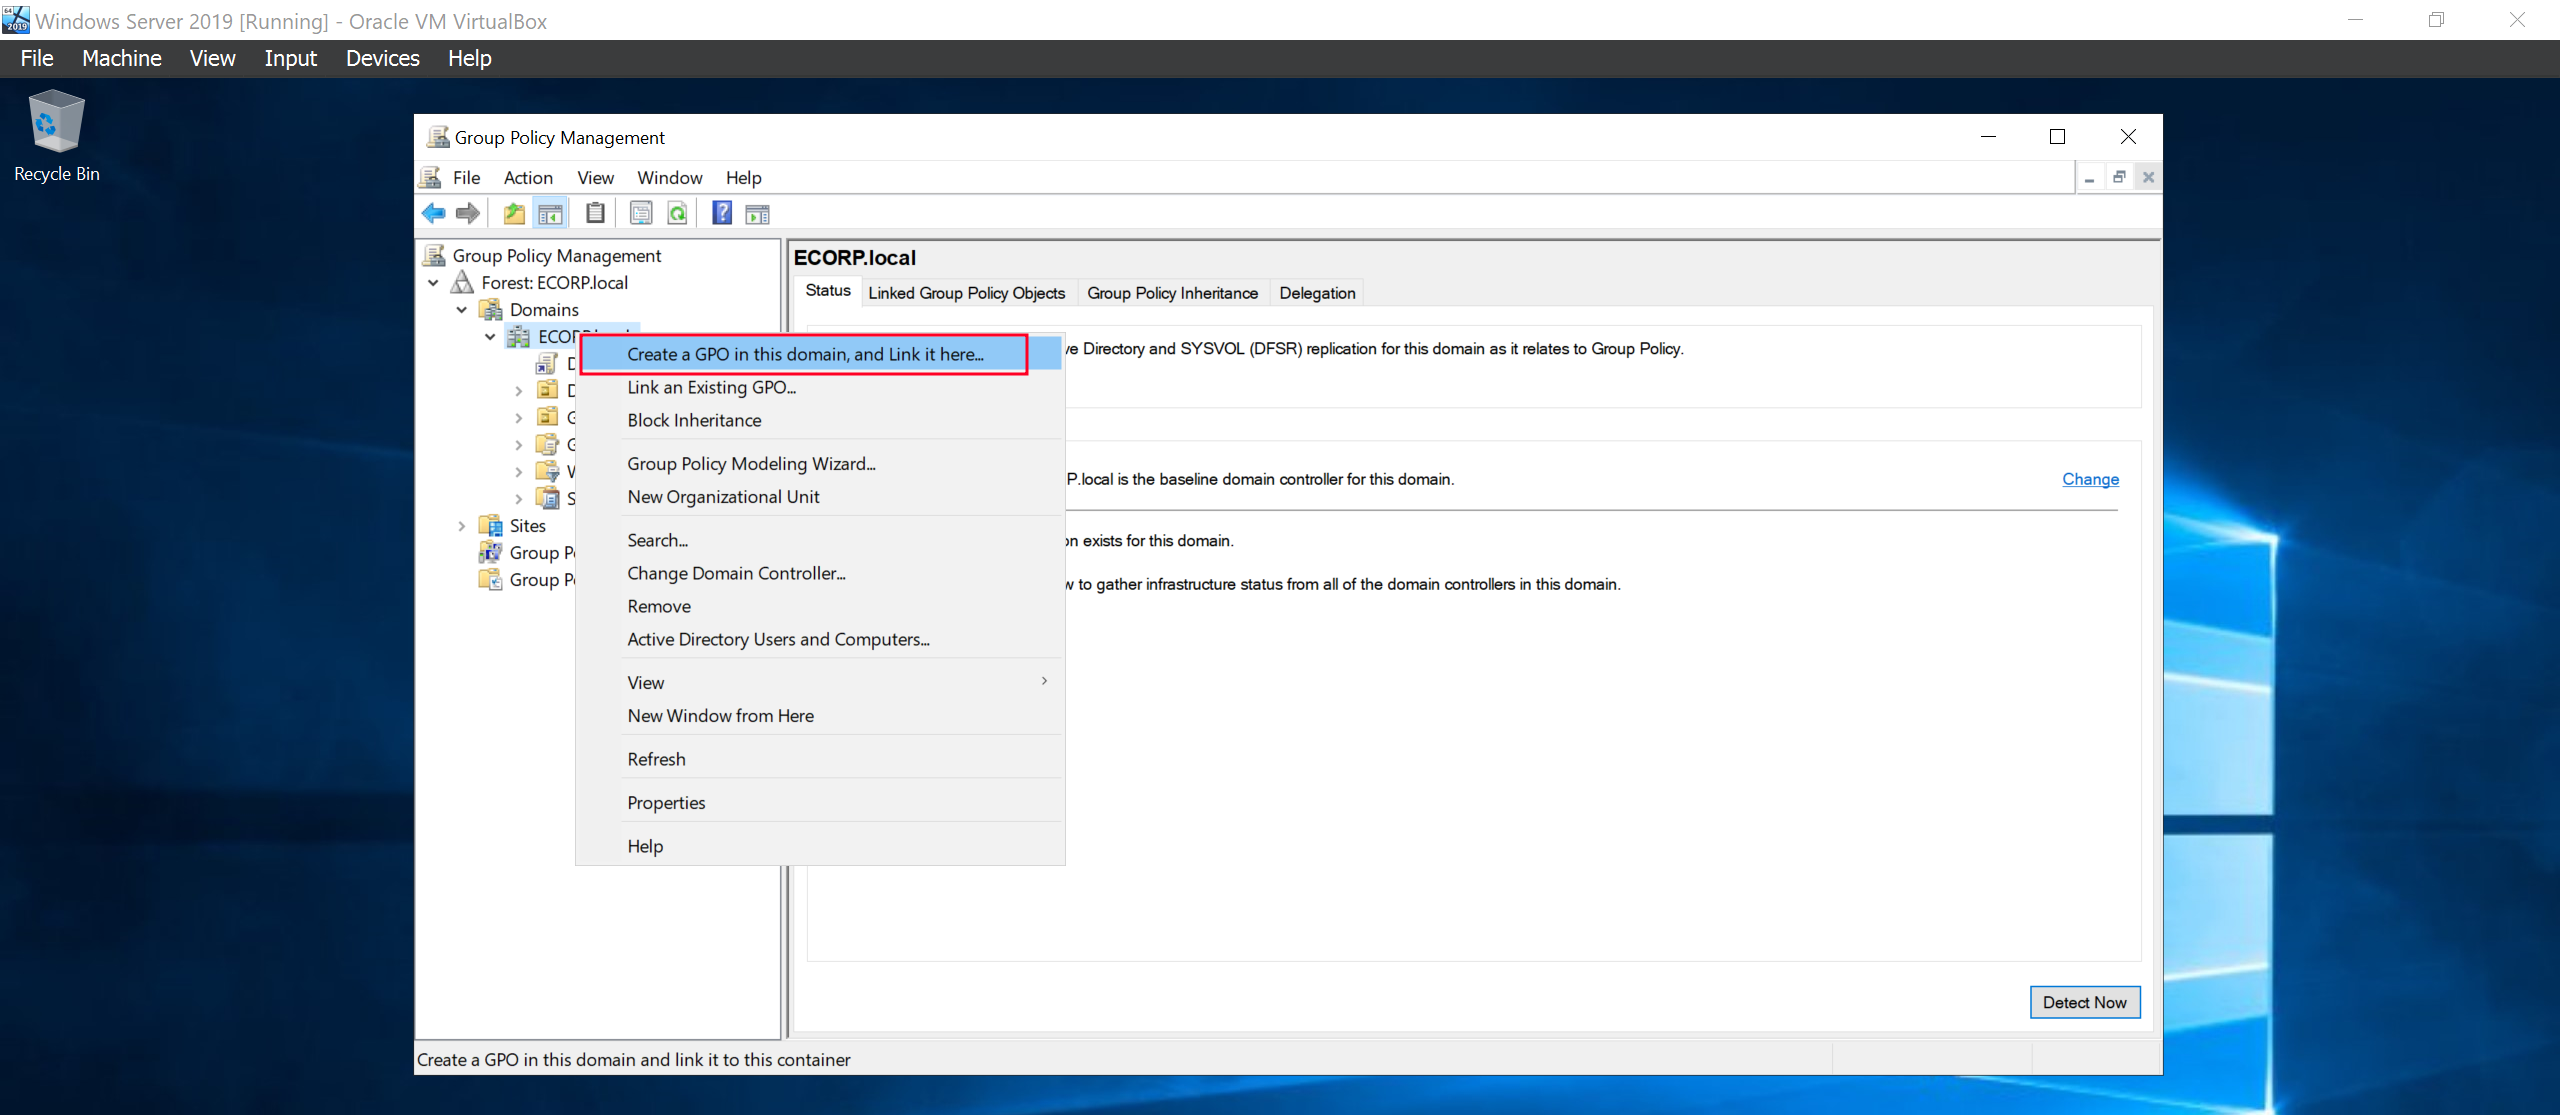
Create a GPO for the whole domain.
Right click on it to edit the policy.
Enable the “Turn Off Windows Defender Antivirus”

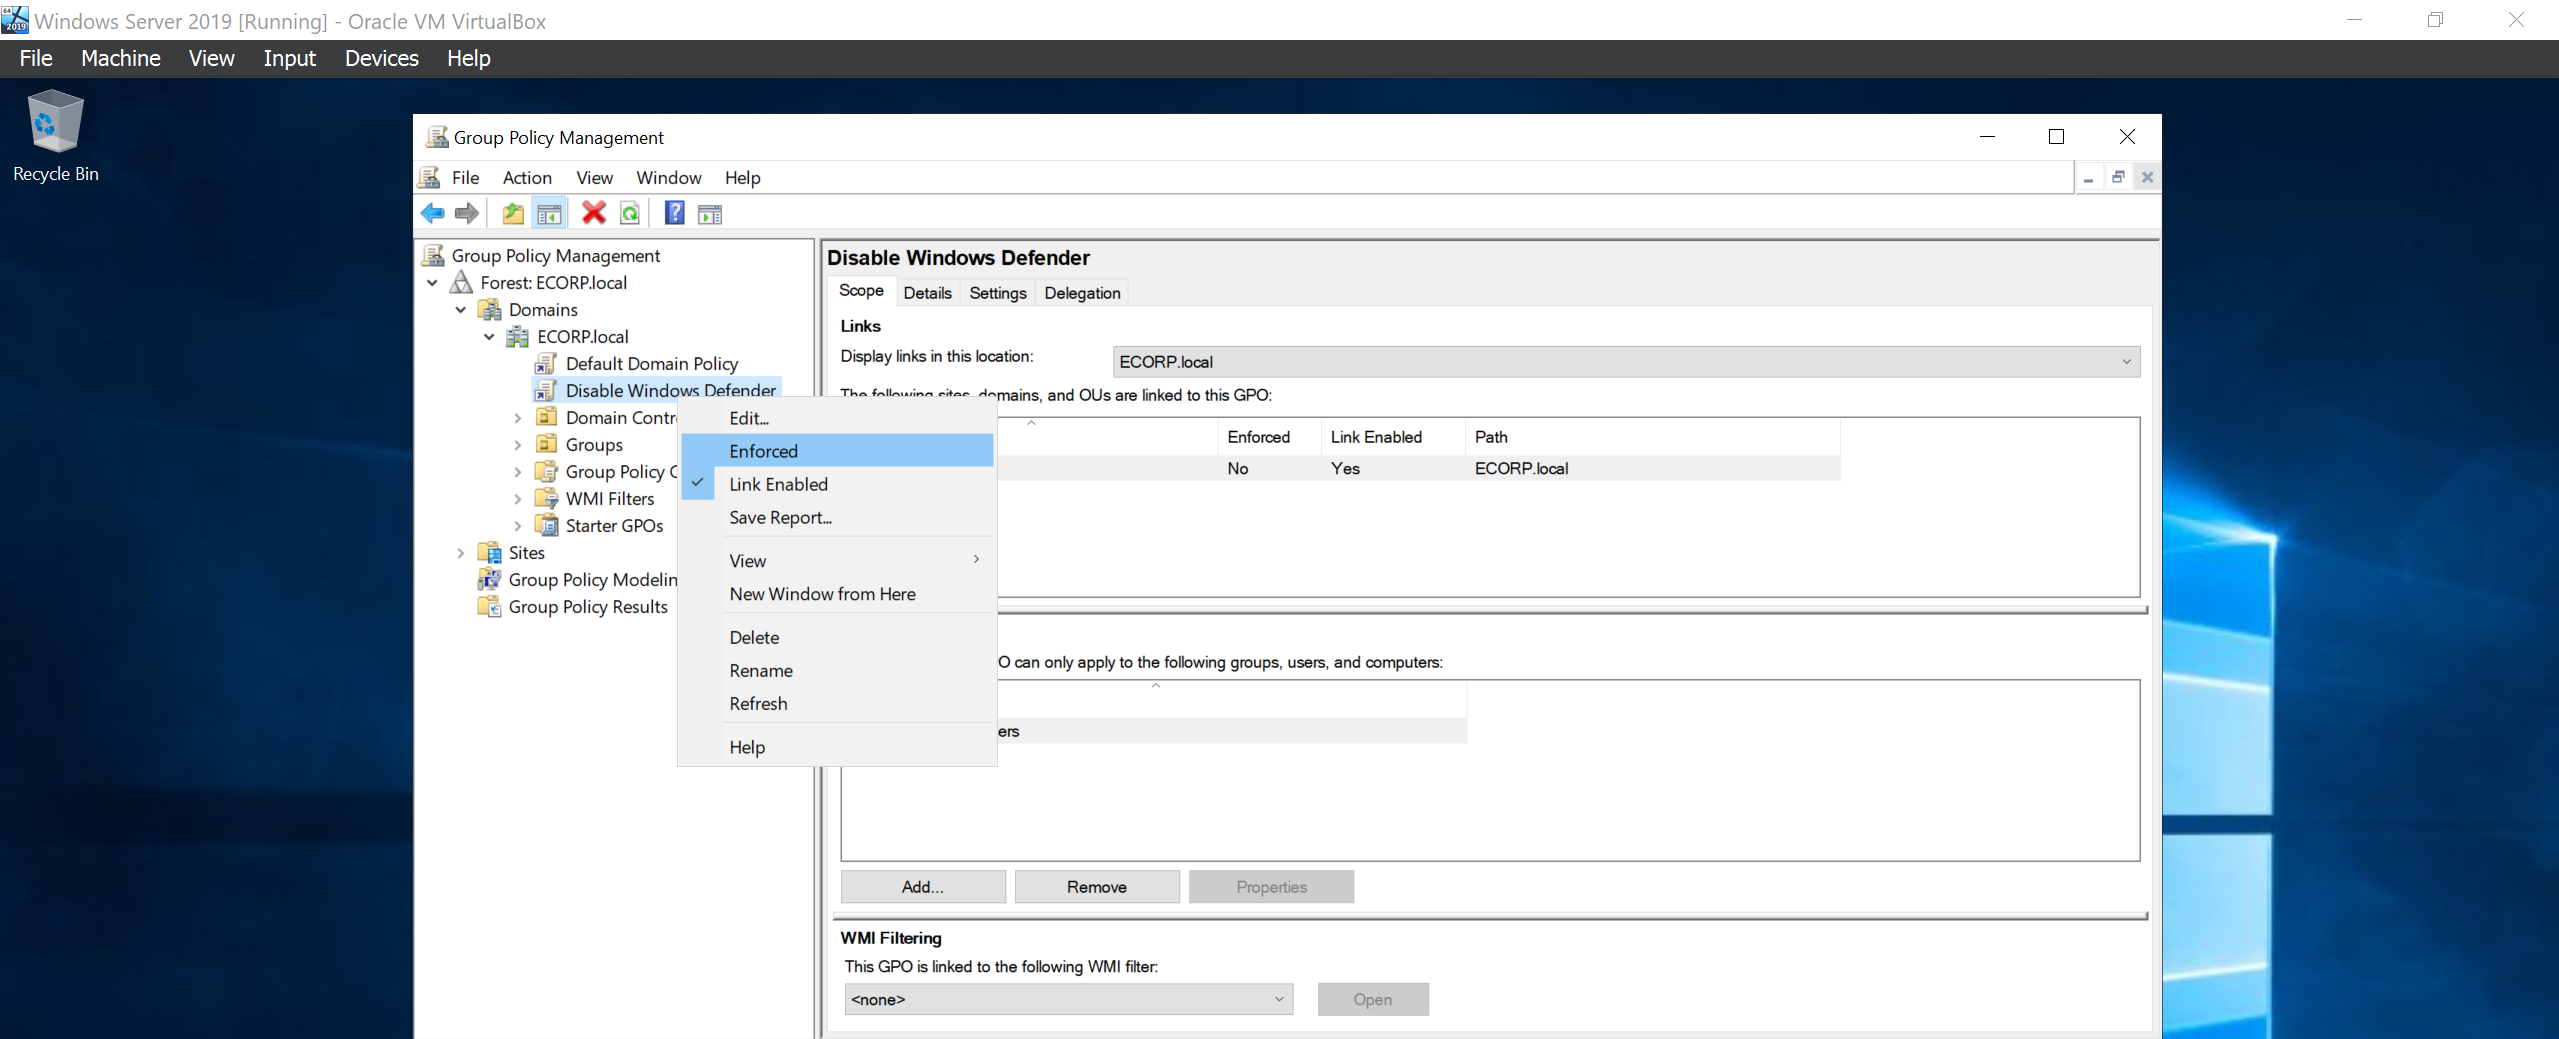
Lastly, make sure the policy is enforced!!
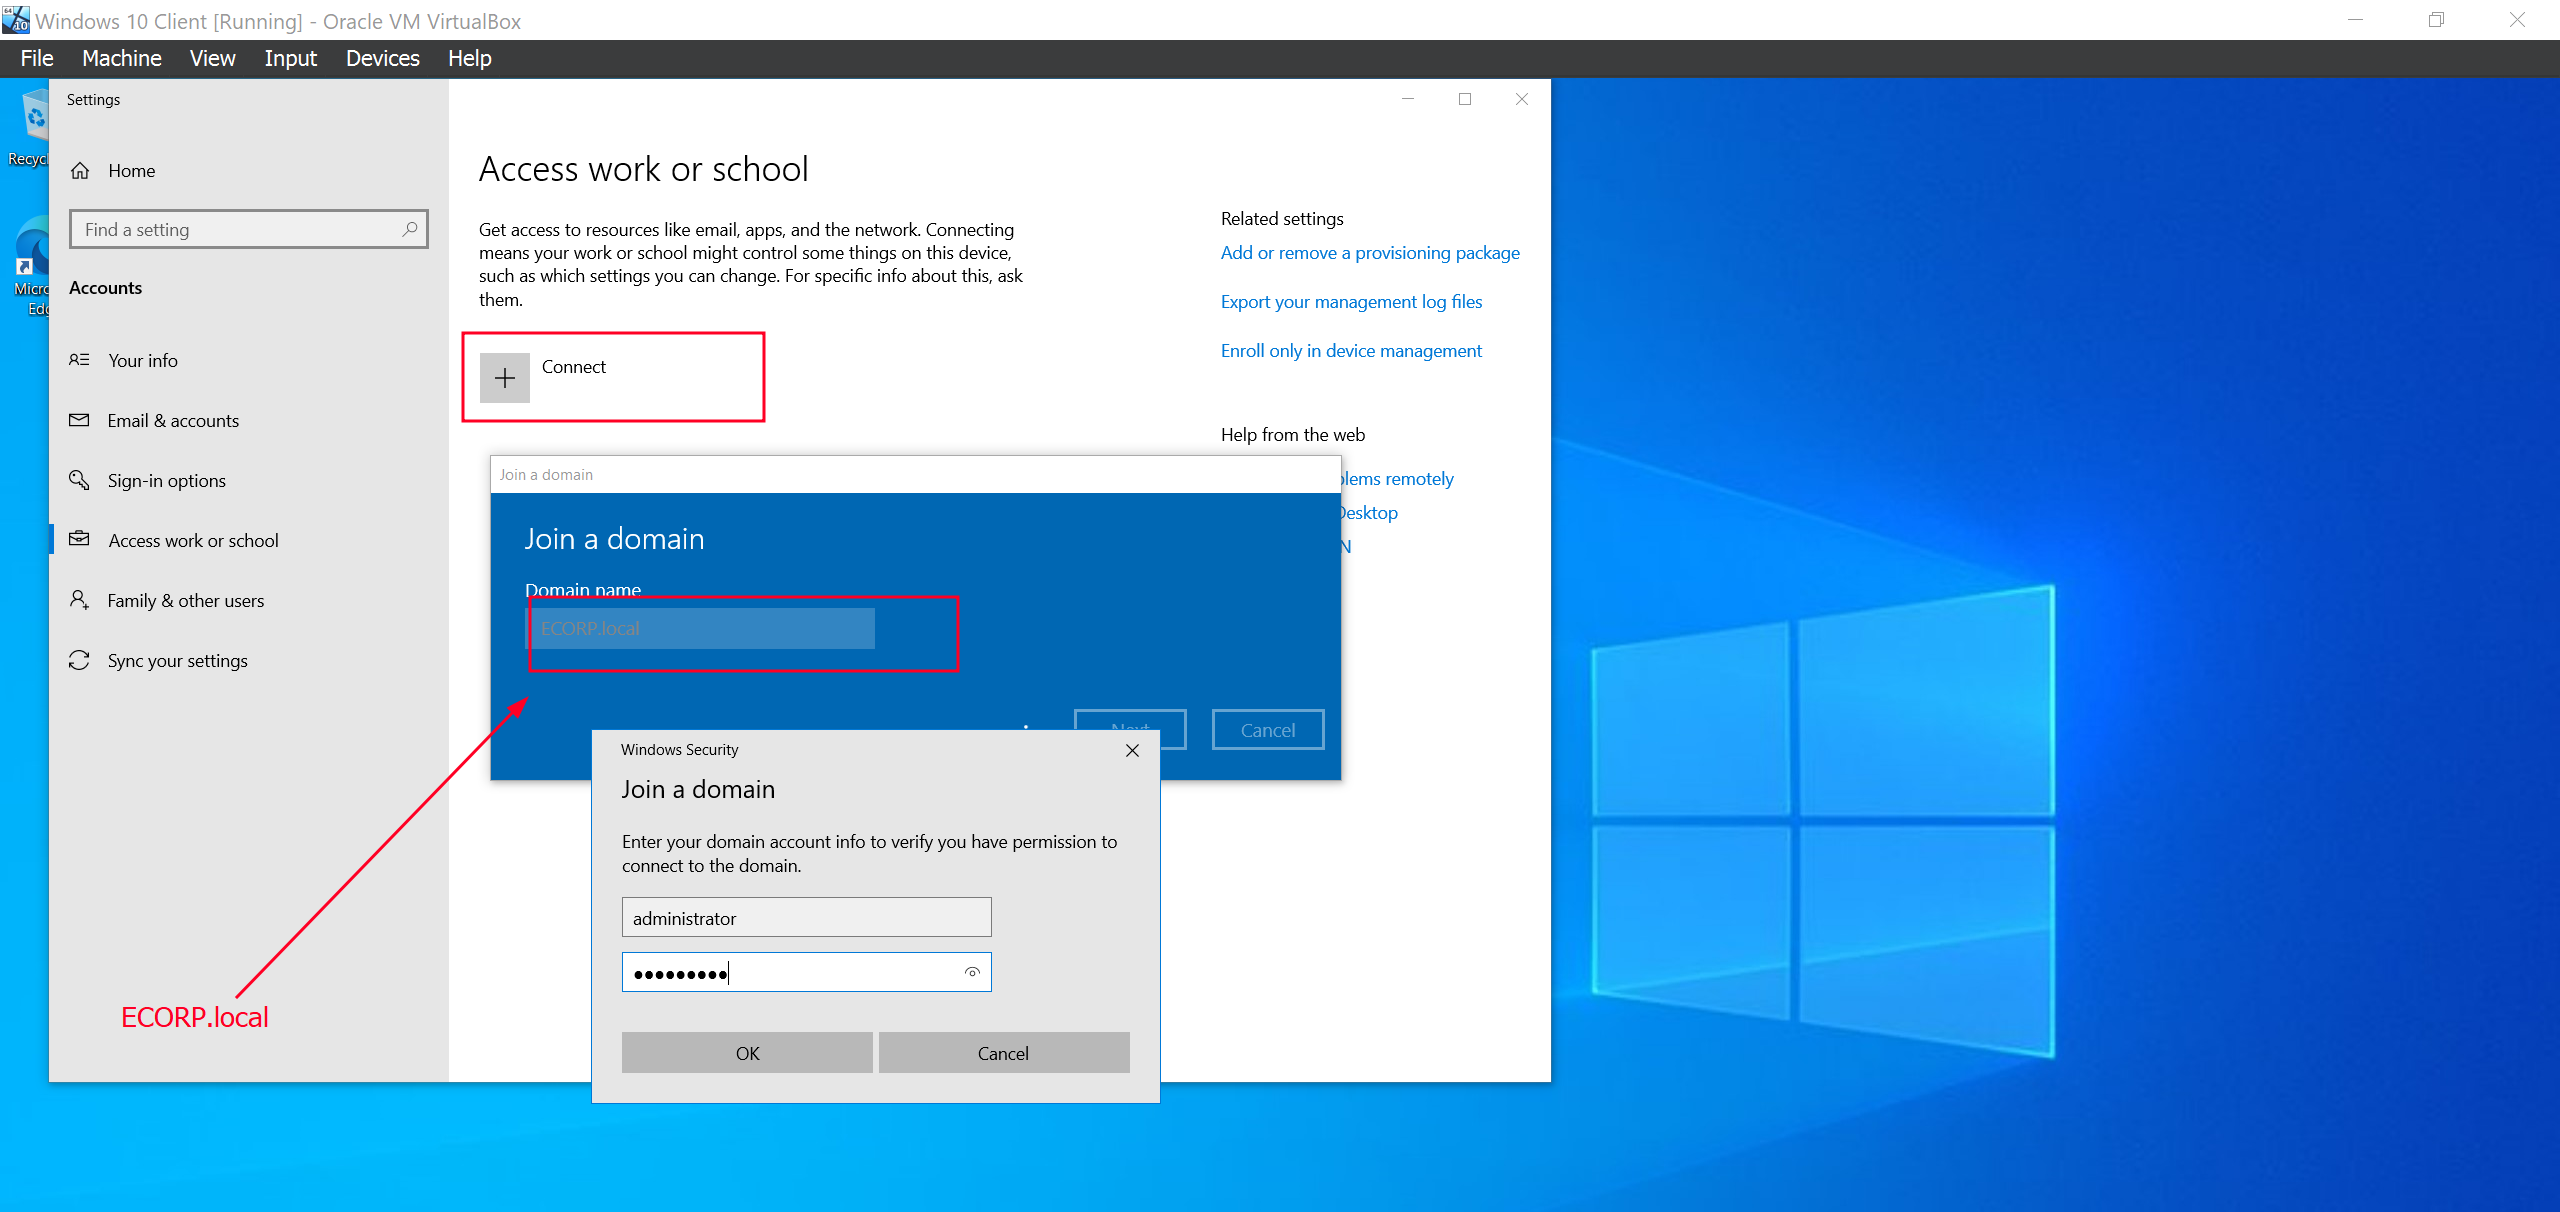
Joining our Machines to the Domains
Now it’s time to join our client workstation to the domain. Before that, let’s confirm our Domain Controller IP address.
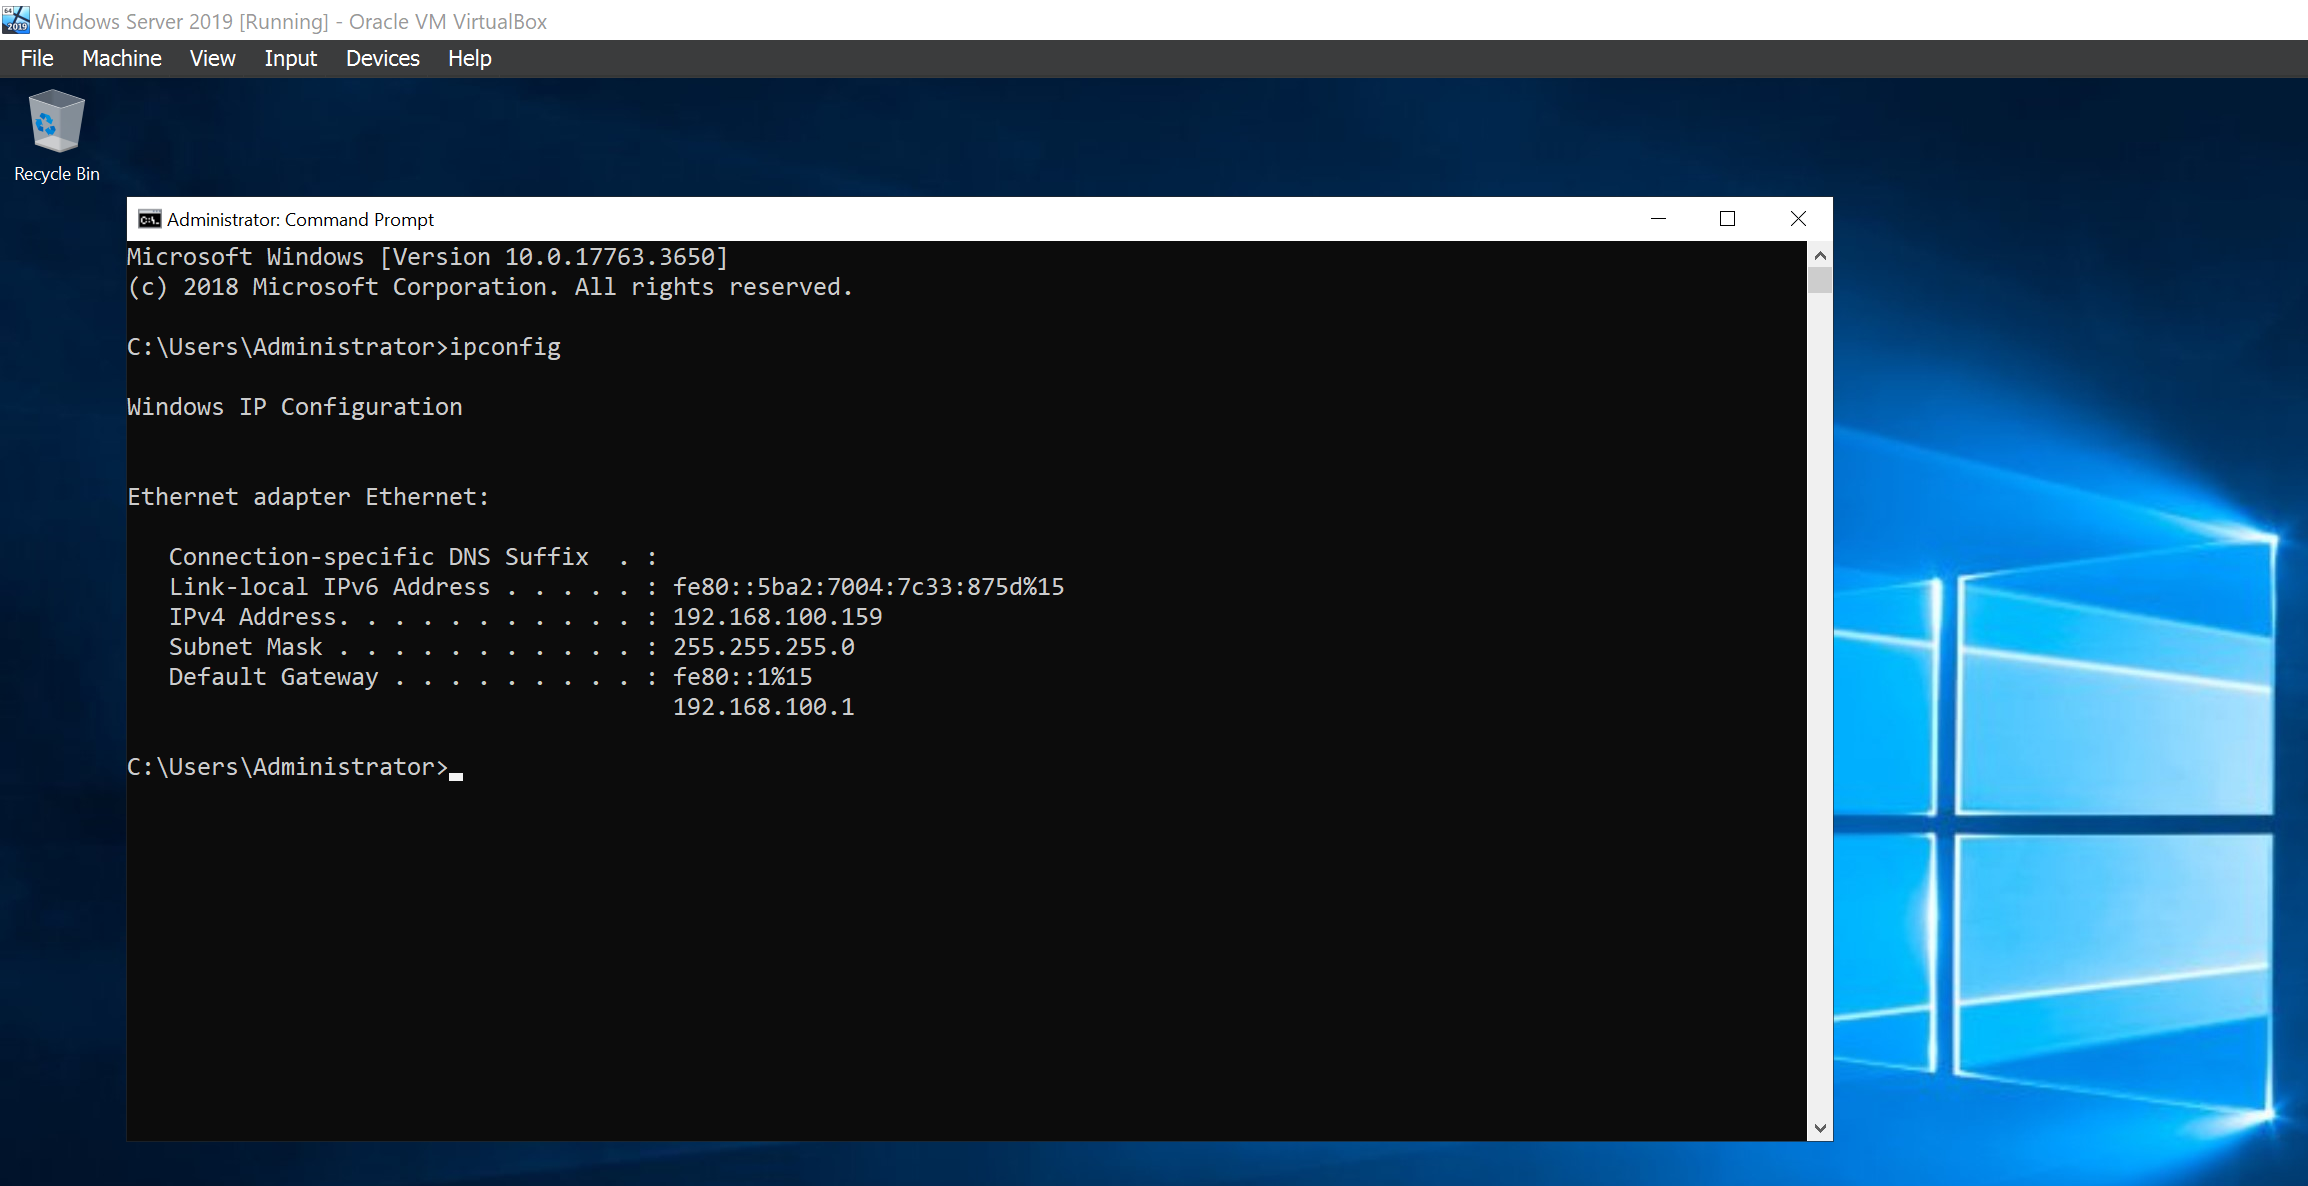
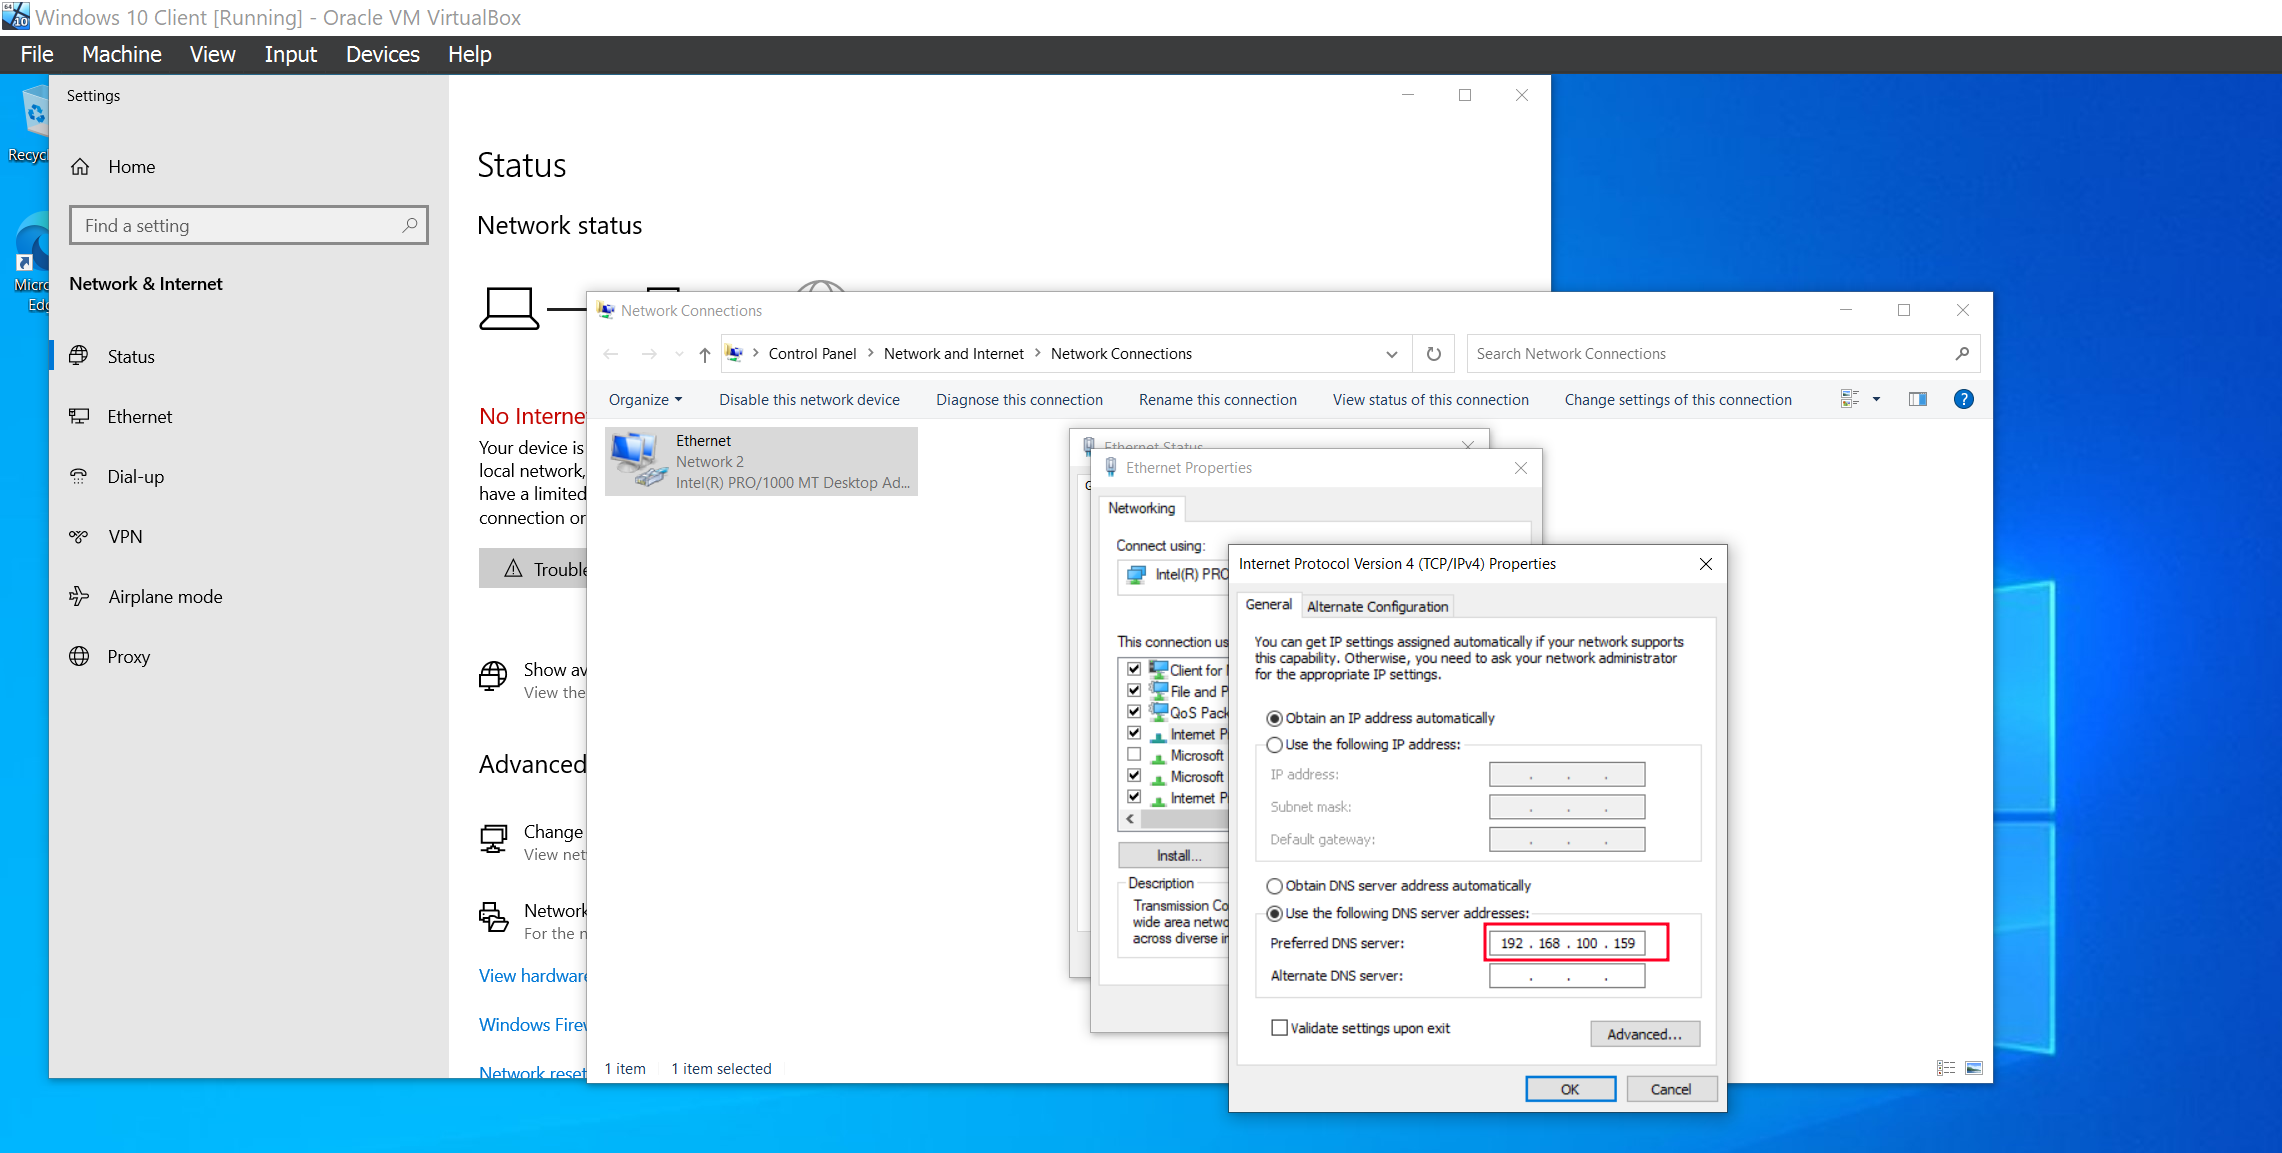
We are going to configure the IP address of the Domain controller as the DNS server for our client machine so that it can be able to identify it on the network.
We can now proceed to joining the domain.
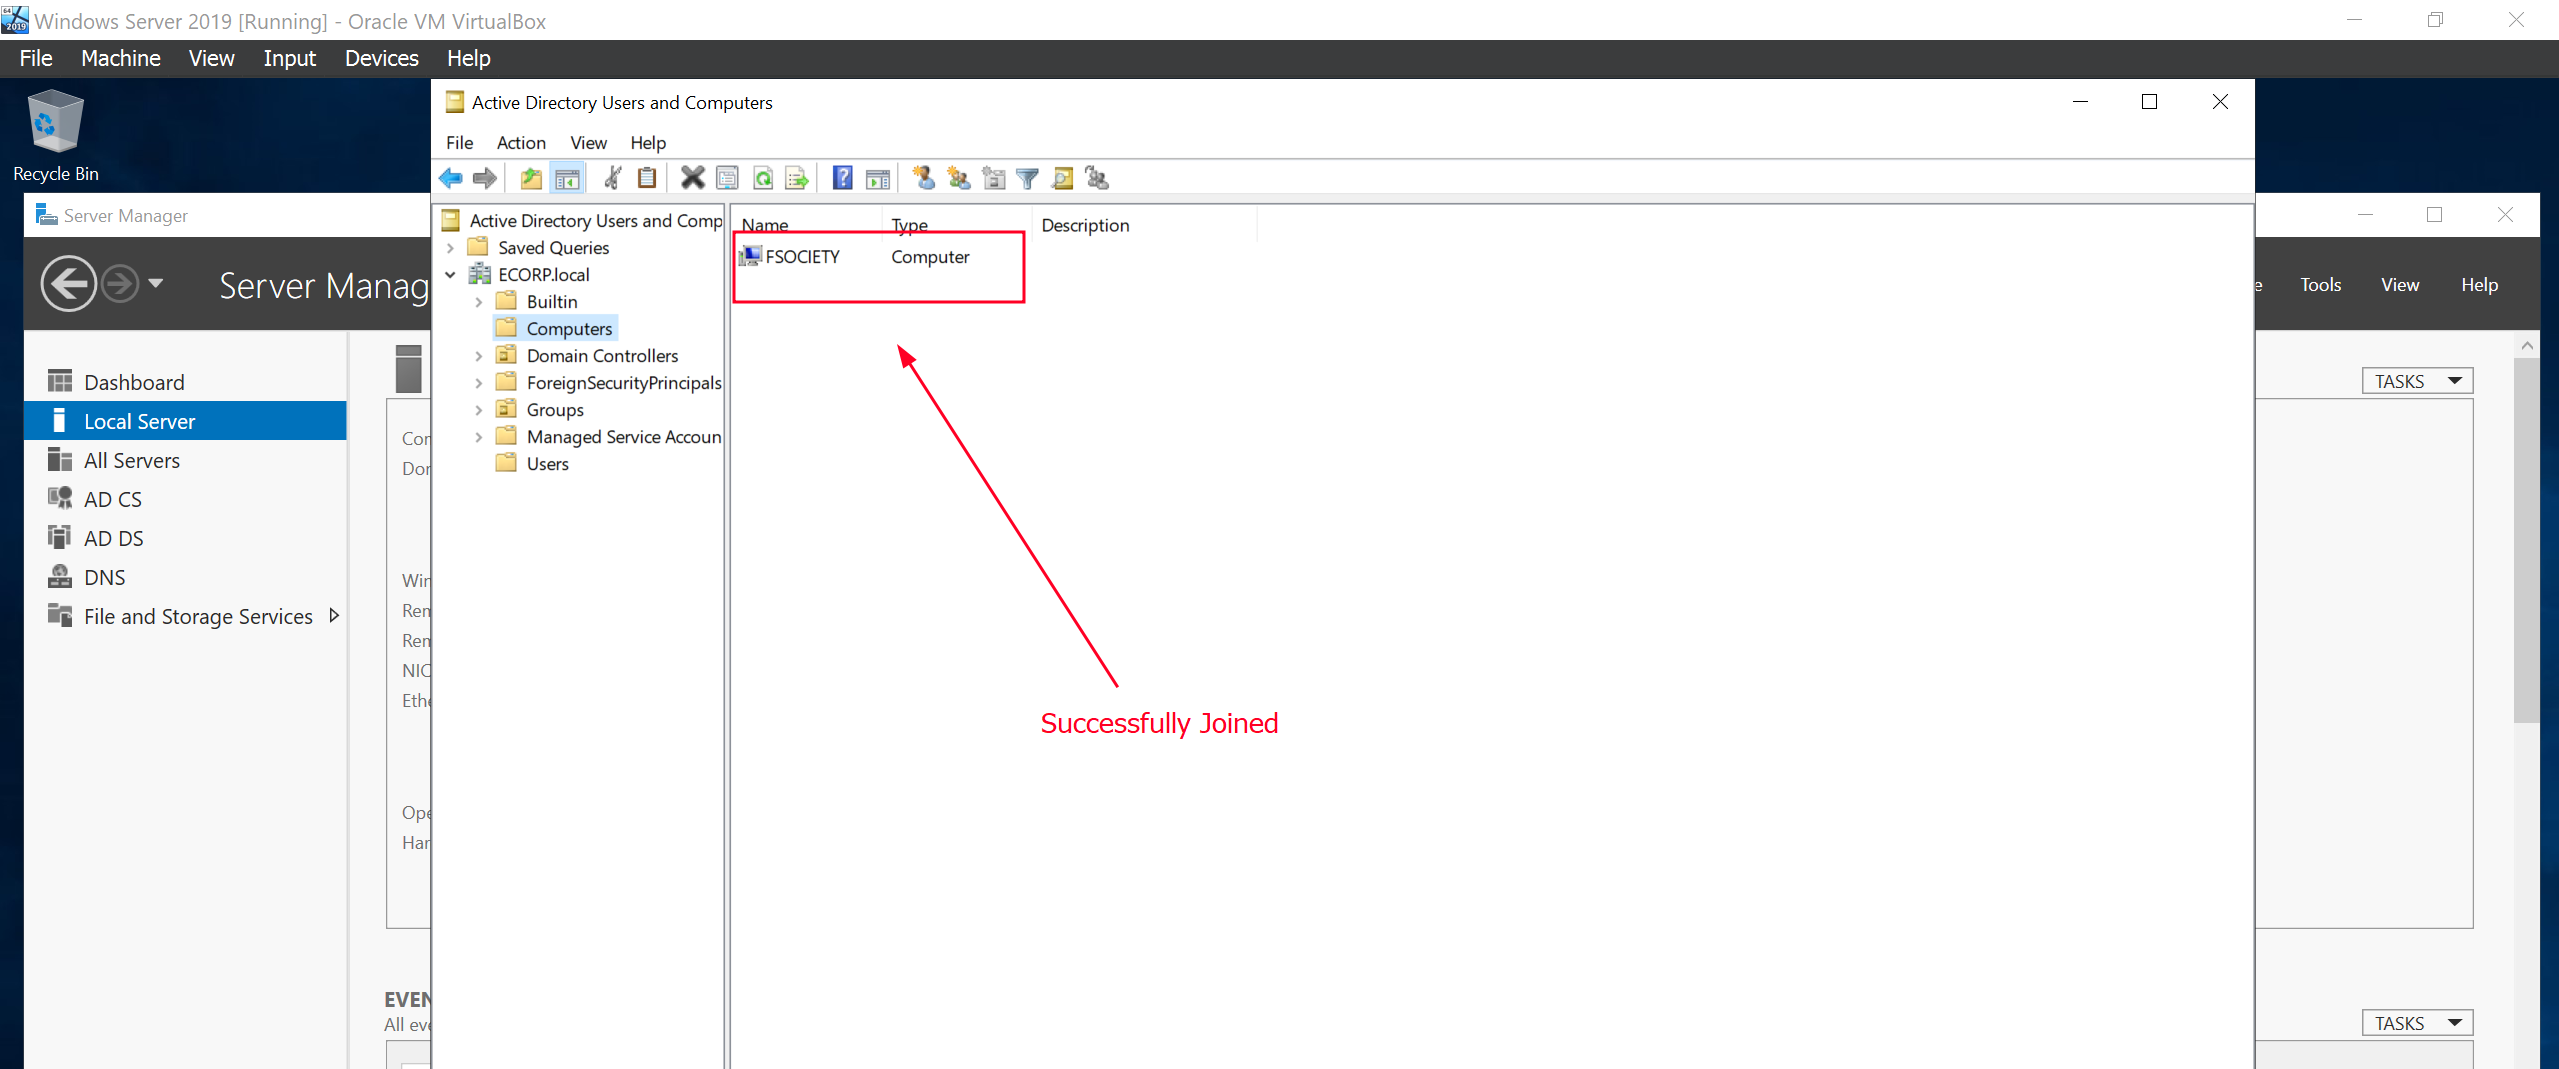
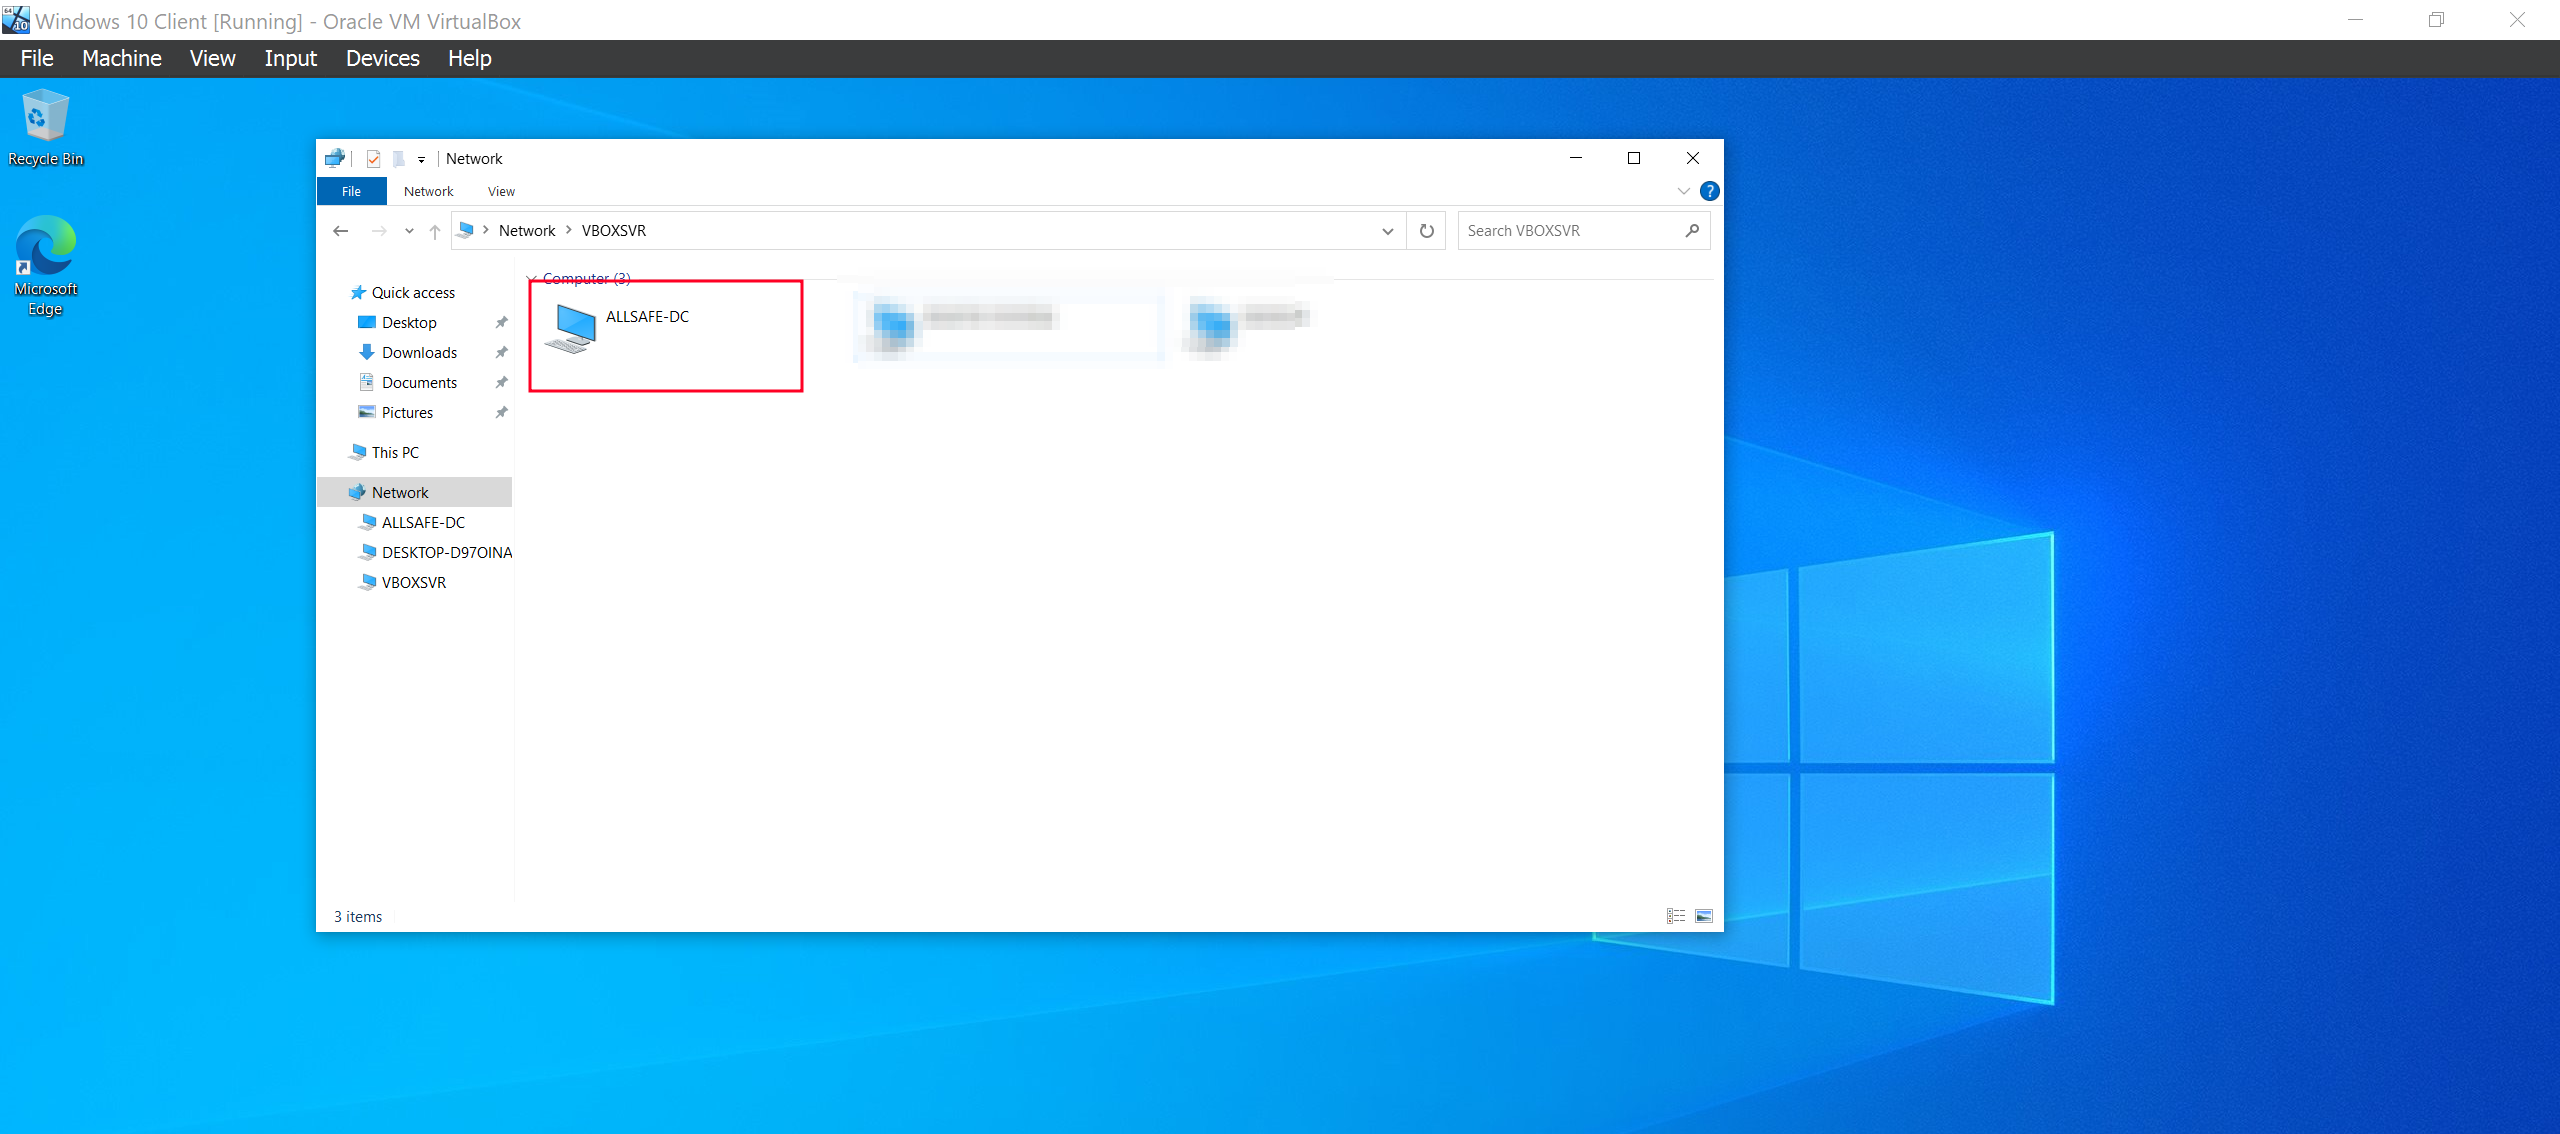
We can confirm from the server that we have successfully joined the domain on Tools > Active Directory Users and Computers.
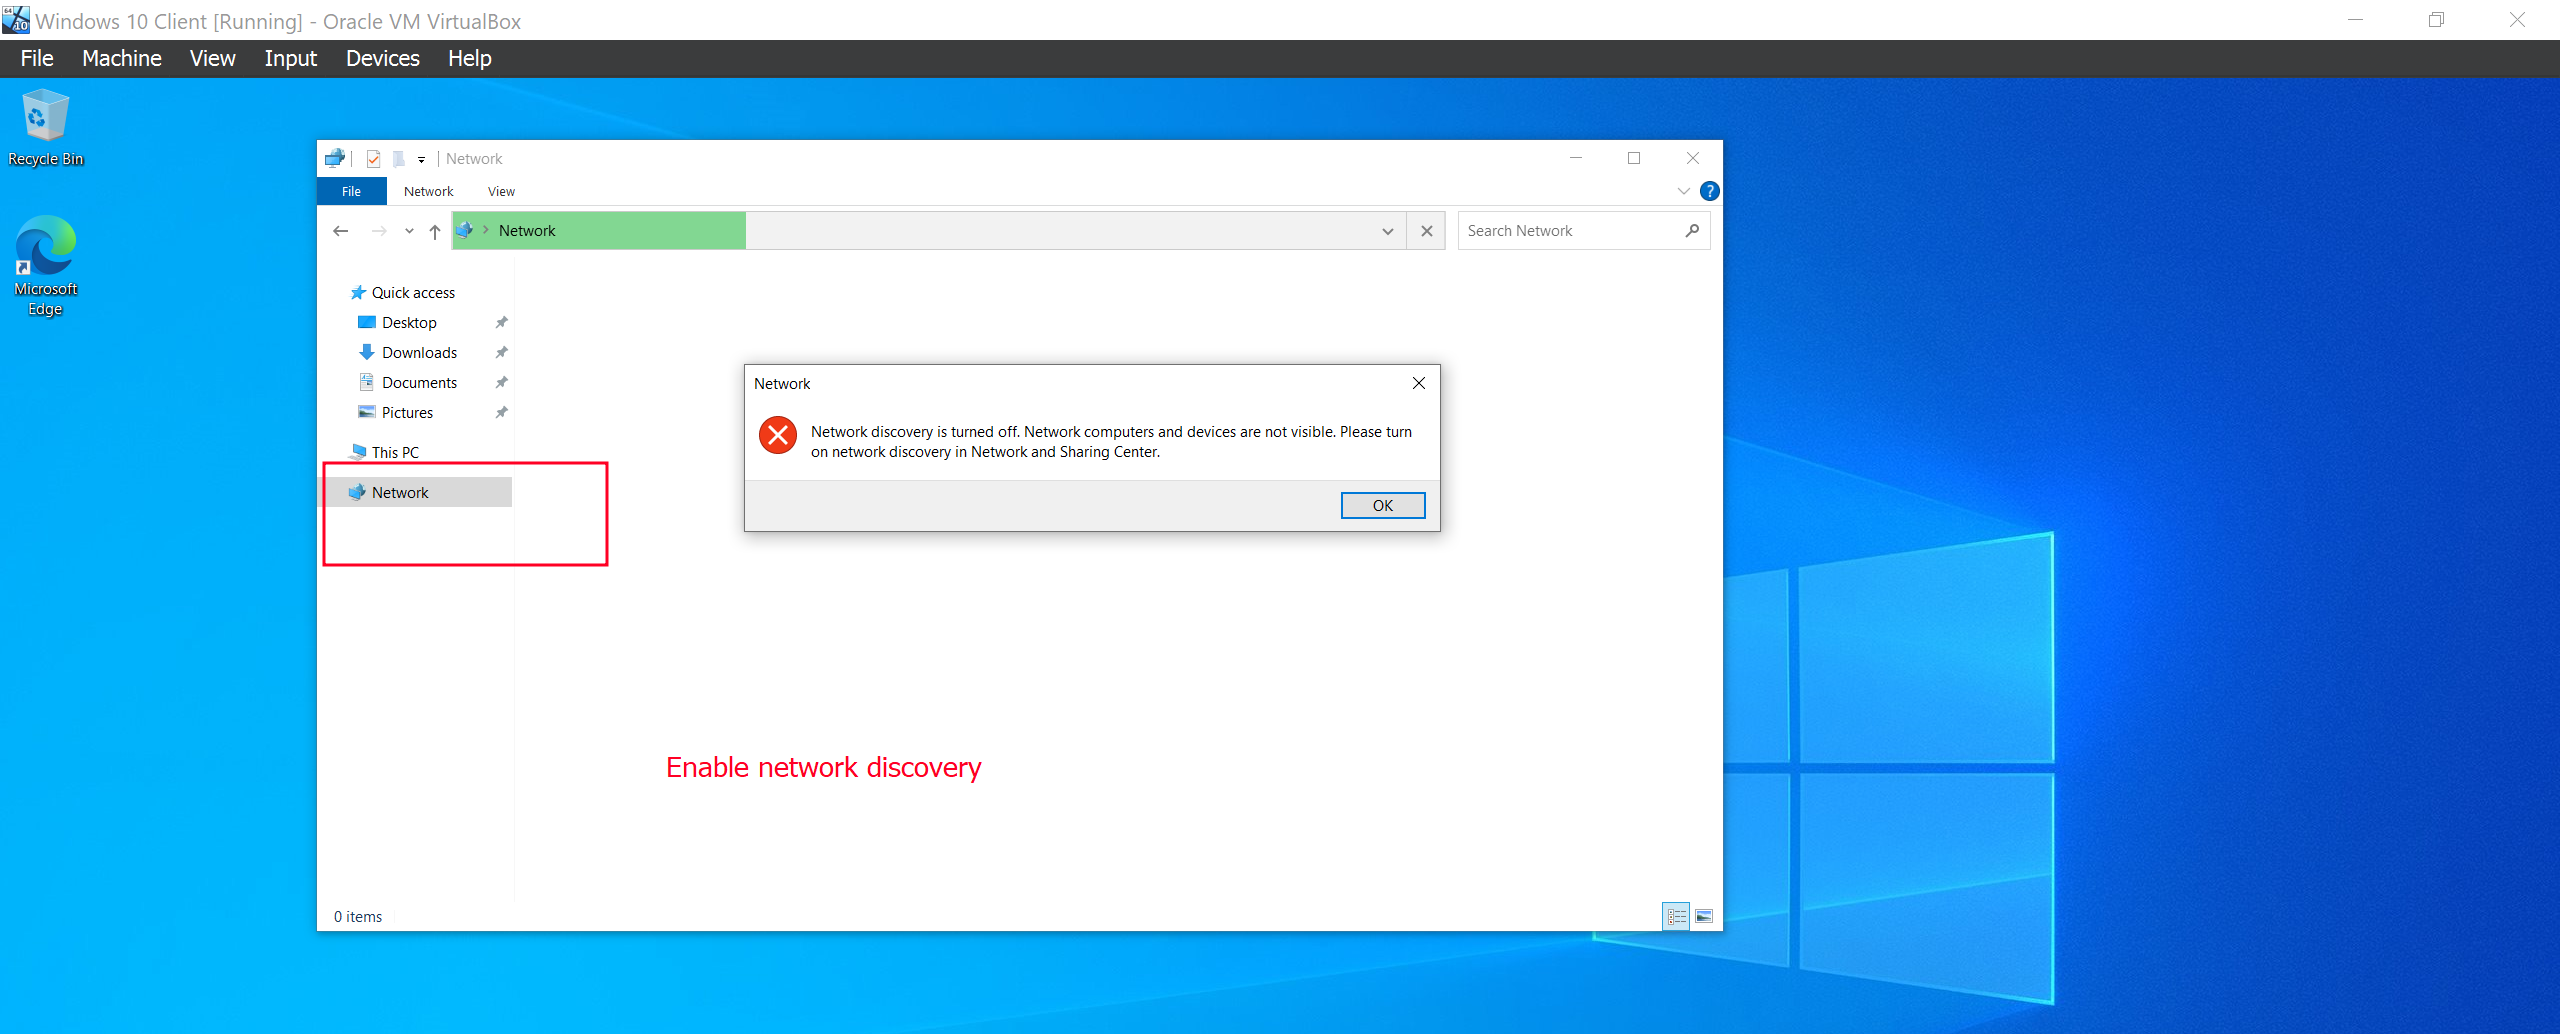
The next thing I did is to ensure that network discovery is enable and that we can access the ALLSAFE-DC network share.
And that’s all for our lab setup. Meet me in the next article where we will start the fun part, Attacking our environment!![]() See ya!
See ya!![]()